
以前,“富数据web应用”还是一种很矛盾的说法。今天,这中应用随处可见,以至于我们不得不掌握如何去构建它们。
传统方式,web应用把繁重的数据放到服务器端处理然后在完整的页面载入后把HTML推向浏览器。客户端的JavaScript对于提升用户体验所做的事情非常有限。现在这种关系反过来了——客户端应用再需要的时候从服务器端拉去原始数据然后渲染到浏览器。
想下那个Ajax的购物车,当添加商品到篮子里时不需要刷新页面。最初,jQuery成为处理这类范例的热门库。它的原理就是通过Ajax请求然后更新页面中的文本和其它内容。不过,这种使用jQuery的模式在客户端暗含里数据模型。服务器不再是唯一知道商品数量的地方了,it was a hint that there was a natural tension and pull of this evolution.
随着客户端与服务器端交互的代码变多,客户端将变得跟加复杂。对客户端的一个经过深思的良好的架构已是必不可少了—— 你不能仅仅是缩减一些jQuery代码以期望能适应应用的增长。最有可能的是,UI的回调与业务逻辑纠缠在一起最终给你带来是一个噩梦,你的代码命中注定要被接手的那个倒霉鬼丢弃掉。
幸好,现在逐渐有很多JavaScript库可以帮助你改进代码的架构并且让代码更有可维护性,不用费太大力气就可以轻易的构建出绚丽的界面。Backbone.js 很快成为非常流程的解决这种问题的方案之一,这本书我将带你深入了解它。
从基本原理开始,通过练习实践,学习如何构建结构清晰可维护的应用。如果你是一个开发者想知道如何编写易阅读,有组织,易扩展的代码——这本教程将对你有所帮助。
对我来说改善开发者的培养更为重要,这就是为什么这本书将遵循署名-非商业性使用-相同方式共享 3.0协议发布。这就意味着你可以免费获取这本书的拷贝 或者帮助(改进)(https://github.com/addyosmani/backbone-fundamentals/)它。 也非常欢迎修正原文中的素材,希望我们能一起为开发社区提供最新的资源帮助。
另外非常感谢 Jeremy Ashkenas 创建Backbone.js,DocumentCloud,以及这些社区成员的帮助,使得这个项目远比我想像中的要好。
这本书面向的那些希望学习如何更好的构建客户端代码的中级开发者。已掌握JavaScript的基本原理和知识,不过必要的时候会在文中做些基本的描述。
我非常感激那些技术评审人员及其给力的工作,帮助校对和改进这本书。他们的知识,精力和激情促使这本书成文更好的学习资源and they continue to serve as a source of inspiration. Thanks go out to:
我要感谢我亲爱的家人,感谢他们的耐心和支持我在这本书上的工作,我还有我杰出的编辑Mary Treseler。
没有其它社区的开发者和作者的时间和精力的投入我是不可能完成这项工作的,我也要感谢他们:
同时还有其它的杰出贡献者帮助使这个项目成为可能。
在阅读这本书前假定你已经有基本的JavaScript知识,并且一些很明确的话题将会被略过,比如对象字面量。如果你想学习关于语言的更多知识,建议你阅读下面这些资料:
弗兰克·劳埃德·赖特(Frank Lloyd Wright)曾说“你不能成为一个建筑师,但是你可以打开门和窗户,走向你所看到的光明。” 在这本书中,我希望分享一些如何改进web应用架构的光明,打开通往更有可维护性,可阅读性应用之门。
所有架构的目的都是把东西构建得更好;在我们的例子中,创建持久的,能使自己和将来我们离开之后维护我们代码的开发者都非常愉悦的代码。希望我们的架构简单而漂亮。
当代的JavaScript框架和库可以给我们的项目提供架构和组织结构,从一开始就建立起可维护的基础。它们构建在开发者不得不解决混乱的回调的考验和痛苦之上,类似于你现在或者可能将来不久会面临的问题。
当使用jQuery开发应用时,缺失块就是一种构建和组织代码的方式。使用一团糟的jQuery选择器和回调来创建JavaScript应用非常容易,所有地方都拼命让数据在UI的HTML,JavaScript逻辑,数据调用的API之间保持同步。
没有什么帮助驯服这些乱起八糟的东西的话,你可能会串起一个独立的插件或者库来实现这些功能或者一切从头开始,并需要自己维护。Backbone就为你解决了这一问题,它提供一种清晰的方式组织代码,把职责分隔到可辨认的容易维护的块中。
在“Developing Backbone.js Applications”这一书中我和一些其他经验丰富的作者将给你展示如何通过流行的JavaScript库,Backbone.js来改进你的web应用架构。
现在有大量的框架给开发者提供一种简单的方式,MVC(Model-View-Controller)模式的变种,来组织他们的代码。MVC把我们在应用中关心的问题分隔成三部分:
JavaScript‘MVC’框架可以帮助我们不用总是严格的遵循上面的模式来组织代码。有些框架会在View中包含Controller的功能(比如 Backbone.js),有些框架会整合他们自己认为更有效的组件。
出于这种原因我们把这类框架称之为MV*模式,就是,你可能有View和Model,但是更可能还包含其它东西。

Backbone.js是一个构建client端代码的轻量级JavaScript框架。它可以非常容易的管理和解耦应用,使你在长远中更容易维护代码。
开发者通常使用Backbone.js创建单页应用或者SPA。简单的说,这些应用可以让浏览器在client端对数据的改变做出响应而不用从服务器端完整地加载你的标记,意味着不用整个重新刷新页面。
在我写这本书的时候Backbone.js是一个成熟、流行的框架,有庞大的开发者社区,丰富的插件和扩展。它被Disqus、Walmart、SoundCloud还有Foursquare用来构建伟大的应用。
当用JavaScript构建一个单页应用的时候,不管它包含一个复杂的用户界面还是简单的,尝试减少创建新Views时的HTTP请求,你可能会发现自己通过MV*框架,比如Backbone.js,创建了很多小块。
在起初,写个避免嵌套式代码的框架并不难,但是同样说写些关于Backbone的标准也不重要是不对的。
如何架构一个应用比尝试组合DOM操作库,模板和路由来的更重要。成熟的MV*框架通常不仅包含可能你发现自己会写的一些模块,还包含在之后的过程中你可能会发现的问题的解决方案。这其中节省的时间你不可低估。
所以,你何处需要MV*框架而何处不需要?
如果你要开发一个只需要跟API或者后台数据服务通讯的应用,应用随着数据在浏览器中的变化会有偏重量级的展现和控制,你将会发现MV*框架非常有用。这类比较好的例子就是GMail和Google Docs。
这种应用通常下载一个包含所有脚本、样式、用户常用任务标记的载体,然后在后台完成添加一系列的行为。你可以在阅读email或者要写的一个文档之间来回切换而根本不需要这个应用去重新渲染整个页面。
但是,如果你要构建一个大部分繁琐的视图/页面依然依赖服务器端的应用,只需要一点Javascript或用jQuery实现一点交互,MV框架就可能有点过重了。当然有复杂的Web应用,对视图的局部刷新可以有效的结合单页应用的方式,但不管怎样,坚持简单的原则总会让你驾驭自如。
一个软件(框架)发展的成熟度不是简单的因其存在了多长时间。而是这个框架的可靠程度和它扮演的角色的重要程度。它在解决通用问题上是否有效?随着开发人员使用它构建更大、更复杂的应用框架是否持续改进?
Backbone提供了一个最小集的数据结构(Models, Collections)和用户接口(Views, URLs)这些对于构建动态的JavaScript应用非常有用的基本实体。它并不是武断的,意思就是说你可以自由和灵活的以你自己认为舒服的方式来构建web应用。你也可以使用它规定的体系结构,或者扩展它以适合你的需求。
这个框架不关注widgets或者是另一种构建对象的方式——它只提供在应用中处理和查询数据的一套工具。它也不规定使用某个特定的模板引擎——不过你可以自由的使用由Underscore.js(其依赖项之一)提供的Micro-templating,views(视图)也可以使用你自己选择的模板方案绑定到HTML结构。
这里有大量的应用使用Backbone构建,很显然它扩张的很好。Backbone同样也可以跟其它框架很好的一起工作。 意味着你可以嵌入同AngularJS编写的Backbone widgets到你的应用中,把它跟TypeScript一起使用,或者仅仅使用它里面个别class(比如Models)作为简单apps里的数据支撑。
使用Backbone来构建应用不会有什么性能上的缺陷。它避免了循环调用,双向绑定,恒定轮询数据结构检查更新,并且劲量保持简单。不过,你想反其道而行之,你可以在它之上来实现这些东西。Backbone不会阻止你的。
有了充满生气的插件社区和扩展作者,如果你想实现一些Backbone缺失的行为,可以通过一个补充的项目来做。Backbone对其源代码提供非常有阅读性的文档,任何人都可以容易的理解其幕后发生了些什么。
经过超过2年半的发展,Backbone已是一个成熟的库,并将继续提供构建更好web应用的极简方案。我会定期的使用它,希望你也会像我一样发现它是一个有用的工具库。
这本书的目的是能创建一个权威和集中的信息库,帮助那些在实际应用中使用Backbone的开发者。如果你有认为需要改进或者扩展的话题,请自由的提交问题(或更好一个pull请求)到这本书的GitHub页面。不久你将会帮助到其它开发者避免你曾经遇到的问题。
这本书的话题包括MVC理论,如何使用Backbone的Models, Views, Collections,以及Routers构建应用。同样也会有更高级的话题比如使用Backbone.js时的模块开发和AMD(使用RequireJS),常见问题的处理比如嵌套views,使用Backbone和jQuery Mobile如何解决路由问题,等等。
每个章节里你分别可以学到:
第2章, 基本原理 追溯MVC设计模式的历史,介绍在Backbone.js和其它JavaScript框架中它是如何实现的。
第3章, Backbone基本要素 包括Backbone.js framework框架的核心和主要特性,以及使用它时需要知道的一些技术和技巧。
第4章, 练习1: Todos - 第一个Backbone.js Appstep-by-step带你开发一个简单的客户端Todo List应用。
第5章, 练习2: Book Library - 第一个RESTful Backbone.js App 指导你完成开发开发一个图书馆应用,通过服务器端的REST API把model持久化保存。
第6章, Backbone扩展 讲述了Backbone.Marionette和Thorax,给Backbone.js添加有利于开发大型应用特性的两个扩展框架。
第7章, 常见问题和解决方案 回顾了一些使用Backbone.js时可能会遇到的问题及解决方式。
第8章, 模块化开发 看看AMD模块和RequireJS可以如何用于模块你的代码。
第9章, 练习3: Todos - 第一个模块化Backbone + RequireJS App带你使用RequireJS重写练习1中创建的app ,使它模块化。
第10章, 分页Backbone请求&集合 教你如何使用Backbone.Paginator插件来分页Collections的数据。
第11章, Backbone Boilerplate和Grunt BBB 介绍通过样板代码构建一个新的Backbone.js应用的强大工具。
第12章, 移动应用 解决使用Backbone和jQuery Mobile时会引发的问题。
第13章, Jasmine 如何使用Jasmine测试框架对Backbone代码进行单元测试。
第14章, QUnit 讨论如何使用QUnit做单元测试。
第15章, SinonJS 讨论如何使用SinonJS对Backbone apps进行单元测试。
第16章, 资源 提供附加的Backbone相关的资源参考。
第17章, 总结对Backbone.js开发的世界做一个概括。
第18章, 附录 回到设计模式的讨论,通过MVC与Model-View-Presenter (MVP)模式的对比pattern以及探讨Backbone.js如何与这两者想关联。同时也包含演练如何从头写一个Backbone类似的框架和一些其它话题。
设计模式是一种可以提升应用程序的组织和架构的通用的开发方法。同过使用设计模式,我们可吸取众多开发者反复实践中总结出来的经验。
通常,开发者创建桌面和服务器类应用有丰富的设计模式供他们去选择,但是,在过去的仅仅几年中,这些模式已经应用到了客户端开发中。
在这一章中,我们将会探索改进的MVC模式以及如何使用Backbone.js框架在客户端开发中实现它。
MVC(Model-View-Controller)是一种提倡通过分层来改进应用的设计模式。它强制通过第三个组件(Controller)来分离业务数据(Model),用户界面(View),控制器通常管理逻辑,用户输入,协调模型与视图间的通讯。这种模式最早是Trygve Reenskaug在Smalltaok-80(1979)中设计的,当初被称之为Model-View-Controller-Editor。1994,“设计模式: 面向对象软件中可重用性元素” (“GOF”或者“四人帮”一书)中详细定义了MVC,这本书普及了它的应用。
随着时间的推移MVC模式变得更加笨重,非常有必要去了解下它早的设计初衷。在70年代,图形用户界面并不多见。有一种方法叫Separated Presentation(表现分离),可以清晰的分离模仿现实世界概念(比如一张图片、一个人)的域对象和被渲染到用户屏幕的描述对象。
Smalltalk-80实现的MVC把这个概念贯彻的更深入,而且有目的性的把应用逻辑从用户界面中分离出来。它的观点是解耦应用这些部分也可以把模型重用到应用中其它的用户界面。这里有些非常有趣的关于Smalltalk-80’s MVC架构的事情:
有时,当开发者知道数十年前观察者模式(现在通常在发布/订阅系统中应用)也是MVC架构的一部分的时候,他们非常的惊讶。在Smalltalk-80的MVC中,View和Controller都观察了Model:Model改变的时候,View则做出响应。一个简单的例子就是基于股票市场数据的应用——因为它要展示实时的信息,所以在Models中的数据有任何改变都 要在View中立即刷新显示。
Martin Fowler在过去的些年中在写关于MVC起源origins 方面做了很多杰出的工作。如果你有兴趣了解更多关于Smalltalk-80 MVC的信息,推荐你阅读他的相关成果。
web严重依赖于HTTP协议,它是无状态的。意思就是说在浏览器和服务器之间没有不间断打开的连接;每个请求都在它们两者之间建立一个新的通讯信道。一旦请求的发起者(例如一个浏览器)获取到了响应连接就关闭。事实上,与许多基于原来的MVC思想开发出来的操作系统中的任何一个相比,这创建了一个完全不同的上下文。MVC的实现需要符合web的上下文。
一个尝试应用MVC到web上下文的服务器端web应用框架的例子是Ruby On Rails.

它的核心就是我们预期的三个MVC组件——Model, View和Controller体系。在Rails中:
虽然在Rails中这种类MVC有清晰的分离,实际上它使用了一种不同的模式Model2。有一条可以证明,Rails不是从model和controllers通知views,而是直接把model数据传递给view。
就是说,即便是对于从一个URL接受请求的服务器端工作流而言,生成HTML页面作为响应并且从界面分离业务逻辑有非常多的好处。同样道理,在服务器端框架中让UI清晰地与数据记录分离是非常有用的,同样在JavaScript中让UI清晰的与数据模型(models)相分离也非常有用。(后面会提到更多)。
其它服务器端的MVC(比如PHP Zend )实现同样实现了前端控制器(Front Controller)设计模式。这种模式把MVC堆栈层叠在一个单一入口背后。单一入口就是说所有HTTP请求(例如,http://www.example.com,http://www.example.com/whichever-page/等)更具服务器配置被路由到同一个处理器,不依赖于URL。
当前端控制器接受到一个HTTP请求它会分析然后决定调用哪个类(Controller)和方法(Action)。被选中的Controller Action接管进行处理和与对应的Model交互然后完成这个请求。Controller接受从Model返回的数据,载入对应的View,注入Model数据到View中,然后把响应返回给浏览器。
比如说,我们有一个blog,www.example.com,想要编辑一篇文章(通过id=43),就请求http://www.example.com/article/edit/43:
在服务器端,前端控制器将分析URL然后调用Article Controller(对应到URL /article/的部分)及它的Edit Action(对应到URL的/edit/部分)。在Action中有一个调用,Articles Model和它的Articles::getEntry(43)方法(43对应到URI的/43部分)。它会从数据库返回blog文章的数据用于编辑。然后Article Controller会加载(article/edit) View, 它包含注入文章数据到编辑文章内容,标题和其它(元)数据表单的逻辑。最后,HTML的响应结果将返回给浏览器。
正如你想象的,当我们触发表单中的一个保存按钮时需要类似的流程来处理POST请求。POST action的URI可能类似于/article/save/43。请求会经过同样的Controller, 不过这次Save Action会调用(取决于/save/ URI块),文章的Model将调用Articles::saveEntry(43)把编辑的文章保存到数据库,并且浏览器会被重定向到/article/edit/43URI以便进一步编辑。
最后,如果用户请求http://www.example.com/,前端控制器将调用默认的Controller和Action;比如,Index Controller和它的Index action。在Index Action中有对Articles model的调用,其Articles::getLastEntries(10)方法会返回最新的10条blog文章。同时Controller也会加载blog/index View, 它包基本的列举blog文章的逻辑。
下面这张图展示了这种典型的服务器端MVC HTTP request/response生命周期:
服务器端接收一个HTTP请求然后路由到一个单一入口。在入口点,前端控制器分析这个请求并且基于它调用对应Controller的Action。这个过程叫路由选择。Action Model则被要求返回或者保存提交的数据。Model与数据源通讯(例如,数据库或者API)。一旦Model完成它的工作就返回数据给Controller, Controller然后加载对应的View。View使用提供的数据执行表示逻辑(遍历文章,输出标题,内容等) 。最后HTTP响应返回给浏览器。
一些研究表明改善延迟对于网站和app的使用有非常积极的影响。这与传统的以服务器为中心,从一个页面跳转到另一个页面需要全部重新载入的web app开发方式是相违背的。即便是有到位的缓存,浏览器仍然需要解析CSS,JavaScript, HTML并且渲染界面。
除了会返回给用户较多重复内容之外,这种方法也会影响延迟和一般的响应性的用户体验。在过去几年中改善这种延迟的趋势都朝着构建单页应(Single Page Applications——SPAs)的方向走——应用在载入一个初始化页面之后能够处理后续哦导航和数据请求,而不需要整个页面的重新载入。
当用户浏览到一个新的view时,view的附加内容需要通过XHR (XMLHttpRequest)去请求,通常与服务器端的REST API或端点通讯。Ajax(Asynchronous JavaScript and XML) 可以异步与服务端通讯,所以数据可以在背后传输和处理,可以让用户不间断的与页面的其它部分交互。它提高了可用性和响应能力。
SPAs同样也可以使用浏览器的高级特性,比如当用户从一个view跳转到另一个view的时候可以使用History API 来更新地址栏的地址。这些URLs同样可以添加到书签和分享应用的状态,无需跳转到完整的新的页面。
典型的SPA由小块的逻辑实体接口组成,每个部分都有他们自己的UI,业务逻辑和数据。一个很好的例子就是购物应用中的购物篮,可以往里面添加元素, 购物篮可能是在页面右上角呈现给用户的一个盒子:
购物篮和它的数据呈现在HTML中。数据和它在HTML中关联的View会随着一起变化。曾经我们使用jQuery (或者类似的DOM操作库),一堆的Ajax调用和回调来保持他们两者的同步。那样经常产生结构不好,不易维护的代码。Bug频繁出现或不可避免。
对于需要快速,复杂和响应的Ajax支持的web应用复制了很多这样的逻辑在客户端上,极大的提高了代码的规模和复杂性。最终,把我们带向需要在客户端上实现MVC(或类似的架构),以便更好的构建代码,在应用生命周期里更容易维护和扩展。
经过反复的尝试也演变,JavaScript开发者利用传统MVC模式的力量,开发出一些受MVC启发的JavaScript框架,比如Backbone.js。
我们通过一Todo应用示例来看下Backbone.js如何带来客户端MVC开发的好处。后面的章节我们会基于这个例子来探索Backbone的特性,不过目前我们只需要关心核心组件与MVC之间的联系。
示例中需要div元素来展现一个Todo列表。同时需要一个HTML模板,包含Todo标题,完成复选框的占位符,用于实例化一个Todo项实例。下面是相关的HTML:
<!doctype html>
<html lang="en">
<head>
  <meta charset="utf-8">
  <title></title>
  <meta name="description" content="">
</head>
<body>
  <div id="todo">
  </div>
  <script type="text/template" id="item-template">
    <div>
      <input id="todo_complete" type="checkbox" <%= completed ? 'checked="checked"' : '' %>>
      <%- title %>
    </div>
  </script>
  <script src="jquery.js"></script>
  <script src="underscore.js"></script>
  <script src="backbone.js"></script>
  <script src="demo.js"></script>
</body>
</html>
在Todo application (demo.js)中, Backbone Model 实例用于持有每个Todo项的数据: ```javascript // Define a Todo Model var Todo = Backbone.Model.extend({ // Default todo attribute values defaults: { title: ’’, completed: false } });
// Instantiate the Todo Model with a title, allowing completed attribute // to default to false var myTodo = new Todo({ title: ‘Check attributes property of the logged models in the console.’ }); ```
Todo Model扩展自Backbone.Model,简单的定义了默认的两个数据属性。接下来的章节中你会发现Backbone Model提供了很多特性,不过这个简单的Model只是为了说明, 首先最重要的是Model是一个数据容器。
每个Todo实例都会通过TodoView渲染到页面上:
var TodoView = Backbone.View.extend({

  tagName:  'li',

  // Cache the template function for a single item.
  todoTpl: _.template( $('#item-template').html() ),

  events: {
    'dblclick label': 'edit',
    'keypress .edit': 'updateOnEnter',
    'blur .edit':   'close'
  },

  // Called when the view is first created
  initialize: function () {
    this.$el = $('#todo');
    // Later we'll look at:
    // this.listenTo(someCollection, 'all', this.render);
    // but you can actually run this example right now by
    // calling TodoView.render();
  },

  // Re-render the titles of the todo item.
  render: function() {
    this.$el.html( this.todoTpl( this.model.toJSON() ) );
    // $el here is a reference to the jQuery element
    // associated with the view, todoTpl is a reference
    // to an Underscore template and toJSON() returns an
    // object containing the model's attributes
    // Altogether, the statement is replacing the HTML of
    // a DOM element with the result of instantiating a
    // template with the model's attributes.
    this.input = this.$('.edit');
    return this;
  },

  edit: function() {
    // executed when todo label is double clicked
  },

  close: function() {
    // executed when todo loses focus
  },

  updateOnEnter: function( e ) {
    // executed on each keypress when in todo edit mode,
    // but we'll wait for enter to get in action
  }
});

// create a view for a todo
var todoView = new TodoView({model: myTodo});TodoView通过扩展自Backbone.View来定义并且使用一个对应的Model进行初始化。例子中,render()方法用了一个模板来构建Todo项的HTML存放到一个li元素内。每次render()调用都会使用当前的Model数据替换li的内容。因此,一个View实例使用对应的Model的属性来渲染DOM元素的内容。后面我们会讲到一个View可以把它的render()方法绑定到Model的change事件,当Model改变的时候就会触发View的重新渲染。
现在,我们已经看到了Backbone.Model实现了MVC的Model,Backbone.View实现了View。不过,正如我们前面提到的,对于Controllers,Backbone跟传统的MVC是不相同的——因为根本没有Backbone.Controller!
不过,Controller的功能已经包含在View里。回想一下,Controllers响应请求并且执行相应的事件,事件则有可能触发Model的改变并更新到View。在单页应用中,不同于传统意义上的请求,我们有事件。事件可以是传统的浏览器事件(比如,click)或者内部的应用事件比如Model changes。
在我们的这个TodoView种,events属性就扮演了Controller配置的角色,定义了View的DOM元素内触发的事件如何路由到View内定义的事件处理方法。
在这个示例中events帮我们把Backbone关联到MVC模式,我们将会看到它们在SPA应用中扮演强大的角色。Backbone.Event是Backbone中一个基本的组件,混入到在Backbone.Model和Backbone.View之中,为它们提供丰富的事件管理功能。注意,传统的controller角色(Smalltalk-80风格)是由模板(template)执行的,而不是Backbone.View。
到这里我们就完成了与Backbone.js初次相遇。在这本书的后面部分我们将会探索这个框架在这些简单的结构基础之上的许多特性。不过,在此之前我们来看下JavaScript MV*框架的通用特性。
一个SPA通过一个普通的HTTP请求和响应载入到浏览器。页面可能是一个简单的HTML文件,正如我们上面的例子一样,或者是一个由服务器端MVC构建的View。
一旦载入,客户端的Router就会拦截URLs并且触发客户端的逻辑,以替代发送一个新的请求道服务器端。下面这张图显示了Backbone实现的客户端MVC中典型的请求处理:
URL路由,DOM事件(比如,鼠标点击),以及Model事件(比如,属性changes)在View中所有触发器的处理逻辑(handling logic)。handlers会更新DOM和 Models,这有也可能触发其它事件。Models与数据源同步时有可能带来与后端服务器的通讯。
Models的内置功能不同的框架会有所不同;不过,它们都共同支持属性验证,attributes代表Model的属性,比如Model的id标识。
在实际应用中使用model的时候通常我们还需要一种方式对model进行持久化。持久化保存可以让我们在对model进行编辑和更新的时候保存它的最新状态。比如在浏览器中使用本地存储,或者与数据库同步。
一个model有可能会有多个views来观察它的变化。观察意思是View注册了一个当Model有任何改变时的消息通知。这可以让View确保显示在频幕上的东西与model的数据保持一致。根据你的需求,你可能会创建单个View来显示所有的Model属性,或者创建单独的Views来显示不同的属性。重点是Model并不关心这些Views是如何组织的,它只是在必要的时候简单的更新它的数据并且通过框架的事件系统来通知更新。
对于现代MVC/MV*框架,提供一种模型组合的方法并不常见。在Backbone中,这些组合叫“Collections”(集合)。把模型组合来管理可以让我们编写应用逻辑时基于一个组合来通知,它包含了任何一个model的改变。这样也避免了手动去观察单个的model实例。后面我们会提到。Collections在执行夸多个model的计算时也非常有用。
用户与view进行交互,通常就是阅读或者编辑model的数据。 比如,在我们的这个todo应用案例中,todo model的视图展现发生在显示所有todo项列表的界面里。每个tod都用一个标题和完成复选框渲染。Model的编辑发生在“编辑”界面,用户选中一个特定的todo可以在form表单中编辑它的title。
在view里定义了一个render()方法,用JavaScript模板引擎 (Underscore渲染和更新this.el引用的视图内容。
然后添加render()的回调作为Model的订阅者(subscribers),这样view就可以在model改变的时候触发更新。
你可能想知道对用户交互行为这里是如何处理的。当用户点击view中的一个Todo项时,接下来该做什么并不是由view决定的,而是由Controller决定的。在Backbone里,通过添加一个事件监听到Todo元素,把点击的处理委托给一个事件处理器。
模板(Templating)
在支持MVC/MV*的JavaScript框架北京下,非常值得近距离的去审视下JavaScript模板和View之间的关系。
长期实践证明通过手工拼接字符串来创建大块的HTML片段是非常低效的。使用这种方式的开发者们经常会发现,他们遍历自己的数据,包裹在嵌套的div里面,然后使用过时的技术,比如document.write把所谓的’template’插入到DOM中。这种方式意味着必须使用标准的标签,脚本代码要放在页面内,而且很快就会变得难以阅读和维护,特别是对于构建大的应用来说。
JavaScript模板库(比如Handlebars.js or Mustache)通常用于view中定义模板,在HMTL标签中包含了一些模板变量。这些模板块可以保存在外部也可以保存在自定义类型(比如’text/template’)的script标签里。变量通过变量语法(比如Underscore里的<%= title %>,Underscore里的{{title}})来定义。
Javascript 模板库通常接受很多种格式的数据,包括JSON;序列化的格式始终是字符串。往模板中填充数据这种繁重的工作也由框架自身来完成。使用模板库有非常多的好处,特别是当模板存在在外部时,应用可以根据需要动态的加载模板。
让我们来比较下2个HTML模板的列子。一个使用流行的Handlebars.js库实现,另一个使用Underscore的’microtemplates’。
Handlebars.js:
<div class="view">
  <input class="toggle" type="checkbox" {{#if completed}} "checked" {{/if}}>
  <label>{{title}}</label>
  <button class="destroy"></button>
</div>
<input class="edit" value="{{title}}">
Underscore.js Microtemplates:
<div class="view">
  <input class="toggle" type="checkbox" <%= completed ? 'checked' : '' %>>
  <label><%- title %></label>
  <button class="destroy"></button>
</div>
<input class="edit" value="<%= title %>">在Microtemplates中,你也可以使用双大括号(比如{{}}) (或者其它你认为爽的字符)。使用大括号的话,可以向下面这样设置Underscore的templateSettings 属性:
_.templateSettings = { interpolate : /\{\{(.+?)\}\}/g };关于导航和状态的注意事项
值得关注的是,在传统web开发中,在独立的view之间导航需要刷新页面。而在单页应用中,通过ajax从服务器端获取数据,可以在同一个页面里动态的渲染一个新的view,因为不会自动更新URL,导航的角色就落到了“router”(路由)的身上,路由独立的管理应用状态(比如允许用户收藏一个他们浏览过的view)。然而,路由并不是MVC或者类MVC框架的一部分,所以在这部分我并不打算介绍更多的细节。
在我们的Todo应用中,Controller负责处理在编辑View中用户对指定Todo的改变,当用户完成编辑时更新指定的Todo Model。
大部分JavaScript MVC框架可通过Controllers与传统MVC模式的说法区分开来。在我看来,这种变化的原因,可能Javascript框架作者最初参照了服务端MVC的观念(比如Ruby on Rails)。认识到这种方式跟服务器端的并不完全一样,而且MVC中的C在服务器端也不是用于解决管理状态问题。这是一个非常聪明的途径,但对于初学者来说更难以理解传统MVC模式和无Javascript框架中controller的特定意义。
那Backbone.js有Controller吗?并不真正有。Backbone的Views通常包含了“controller”的逻辑,而且Routers(后面会讨论)也用于帮助管理应用状态,但这两者都不是传统MVC模式中真正意义上的控制器。
在这方面,与官方文档或者网络博客中描述的相反,Backbone并不是正真的MVC框架。事实上,它更适合归类到MV家族中,它有自己的实现架构。当然这并没有什么不对,只是帮助你区分和理解传统MVC与你在Backbone项目中的MV。
总的来说,MVC模式可以帮助我们把应用的逻辑从界面中分离,使它们更容易修改和维护。基于这种分离的逻辑,对于数据的变化,用户界面,或者业务逻辑以及需要编写的单元测试都将非常的清晰。
现在,相信你对MVC模式已经有基本的了解了。为了满足大家的求知欲,这里我们将探索的更深入一点。
GoF (Gang of Four,四人组, 《Design Patterns: Elements of Reusable Object-Oriented Software》/《设计模式》一书的作者:Erich Gamma、Richard Helm、Ralph Johnson、John Vlissides)并没有把MVC提及为一种设计模式,而是把它当做“一组用于构建用户界面的类集合”。在他们看来,它其实是其它三个经典的设计模式的演变:观察者模式(Observer)(Pub/Sub), 策略模式(Strategy)和组合模式(Composite)。根据MVC在框架中的实现不同可能还会用到工厂模式(Factory)和装饰器(Decorator)模式。我在另一本免费的书“JavaScript Design Patterns For Beginners”中讲述了这些模式,如果你有兴趣可以阅读更多信息。
正如我们所讨论的,models表示应用的数据,而views处理屏幕上展现给用户的内容。为此,MVC在核心通讯上基于推送/订阅模型(惊讶的是在很多关于MVC的文章中并没有提及到)。当一个model变化时它对应用其它模块发出更新通知(“publishes”),订阅者(subscriber)——通常是一个Controller,然后更新对应的view。观察者——这种自然的观察关系促进了多个view关联到同一个model。
对于感兴趣的开发人员想更多的了解解耦性的MVC(根据不同的实现),这种模式的目标之一就是在一个主题和它的观察者之间建立一对多的关系。当这个主题改变的时候,它的观察者也会得到更新。Views和controllers的关系稍微有点不同。Controllers帮助views对不同用户的输入做不同的响应,是一个非常好的策略模式列子。
已经回顾了经典的MVC模式,你现在应该明白了它是如何让开发者将一个应用清晰的分离开来。你应该也能区分出JavaScript MVC框架可能在实现上与原有模式的相似与不同。
当评定一个新的JavaScript MVC/MV*框架时,请记住——可以退一步想,看看它是如何实现Models, Views, Controllers或者其它备选方案,这样或许更能帮助你理解这个框架。
如果你对Backbone.js使用的MVC变异模式感兴趣的话,可以阅读附录的MVP (Model-View-Presenter)章节。
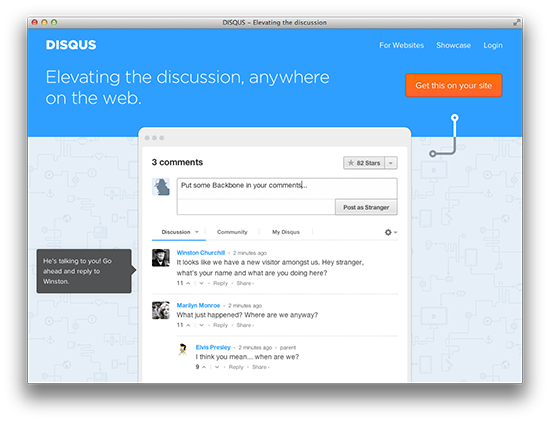
new关键字来实例化,很多开发者更喜欢这种方式。Disqus
Disqus选择Backbone.js来够坚挺他们的commenting widget。他们认为这对他们分布式web app的正确选择,Backbone体积小而且容易扩展。
Khan Academy
提供可在任何地方都能使用的世界一流的免费教育,Khan使用Backbone来保持他们前端代码的模块化和有组织化。

MetaLab
MetaLab使用Backbone为团队提供流程创建,任务管理的app。他们的工作空间使用Backbone创建任务的views,活动,账户,标签等等。
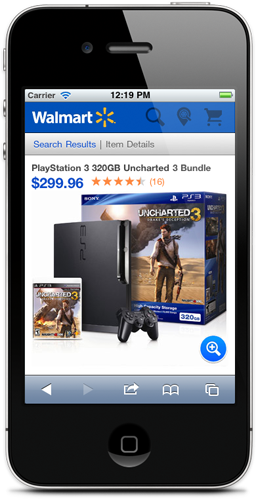
Walmart Mobile
Walmart选择Backbone来构建他们的移动web应用,在这个过程中创建了2个新的扩展框架——Thorax和Lumbar。本书的后面我么会讲到这两个框架。
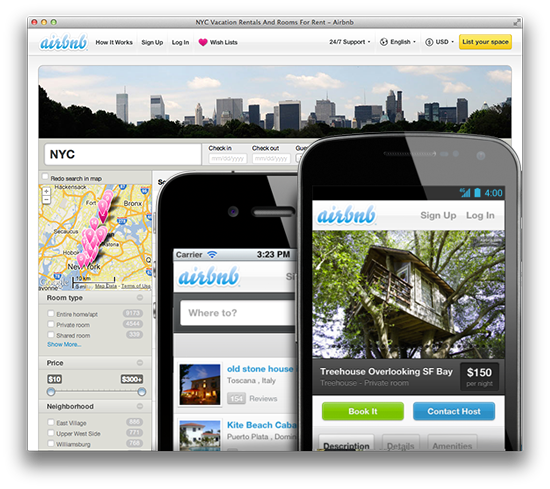
AirBnb
Airbnb使用Backbone开发他们的移动web app,并且在很多产品中使用Backbone。
Code School
Code School的课程挑战app从一开始就使用Backbone,利用了它提供的所有能力:routers, collections, models 以及复杂的事件处理。

在这一章中,你将学习到Backbone的基本元素,models、views、collections和routers。这并不是说这些内容就替代的官方文档,这会在你开始使用它构建应用前帮助你理解Backbone背后的一些核心观念。
在投入代码示例前,我们先来定义一些样板标签,可以指定Backbone的依赖项。这些样板可以无需修改标题就能在很多情况下复用,而且可以帮你轻松的运行示例代码。
你可以选择把下面代码复制到你的编辑器中,把script标签里的注释替换成任何想要运行的示例代码就可以了:
<!DOCTYPE HTML>
<html>
<head>
    <meta charset="UTF-8">
    <title>Title</title>
</head>
<body>

<script src="https://ajax.googleapis.com/ajax/libs/jquery/1.9.1/jquery.min.js"></script>
<script type="text/javascript" src="http://documentcloud.github.com/underscore/underscore-min.js"></script>
<script type="text/javascript" src="http://documentcloud.github.com/backbone/backbone-min.js"></script>
<script type="text/javascript">
  // Your code goes here
</script>
</body>
</html>你可以保存文件后在浏览器中浏览你的页面。不过,如果你更喜欢使用在线编辑器的话,jsFiddle或者jsBin,上面的样板代码也同样可用。
大部分示例都可以直接在浏览器developer tools的console中运行,如果你加载了上面的样板HTML页面的话,这样Backbone的依赖项才是可用。
Backbone的models包含了应用中的交互是数据,以及数据的相关逻辑。比如,我们可以用一个model来代表一个todo对象,包含了它的标题(todo的内容),已完成标识(todo当前的状态)。
Models可以通过继承Backbone.Model来创建:
var Todo = Backbone.Model.extend({});

// We can then create our own concrete instance of a (Todo) model
// with no values at all:
var todo1 = new Todo();
// Following logs: {}
console.log(JSON.stringify(todo1));

// or with some arbitrary data:
var todo2 = new Todo({
  title: 'Check the attributes of both model instances in the console.',
  completed: true
});

// Following logs: {"title":"Check the attributes of both model instances in the console.","completed":true}
console.log(JSON.stringify(todo2));initialize()方法在当一个model创建一个新的实例是调用。它是可选的,不过你最好像下面这样去使用它,后面你会发现其好处的原因。
var Todo = Backbone.Model.extend({
  initialize: function(){
      console.log('This model has been initialized.');
  }
});

var myTodo = new Todo();
// Logs: This model has been initialized.
默认值
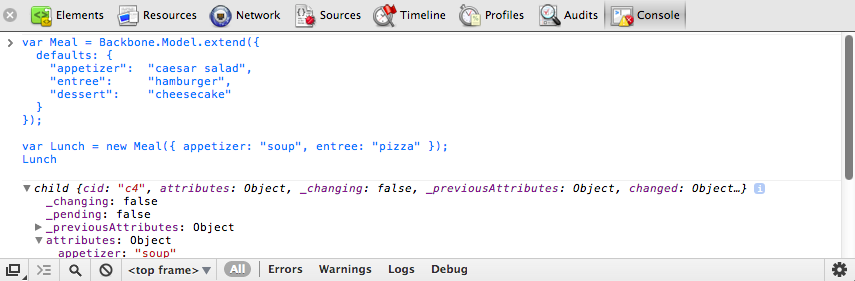
当你想给model设置默认属性时(比如,当用户不会提供一份完整的数据时),可以用defaults属性。
var Todo = Backbone.Model.extend({
  // Default todo attribute values
  defaults: {
    title: '',
    completed: false
  }
});

// Now we can create our concrete instance of the model
// with default values as follows:
var todo1 = new Todo();

// Following logs: {"title":"","completed":false}
console.log(JSON.stringify(todo1));

// Or we could instantiate it with some of the attributes (e.g., with custom title):
var todo2 = new Todo({
  title: 'Check attributes of the logged models in the console.'
});

// Following logs: {"title":"Check attributes of the logged models in the console.","completed":false}
console.log(JSON.stringify(todo2));

// Or override all of the default attributes:
var todo3 = new Todo({
  title: 'This todo is done, so take no action on this one.',
  completed: true
});

// Following logs: {"title":"This todo is done, so take no action on this one.","completed":true}
console.log(JSON.stringify(todo3));Model.get()
Model.get()提供了简单的对模型属性的访问。
var Todo = Backbone.Model.extend({
  // Default todo attribute values
  defaults: {
    title: '',
    completed: false
  }
});

var todo1 = new Todo();
console.log(todo1.get('title')); // empty string
console.log(todo1.get('completed')); // false

var todo2 = new Todo({
  title: "Retrieved with model's get() method.",
  completed: true
});
console.log(todo2.get('title')); // Retrieved with model's get() method.
console.log(todo2.get('completed')); // true如果你想读取或者复制model的所有数据,可以使用它的toJSON()方法。这个方法复制其属性作为一个对象返回(不是JSON 字符串,虽然其名字有点像)。(当使用JSON.stringify()传入一个对象调用toJSON()方法的结果时,它字符串化toJSON()的返回值,而不是原始的对象。前面这个例子使用这个特性改进下,调用JSON.stringify()来log model的实例。)
var Todo = Backbone.Model.extend({
  // Default todo attribute values
  defaults: {
    title: '',
    completed: false
  }
});

var todo1 = new Todo();
var todo1Attributes = todo1.toJSON();
// Following logs: {"title":"","completed":false}
console.log(todo1Attributes);

var todo2 = new Todo({
  title: "Try these examples and check results in console.",
  completed: true
});

// logs: {"title":"Try these examples and check results in console.","completed":true}
console.log(todo2.toJSON());
Model.set()
Model.set()给model设置包含一个或多个属性的hash对象。当这些属性任何一个改变model的状态时,“change”事件就会触发。每个属性的Change事件都可以触发和绑定(比如 change:name, change:age)。
var Todo = Backbone.Model.extend({
  // Default todo attribute values
  defaults: {
    title: '',
    completed: false
  }
});

// Setting the value of attributes via instantiation
var myTodo = new Todo({
  title: "Set through instantiation."
});
console.log('Todo title: ' + myTodo.get('title')); // Todo title: Set through instantiation.
console.log('Completed: ' + myTodo.get('completed')); // Completed: false

// Set single attribute value at a time through Model.set():
myTodo.set("title", "Title attribute set through Model.set().");
console.log('Todo title: ' + myTodo.get('title')); // Todo title: Title attribute set through Model.set().
console.log('Completed: ' + myTodo.get('completed')); // Completed: false

// Set map of attributes through Model.set():
myTodo.set({
  title: "Both attributes set through Model.set().",
  completed: true
});
console.log('Todo title: ' + myTodo.get('title')); // Todo title: Both attributes set through Model.set().
console.log('Completed: ' + myTodo.get('completed')); // Completed: true
直接访问
Models提供了一个.attributes属性,是包含model内部状态的一个hash。通常是以JSON对象的形式,与在服务器端的model数据基本相似,不过也可以是其它形式。
通过.attributes属性来给model设置值会绕过绑定在model上的触发器(triggers或者说事件)。
改变model属性的时候传入{silent:true}并不会避免特定的"change:attr"事件,而是完全沉默:
var Person = new Backbone.Model();
Person.set({name: 'Jeremy'}, {silent: true});

console.log(!Person.hasChanged(0));
// true
console.log(!Person.hasChanged(''));
// true请记住,最好使用Model.set()或者像前面一样直接实例化来设置model的属性。
如果你想在Backbone model改变接收到通知可以监听它的change事件。可以在initialize()函数中添加监听:
var Todo = Backbone.Model.extend({
  // Default todo attribute values
  defaults: {
    title: '',
    completed: false
  },
  initialize: function(){
    console.log('This model has been initialized.');
    this.on('change', function(){
        console.log('- Values for this model have changed.');
    });
  }
});

var myTodo = new Todo();

myTodo.set('title', 'The listener is triggered whenever an attribute value changes.');
console.log('Title has changed: ' + myTodo.get('title'));


myTodo.set('completed', true);
console.log('Completed has changed: ' + myTodo.get('completed'));

myTodo.set({
  title: 'Changing more than one attribute at the same time only triggers the listener once.',
  completed: true
});

// Above logs:
// This model has been initialized.
// - Values for this model have changed.
// Title has changed: The listener is triggered whenever an attribute value changes.
// - Values for this model have changed.
// Completed has changed: true
// - Values for this model have changed.
在Backbone model中也可以监听个别的属性变化。下面这个示例,当指定属性(Todo model的title)修改时打印日志。
var Todo = Backbone.Model.extend({
  // Default todo attribute values
  defaults: {
    title: '',
    completed: false
  },

  initialize: function(){
    console.log('This model has been initialized.');
    this.on('change:title', function(){
        console.log('Title value for this model has changed.');
    });
  },

  setTitle: function(newTitle){
    this.set({ title: newTitle });
  }
});

var myTodo = new Todo();

// Both of the following changes trigger the listener:
myTodo.set('title', 'Check what\'s logged.');
myTodo.setTitle('Go fishing on Sunday.');

// But, this change type is not observed, so no listener is triggered:
myTodo.set('completed', true);
console.log('Todo set as completed: ' + myTodo.get('completed'));

// Above logs:
// This model has been initialized.
// Title value for this model has changed.
// Title value for this model has changed.
// Todo set as completed: trueBackbone支持通过Model.validate()对model进行验证,可以在设置model的属性前对值进行校验。默认情况下,验证会在model调用save()或者调用set()传入{validate:true}参数时触发。
var Person = new Backbone.Model({name: 'Jeremy'});

// Validate the model name
Person.validate = function(attrs) {
  if (!attrs.name) {
    return 'I need your name';
  }
};

// Change the name
Person.set({name: 'Samuel'});
console.log(Person.get('name'));
// 'Samuel'

// Remove the name attribute, force validation
Person.unset('name', {validate: true});
// false
上面,我们同样在unset()`方法时做验证,它可以从内部model的hash中删除一个属性。
验证函数可以简单也可以看需要而极为复杂。如果属性值验证通过,.validate()方法可以不返回任何值。如果验证失败,需要返回一个自定义错误(error)。
如果返回error:
invalid事件,model的validationError属性被设置成.validate()返回的值。.save()将不会继续,服务器端的model属性页不会被修改。下面是一个更复杂点的验证的例子:
var Todo = Backbone.Model.extend({
  defaults: {
    completed: false
  },

  validate: function(attribs){
    if(attribs.title === undefined){
        return "Remember to set a title for your todo.";
    }
  },

  initialize: function(){
    console.log('This model has been initialized.');
    this.on("invalid", function(model, error){
        console.log(error);
    });
  }
});

var myTodo = new Todo();
myTodo.set('completed', true, {validate: true}); // logs: Remember to set a title for your todo.
console.log('completed: ' + myTodo.get('completed')); // completed: false提示: 传递给validate函数的attributes对象表示完成当前的set()或者save()之后的属性。这个对象与当前的model属性和传递给这个操作的参数都是不同的。因为它是浅拷贝,所以在该函数内不会修改传入的Number, String, 或者Boolean类型的值,但是可以改变嵌套对象的属性值。
这里有一个相关的例子(by @fivetanley)。
Backbone中的Views不包含应用中的标记,但是它们定义models如何呈现给用户的逻辑。通常通过JavaScript模板来完成(比如:Mustache, jQuery-tmpl等)。view的render()方法可以绑定到model的change()事件上,这样view就可以保持更新而不用刷新整个页面。
创建一个view跟前面创建一个model一样类似的简单。 通过扩展自Backbone.View创建一个view。在前面的章节中,我们介绍了下面的这个TodoView示例;现在我们进一步的来看下它是如何工作的。
var TodoView = Backbone.View.extend({

  tagName:  'li',

  // Cache the template function for a single item.
  todoTpl: _.template( "An example template" ),

  events: {
    'dblclick label': 'edit',
    'keypress .edit': 'updateOnEnter',
    'blur .edit':   'close'
  },

  // Re-render the titles of the todo item.
  render: function() {
    this.$el.html( this.todoTpl( this.model.toJSON() ) );
    this.input = this.$('.edit');
    return this;
  },

  edit: function() {
    // executed when todo label is double clicked
  },

  close: function() {
    // executed when todo loses focus
  },

  updateOnEnter: function( e ) {
    // executed on each keypress when in todo edit mode,
    // but we'll wait for enter to get in action
  }
});

var todoView = new TodoView();

// log reference to a DOM element that corresponds to the view instance
console.log(todoView.el); // logs <li></li>el(上面例子中最后一行打印的值)是view的一个核心属性。那什么是el,它是如何定义的?
el通常是DOM元素的引用,所有views都必须有一个。所有view的内容都一次性插入这个DOM,可以让让浏览器执行最小化的重绘,渲染更快。
有2种方式给view指定一个DOM元素:元素在页面中已存在,或者一个新创建的元素,开发者手动添加。 如果元素已经存在,你可以设置el为一个css选择器或者直接对DOM的引用。
如果要给view创建一个新的元素,设置view属性的任意组合:tagName, id和className。框架会为你创建一个新的元素,并且可以通过el属性来引用这个元素。如果没有指定tagName的值,默认会是div。
上面这个例子中,tagName设为’li’,就会创建一个li元素。下面这个例子会创建一个ul元素,并且包含id和class属性:
var TodosView = Backbone.View.extend({
  tagName: 'ul', // required, but defaults to 'div' if not set
  className: 'container', // optional, you can assign multiple classes to this property like so: 'container homepage'
  id: 'todos', // optional
});

var todosView = new TodosView();
console.log(todosView.el); // logs <ul id="todos" class="container"></ul>
上面的代码创建下面的DOM元素,但不会添加到DOM中。
<ul id="todos" class="container"></ul>如果这个元素已经存在页面中,你可以把el设为匹配该元素的CSS选择器。
el: '#footer'当创建view时el设置为一个存在的元素:
var todosView = new TodosView({el: $('#footer')});提示: 当声明View时,options, el, tagName, id和className都可以定义成函数,如果你期望它们在运行时返回特定的值。
el和()
View的逻辑通常要在el和它嵌套的元素上调用jQuery和Zepto的函数。Backbone通过定义的$el属性和$()函数可以很容易的做到这点。view.$el属性等同于$(view.el) ,view.$(selector)等同于$(view.el).find(selector)。TodosView例子的render方法就看到this.$el用于设置元素的HTML,this.$()用于查找具有’edit’class名称的子元素。
setElement
如果你想把一个已有的Backbone view应用到一个不同的DOM元素上,可以使用setElement覆盖this.el需要改变DOM的引用,重新绑定事件到新的元素(并且从老的元素上解除事件绑定)。
setElement 会为你创建缓存的$el引用, 把事件委托从老的元素上转移到新的元素上。
// We create two DOM elements representing buttons
// which could easily be containers or something else
var button1 = $('<button></button>');
var button2 = $('<button></button>');

// Define a new view
var View = Backbone.View.extend({
      events: {
        click: function(e) {
          console.log(view.el === e.target);
        }
      }
    });

// Create a new instance of the view, applying it
// to button1
var view = new View({el: button1});

// Apply the view to button2 using setElement
view.setElement(button2);

button1.trigger('click');
button2.trigger('click'); // returns true
“el”属性表示view将会渲染到的其中的标签;要让view最终渲染到页面,需要把它作为一个新元素添加或者追加到一个已有的元素中去。
// 我们也可以像下面这样给setElement提供一行的标签(仅仅为了演示它是可以的):
var view = new Backbone.View;
view.setElement('<p><a><b>test</b></a></p>');
view.$('a b').html(); // 输出"test"
理解 render()
render()是一个可选方法,定义模板的渲染逻辑。在这里示例中我们会用Underscore的micro-templating,但是你要记得,你也可以使用其它的模板框架。示例中将使用下面的HTML标签:
<!doctype html>
<html lang="en">
<head>
  <meta charset="utf-8">
  <title></title>
  <meta name="description" content="">
</head>
<body>
  <div id="todo">
  </div>
  <script type="text/template" id="item-template">
    <div>
      <input id="todo_complete" type="checkbox" <%= completed ? 'checked="checked"' : '' %>>
      <%= title %>
    </div>
  </script>
  <script src="underscore-min.js"></script>
  <script src="backbone-min.js"></script>
  <script src="jquery-min.js"></script>
  <script src="example.js"></script>
</body>
</html>Underscore的_.template方法把JavaScript模板编译成方法, 在渲染的时候执行。在上面这个view中,通过ID item-template获取模板标记,传给_.template()去编译,并且当view创建时保存在todoTpl属性上。
render()方法中,toJSON()方法把model的属性进行编码,然后传给模板。模板返回使用model的title,completed数据对表达式进行计算之后的结果标签。然后把结果设为el($el访问)元素HTML内容。
转眼间!在短短几行代码之内,填充模板,给你一个完成数据填充的标签集合。
Backbone通用的惯例是在render()末尾返回this。这有很多好处:
后面我们会尝试实现它。一个最简单的没有使用ItemView的ListView,其render方法可以这样:
var ListView = Backbone.View.extend({
  render: function(){
    this.$el.html(this.model.toJSON());
  }
});
已足够简单了。现在,假定我们要使用ItemView来构建真个items,加强list行为。ItemView可以像下面这样:
var ItemView = Backbone.View.extend({
  events: {},
  render: function(){
    this.$el.html(this.model.toJSON());
    return this;
  }
});注意render末尾return this;的用处。这中普通的模式可以让我们把它作为子view重复使用。我们也可以利用它在呈现之前做预渲染(pre-render)。需要对ListView的render方法做些修改:
var ListView = Backbone.View.extend({
  render: function(){

    // 假定items是model暴露的需要呈现的list
    var items = this.model.get('items');

    // Loop through each our items using the Underscore
    // _.each iterator
    _.each(items, function(item){

      // 创建一个新的ItemView实例,传入指定的model项
      var itemView = new ItemView({ model: item });
      // itemView的DOM元素渲染之后追加到ListView的el中。
      // 这里'return this'可帮助在render之后访问到它的输出("el")
      this.$el.append( itemView.render().el );
    }, this);
  }
});
events hash
Backbone events hash可以允许我们添加事件监听到el——用户自定义的选择器,或者未指定选择器的时直接监听到el。事件以{"事件名称 选择器": "回调函数"}的格式表示,支持大量的DOM事件,包括click, submit, mouseover, dblclick 还有更多。
// A sample view
var TodoView = Backbone.View.extend({
  tagName:  'li',

  // with an events hash containing DOM events
  // specific to an item:
  events: {
    'click .toggle': 'toggleCompleted',
    'dblclick label': 'edit',
    'click .destroy': 'clear',
    'blur .edit': 'close'
},不是特别明显的是,Backbone用jQuery的.delegate()来提供事件代理的支持,但有些改进,this始终指向当前的view对象。需要记住的是,events属性中指定的回调函数名称必须在view范围内有一个对应函数。
需要声明的是,委托jQuery事件意味着你不需要担心特定的元素是否已经渲染到DOM。通常使用jQuery绑定事件时你需要担心元素是否一直存在DOM中。
TodoView示例中,edit回调当用户双击el元素内的label元素时触发,updateOnEnter在每个’edit’类元素keypress时调用,close在’edit’类元素失去焦点时执行。每个回调函数内都可以使用this来引用TodoView对象。
你也可以自己使用_.bind(this.viewEvent, this)来绑定方法,实际上跟在events key-value对立面做的是一样的。下面使用_.bind当model change的时候重新渲染view。
var TodoView = Backbone.View.extend({
  initialize: function() {
    this.model.bind('change', _.bind(this.render, this));
  }
});_.bind一次只能指定一个方法,但是支持返回作为绑定函数,意思是说可以在匿名函数上使用_.bind。
Collections是Models的集合,通过扩展自Backbone.Collection来创建。
Normally, when creating a collection you’ll also want to define a property specifying the type of model that your collection will contain, along with any instance properties required.
In the following example, we create a TodoCollection that will contain our Todo models:
var Todo = Backbone.Model.extend({
  defaults: {
    title: '',
    completed: false
  }
});

var TodosCollection = Backbone.Collection.extend({
  model: Todo
});

var myTodo = new Todo({title:'Read the whole book', id: 2});

// pass array of models on collection instantiation
var todos = new TodosCollection([myTodo]);
console.log("Collection size: " + todos.length); // Collection size: 1The preceding example populated the collection using an array of models when it was instantiated. After a collection has been created, models can be added and removed using the add() and remove() methods:
var Todo = Backbone.Model.extend({
  defaults: {
    title: '',
    completed: false
  }
});

var TodosCollection = Backbone.Collection.extend({
  model: Todo,
});

var a = new Todo({ title: 'Go to Jamaica.'}),
    b = new Todo({ title: 'Go to China.'}),
    c = new Todo({ title: 'Go to Disneyland.'});

var todos = new TodosCollection([a,b]);
console.log("Collection size: " + todos.length);
// Logs: Collection size: 2

todos.add(c);
console.log("Collection size: " + todos.length);
// Logs: Collection size: 3

todos.remove([a,b]);
console.log("Collection size: " + todos.length);
// Logs: Collection size: 1

todos.remove(c);
console.log("Collection size: " + todos.length);
// Logs: Collection size: 0
Note that add() and remove() accept both individual models and lists of models.
Also note that when using add() on a collection, passing {merge: true} causes duplicate models to have their attributes merged in to the existing models, instead of being ignored.
var items = new Backbone.Collection;
items.add([{ id : 1, name: "Dog" , age: 3}, { id : 2, name: "cat" , age: 2}]);
items.add([{ id : 1, name: "Bear" }], {merge: true });
items.add([{ id : 2, name: "lion" }]); // merge: false

console.log(JSON.stringify(items.toJSON()));
// [{"id":1,"name":"Bear","age":3},{"id":2,"name":"cat","age":2}]There are a few different ways to retrieve a model from a collection. The most straight-forward is to use Collection.get() which accepts a single id as follows:
var myTodo = new Todo({title:'Read the whole book', id: 2});

// pass array of models on collection instantiation
var todos = new TodosCollection([myTodo]);

var todo2 = todos.get(2);

// Models, as objects, are passed by reference
console.log(todo2 === myTodo); // true
In client-server applications, collections contain models obtained from the server. Anytime you’re exchanging data between the client and a server, you will need a way to uniquely identify models. In Backbone, this is done using the id, cid, and idAttribute properties.
Each model in Backbone has an id, which is a unique identifier that is either an integer or string (e.g., a UUID). Models also have a cid (client id) which is automatically generated by Backbone when the model is created. Either identifier can be used to retrieve a model from a collection.
The main difference between them is that the cid is generated by Backbone; it is helpful when you don’t have a true id - this may be the case if your model has yet to be saved to the server or you aren’t saving it to a database.
The idAttribute is the identifying attribute of the model returned from the server (i.e., the id in your database). This tells Backbone which data field from the server should be used to populate the id property (think of it as a mapper). By default, it assumes id, but this can be customized as needed. For instance, if your server sets a unique attribute on your model named “userId” then you would set idAttribute to “userId” in your model definition.
The value of a model’s idAttribute should be set by the server when the model is saved. After this point you shouldn’t need to set it manually, unless further control is required.
Internally, Backbone.Collection contains an array of models enumerated by their id property, if the model instances happen to have one. When collection.get(id) is called, this array is checked for existence of the model instance with the corresponding id.
// extends the previous example

var todoCid = todos.get(todo2.cid);

// As mentioned in previous example,
// models are passed by reference
console.log(todoCid === myTodo); // trueAs collections represent a group of items, we can listen for add and remove events which occur when models are added to or removed from a collection. Here’s an example:
var TodosCollection = new Backbone.Collection();

TodosCollection.on("add", function(todo) {
  console.log("I should " + todo.get("title") + ". Have I done it before? "  + (todo.get("completed") ? 'Yeah!': 'No.' ));
});

TodosCollection.add([
  { title: 'go to Jamaica', completed: false },
  { title: 'go to China', completed: false },
  { title: 'go to Disneyland', completed: true }
]);

// The above logs:
// I should go to Jamaica. Have I done it before? No.
// I should go to China. Have I done it before? No.
// I should go to Disneyland. Have I done it before? Yeah!
In addition, we’re also able to bind to a change event to listen for changes to any of the models in the collection.
var TodosCollection = new Backbone.Collection();

// log a message if a model in the collection changes
TodosCollection.on("change:title", function(model) {
    console.log("Changed my mind! I should " + model.get('title'));
});

TodosCollection.add([
  { title: 'go to Jamaica.', completed: false, id: 3 },
]);

var myTodo = TodosCollection.get(3);

myTodo.set('title', 'go fishing');
// Logs: Changed my mind! I should go fishing
jQuery-style event maps of the form obj.on({click: action}) can also be used. These can be clearer than needing three separate calls to .on and should align better with the events hash used in Views:
var Todo = Backbone.Model.extend({
  defaults: {
    title: '',
    completed: false
  }
});

var myTodo = new Todo();
myTodo.set({title: 'Buy some cookies', completed: true});

myTodo.on({
   'change:title' : titleChanged,
   'change:completed' : stateChanged
});

function titleChanged(){
  console.log('The title was changed!');
}

function stateChanged(){
  console.log('The state was changed!');
}

myTodo.set({title: 'Get the groceries'});
// The title was changed!
Backbone events also support a once() method, which ensures that a callback only fires one time when a notification arrives.It is similar to Node’s once, or jQuery’s one. This is particularly useful for when you want to say “the next time something happens, do this”.
// Define an object with two counters
var TodoCounter = { counterA: 0, counterB: 0 };
// Mix in Backbone Events
_.extend(TodoCounter, Backbone.Events);

// Increment counterA, triggering an event
var incrA = function(){
  TodoCounter.counterA += 1;
  TodoCounter.trigger('event');
};

// Increment counterB
var incrB = function(){
  TodoCounter.counterB += 1;
};

// Use once rather than having to explicitly unbind
// our event listener
TodoCounter.once('event', incrA);
TodoCounter.once('event', incrB);

// Trigger the event once again
TodoCounter.trigger('event');

// Check out output
console.log(TodoCounter.counterA === 1); // true
console.log(TodoCounter.counterB === 1); // true
counterA and counterB should only have been incremented once.
Rather than adding or removing models individually, you might want to update an entire collection at once. Collection.set() takes an array of models and performs the necessary add, remove, and change operations required to update the collection.
var TodosCollection = new Backbone.Collection();

TodosCollection.add([
    { id: 1, title: 'go to Jamaica.', completed: false },
    { id: 2, title: 'go to China.', completed: false },
    { id: 3, title: 'go to Disneyland.', completed: true }
]);

// we can listen for add/change/remove events
TodosCollection.on("add", function(model) {
  console.log("Added " + model.get('title'));
});

TodosCollection.on("remove", function(model) {
  console.log("Removed " + model.get('title'));
});

TodosCollection.on("change:completed", function(model) {
  console.log("Completed " + model.get('title'));
});

TodosCollection.set([
    { id: 1, title: 'go to Jamaica.', completed: true },
    { id: 2, title: 'go to China.', completed: false },
    { id: 4, title: 'go to Disney World.', completed: false }
]);

// Above logs:
// Removed go to Disneyland.
// Completed go to Jamaica.
// Added go to Disney World.
If you need to simply replace the entire content of the collection then Collection.reset() can be used:
var TodosCollection = new Backbone.Collection();

// we can listen for reset events
TodosCollection.on("reset", function() {
  console.log("Collection reset.");
});

TodosCollection.add([
  { title: 'go to Jamaica.', completed: false },
  { title: 'go to China.', completed: false },
  { title: 'go to Disneyland.', completed: true }
]);

console.log('Collection size: ' + TodosCollection.length); // Collection size: 3

TodosCollection.reset([
  { title: 'go to Cuba.', completed: false }
]);
// Above logs 'Collection reset.'

console.log('Collection size: ' + TodosCollection.length); // Collection size: 1
Another useful tip is to use reset with no arguments to clear out a collection completely. This is handy when dynamically loading a new page of results where you want to blank out the current page of results.
myCollection.reset();Note that using Collection.reset() doesn’t fire any add or remove events. A reset event is fired instead as shown in the previous example. The reason you might want to use this is to perform super-optimized rendering in extreme cases where individual events are too expensive.
Also note that listening to a reset event, the list of previous models is available in options.previousModels, for convenience.
var Todo = new Backbone.Model();
var Todos = new Backbone.Collection([Todo])
.on('reset', function(Todos, options) {
  console.log(options.previousModels);
  console.log([Todo]);
  console.log(options.previousModels[0] === Todo); // true
});
Todos.reset([]);
An update() method is available for Collections (which is also available as an option to fetch) for “smart” updating of sets of models. This method attempts to perform smart updating of a collection using a specified list of models. When a model in this list isn’t present in the collection, it is added. If it is, its attributes will be merged. Models which are present in the collection but not in the list are removed.
var theBeatles = new Collection(['john', 'paul', 'george', 'ringo']);

theBeatles.update(['john', 'paul', 'george', 'pete']);

// Fires a `remove` event for 'ringo', and an `add` event for 'pete'.
// Updates any of john, paul and georges's attributes that may have
// changed over the years.Backbone takes full advantage of its hard dependency on Underscore by making many of its utilities directly available on collections:
forEach: iterate over collections
var Todos = new Backbone.Collection();

Todos.add([
  { title: 'go to Belgium.', completed: false },
  { title: 'go to China.', completed: false },
  { title: 'go to Austria.', completed: true }
]);

// iterate over models in the collection
Todos.forEach(function(model){
  console.log(model.get('title'));
});
// Above logs:
// go to Belgium.
// go to China.
// go to Austria.sortBy(): sort a collection on a specific attribute
// sort collection
var sortedByAlphabet = Todos.sortBy(function (todo) {
    return todo.get("title").toLowerCase();
});

console.log("- Now sorted: ");

sortedByAlphabet.forEach(function(model){
  console.log(model.get('title'));
});
// Above logs:
// go to Austria.
// go to Belgium.
// go to China.map(): iterate through a collection, mapping each value through a transformation function
var count = 1;
console.log(Todos.map(function(model){
  return count++ + ". " + model.get('title');;
}));
// Above logs:
//1. go to Belgium.
//2. go to China.
//3. go to Austria.min()/max(): retrieve item with the min or max value of an attribute
Todos.max(function(model){
  return model.id;
}).id;

Todos.min(function(model){
  return model.id;
}).id;pluck(): extract a specific attribute
var captions = Todos.pluck('caption');
// returns list of captionsfilter(): filter a collection
Filter by an array of model IDs
var Todos = Backbone.Collection.extend({
  model: Todo,
  filterById: function(ids){
    return this.models.filter(
      function(c) {
        return _.contains(ids, c.id);
      })
  }
});indexOf(): return the item at a particular index within a collection
var People = new Backbone.Collection;

People.comparator = function(a, b) {
  return a.get('name') < b.get('name') ? -1 : 1;
};

var tom = new Backbone.Model({name: 'Tom'});
var rob = new Backbone.Model({name: 'Rob'});
var tim = new Backbone.Model({name: 'Tim'});

People.add(tom);
People.add(rob);
People.add(tim);

console.log(People.indexOf(rob) === 0); // true
console.log(People.indexOf(tim) === 1); // true
console.log(People.indexOf(tom) === 2); // trueany(): Confirm if any of the values in a collection pass an iterator truth test
Todos.any(function(model){
  return model.id === 100;
});

// or
Todos.some(function(model){
  return model.id === 100;
});size(): return the size of a collection
Todos.size();

// equivalent to
Todos.length;isEmpty(): determine whether a collection is empty
var isEmpty = Todos.isEmpty();groupBy(): group a collection into groups of like items
var Todos = new Backbone.Collection();

Todos.add([
  { title: 'go to Belgium.', completed: false },
  { title: 'go to China.', completed: false },
  { title: 'go to Austria.', completed: true }
]);

// create groups of completed and incomplete models
var byCompleted = Todos.groupBy('completed');
var completed = new Backbone.Collection(byCompleted[true]);
console.log(completed.pluck('title'));
// logs: ["go to Austria."]
In addition, several of the Underscore operations on objects are available as methods on Models.
pick(): extract a set of attributes from a model
var Todo = Backbone.Model.extend({
  defaults: {
    title: '',
    completed: false
  }
});

var todo = new Todo({title: 'go to Austria.'});
console.log(todo.pick('title'));
// logs {title: "go to Austria"}omit(): extract all attributes from a model except those listed
var todo = new Todo({title: 'go to Austria.'});
console.log(todo.omit('title'));
// logs {completed: false}
keys() and values(): get lists of attribute names and values
var todo = new Todo({title: 'go to Austria.'});
console.log(todo.keys());
// logs: ["title", "completed"]

console.log(todo.values());
//logs: ["go to Austria.", false]pairs(): get list of attributes as [key, value] pairs
var todo = new Todo({title: 'go to Austria.'});
var pairs = todo.pairs();

console.log(pairs[0]);
// logs: ["title", "go to Austria."]
console.log(pairs[1]);
// logs: ["completed", false]invert(): create object in which the values are keys and the attributes are values
var todo = new Todo({title: 'go to Austria.'});
console.log(todo.invert());

// logs: {go to Austria.: "title", false: "completed"}
The complete list of what Underscore can do can be found in its official docs.
Speaking of utility methods, another bit of sugar in Backbone is its support for Underscore’s chain() method. Chaining is a common idiom in object-oriented languages; a chain is a sequence of method calls on the same object that are performed in a single statement. While Backbone makes Underscore’s array manipulation operations available as methods of Collection objects, they cannot be directly chained since they return arrays rather than the original Collection.
Fortunately, the inclusion of Underscore’s chain() method enables you to chain calls to these methods on Collections.
The chain() method returns an object that has all of the Underscore array operations attached as methods which return that object. The chain ends with a call to the value() method which simply returns the resulting array value. In case you haven’t seen it before, the chainable API looks like this:
var collection = new Backbone.Collection([
  { name: 'Tim', age: 5 },
  { name: 'Ida', age: 26 },
  { name: 'Rob', age: 55 }
]);

var filteredNames = collection.chain() // start chain, returns wrapper around collection's models
  .filter(function(item) { return item.get('age') > 10; }) // returns wrapped array excluding Tim
  .map(function(item) { return item.get('name'); }) // returns wrapped array containing remaining names
  .value(); // terminates the chain and returns the resulting array

console.log(filteredNames); // logs: ['Ida', 'Rob']
Some of the Backbone-specific methods do return this, which means they can be chained as well:
var collection = new Backbone.Collection();

collection
    .add({ name: 'John', age: 23 })
    .add({ name: 'Harry', age: 33 })
    .add({ name: 'Steve', age: 41 });

var names = collection.pluck('name');

console.log(names); // logs: ['John', 'Harry', 'Steve']Thus far, all of our example data has been created in the browser. For most single page applications, the models are derived from a data set residing on a server. This is an area in which Backbone dramatically simplifies the code you need to write to perform RESTful synchronization with a server through a simple API on its models and collections.
Fetching models from the server
Collections.fetch() retrieves a set of models from the server in the form of a JSON array by sending an HTTP GET request to the URL specified by the collection’s url property (which may be a function). When this data is received, a set() will be executed to update the collection.
var Todo = Backbone.Model.extend({
  defaults: {
    title: '',
    completed: false
  }
});

var TodosCollection = Backbone.Collection.extend({
  model: Todo,
  url: '/todos'
});

var todos = new TodosCollection();
todos.fetch(); // sends HTTP GET to /todos
Saving models to the server
While Backbone can retrieve an entire collection of models from the server at once, updates to models are performed individually using the model’s save() method. When save() is called on a model that was fetched from the server, it constructs a URL by appending the model’s id to the collection’s URL and sends an HTTP PUT to the server. If the model is a new instance that was created in the browser (i.e., it doesn’t have an id) then an HTTP POST is sent to the collection’s URL. Collections.create() can be used to create a new model, add it to the collection, and send it to the server in a single method call.
var Todo = Backbone.Model.extend({
  defaults: {
    title: '',
    completed: false
  }
});

var TodosCollection = Backbone.Collection.extend({
  model: Todo,
  url: '/todos'
});

var todos = new TodosCollection();
todos.fetch();

var todo2 = todos.get(2);
todo2.set('title', 'go fishing');
todo2.save(); // sends HTTP PUT to /todos/2

todos.create({title: 'Try out code samples'}); // sends HTTP POST to /todos and adds to collection
As mentioned earlier, a model’s validate() method is called automatically by save() and will trigger an invalid event on the model if validation fails.
Deleting models from the server
A model can be removed from the containing collection and the server by calling its destroy() method. Unlike Collection.remove() which only removes a model from a collection, Model.destroy() will also send an HTTP DELETE to the collection’s URL.
var Todo = Backbone.Model.extend({
  defaults: {
    title: '',
    completed: false
  }
});

var TodosCollection = Backbone.Collection.extend({
  model: Todo,
  url: '/todos'
});

var todos = new TodosCollection();
todos.fetch();

var todo2 = todos.get(2);
todo2.destroy(); // sends HTTP DELETE to /todos/2 and removes from collection
Calling destroy on a Model will return false if the model isNew:
var Todo = new Backbone.Model();
console.log(Todo.destroy());
// false
Options
Each RESTful API method accepts a variety of options. Most importantly, all methods accept success and error callbacks which can be used to customize the handling of server responses.
Specifying the {patch: true} option to Model.save() will cause it to use HTTP PATCH to send only the changed attributes (i.e partial updates) to the server instead of the entire model i.e model.save(attrs, {patch: true}):
// Save partial using PATCH
model.clear().set({id: 1, a: 1, b: 2, c: 3, d: 4});
model.save();
model.save({b: 2, d: 4}, {patch: true});
console.log(this.syncArgs.method);
// 'patch'
Similarly, passing the {reset: true} option to Collection.fetch() will result in the collection being updated using reset() rather than set().
See the Backbone.js documentation for full descriptions of the supported options.
Events are a basic inversion of control. Instead of having one function call another by name, the second function is registered as a handler to be called when a specific event occurs.
The part of your application that has to know how to call the other part of your app has been inverted. This is the core thing that makes it possible for your business logic to not have to know about how your user interface works and is the most powerful thing about the Backbone Events system.
Mastering events is one of the quickest ways to become more productive with Backbone, so let’s take a closer look at Backbone’s event model.
Backbone.Events is mixed into the other Backbone “classes”, including:
Note that Backbone.Events is mixed into the Backbone object. Since Backbone is globally visible, it can be used as a simple event bus:
Backbone.on('event', function() {console.log('Handled Backbone event');});
Backbone.trigger('event'); // logs: Handled Backbone eventBackbone.Events can give any object the ability to bind and trigger custom events. We can mix this module into any object easily and there isn’t a requirement for events to be declared before being bound to a callback handler.
Example:
var ourObject = {};

// Mixin
_.extend(ourObject, Backbone.Events);

// Add a custom event
ourObject.on('dance', function(msg){
  console.log('We triggered ' + msg);
});

// Trigger the custom event
ourObject.trigger('dance', 'our event');
If you’re familiar with jQuery custom events or the concept of Publish/Subscribe, Backbone.Events provides a system that is very similar with on being analogous to subscribe and trigger being similar to publish.
on binds a callback function to an object, as we’ve done with dance in the above example. The callback is invoked whenever the event is triggered.
The official Backbone.js documentation recommends namespacing event names using colons if you end up using quite a few of these on your page. e.g.:
var ourObject = {};

// Mixin
_.extend(ourObject, Backbone.Events);

function dancing (msg) { console.log("We started " + msg); }

// Add namespaced custom events
ourObject.on("dance:tap", dancing);
ourObject.on("dance:break", dancing);

// Trigger the custom events
ourObject.trigger("dance:tap", "tap dancing. Yeah!");
ourObject.trigger("dance:break", "break dancing. Yeah!");

// This one triggers nothing as no listener listens for it
ourObject.trigger("dance", "break dancing. Yeah!");
A special all event is made available in case you would like notifications for every event that occurs on the object (e.g., if you would like to screen events in a single location). The all event can be used as follows:
var ourObject = {};

// Mixin
_.extend(ourObject, Backbone.Events);

function dancing (msg) { console.log("We started " + msg); }

ourObject.on("all", function(eventName){
  console.log("The name of the event passed was " + eventName);
});

// This time each event will be caught with a catch 'all' event listener
ourObject.trigger("dance:tap", "tap dancing. Yeah!");
ourObject.trigger("dance:break", "break dancing. Yeah!");
ourObject.trigger("dance", "break dancing. Yeah!");
off removes callback functions that were previously bound to an object. Going back to our Publish/Subscribe comparison, think of it as an unsubscribe for custom events.
To remove the dance event we previously bound to ourObject, we would simply do:
var ourObject = {};

// Mixin
_.extend(ourObject, Backbone.Events);

function dancing (msg) { console.log("We " + msg); }

// Add namespaced custom events
ourObject.on("dance:tap", dancing);
ourObject.on("dance:break", dancing);

// Trigger the custom events. Each will be caught and acted upon.
ourObject.trigger("dance:tap", "started tap dancing. Yeah!");
ourObject.trigger("dance:break", "started break dancing. Yeah!");

// Removes event bound to the object
ourObject.off("dance:tap");

// Trigger the custom events again, but one is logged.
ourObject.trigger("dance:tap", "stopped tap dancing."); // won't be logged as it's not listened for
ourObject.trigger("dance:break", "break dancing. Yeah!");
To remove all callbacks for the event we pass an event name (e.g., move) to the off() method on the object the event is bound to. If we wish to remove a specific callback, we can pass that callback as the second parameter:
var ourObject = {};

// Mixin
_.extend(ourObject, Backbone.Events);

function dancing (msg) { console.log("We are dancing. " + msg); }
function jumping (msg) { console.log("We are jumping. " + msg); }

// Add two listeners to the same event
ourObject.on("move", dancing);
ourObject.on("move", jumping);

// Trigger the events. Both listeners are called.
ourObject.trigger("move", "Yeah!");

// Removes specified listener
ourObject.off("move", dancing);

// Trigger the events again. One listener left.
ourObject.trigger("move", "Yeah, jump, jump!");
Finally, as we have seen in our previous examples, trigger triggers a callback for a specified event (or a space-separated list of events). e.g.:
var ourObject = {};

// Mixin
_.extend(ourObject, Backbone.Events);

function doAction (msg) { console.log("We are " + msg); }

// Add event listeners
ourObject.on("dance", doAction);
ourObject.on("jump", doAction);
ourObject.on("skip", doAction);

// Single event
ourObject.trigger("dance", 'just dancing.');

// Multiple events
ourObject.trigger("dance jump skip", 'very tired from so much action.');
trigger can pass multiple arguments to the callback function:
var ourObject = {};

// Mixin
_.extend(ourObject, Backbone.Events);

function doAction (action, duration) {
  console.log("We are " + action + ' for ' + duration );
}

// Add event listeners
ourObject.on("dance", doAction);
ourObject.on("jump", doAction);
ourObject.on("skip", doAction);

// Passing multiple arguments to single event
ourObject.trigger("dance", 'dancing', "5 minutes");

// Passing multiple arguments to multiple events
ourObject.trigger("dance jump skip", 'on fire', "15 minutes");While on() and off() add callbacks directly to an observed object, listenTo() tells an object to listen for events on another object, allowing the listener to keep track of the events for which it is listening. stopListening() can subsequently be called on the listener to tell it to stop listening for events:
var a = _.extend({}, Backbone.Events);
var b = _.extend({}, Backbone.Events);
var c = _.extend({}, Backbone.Events);

// add listeners to A for events on B and C
a.listenTo(b, 'anything', function(event){ console.log("anything happened"); });
a.listenTo(c, 'everything', function(event){ console.log("everything happened"); });

// trigger an event
b.trigger('anything'); // logs: anything happened

// stop listening
a.stopListening();

// A does not receive these events
b.trigger('anything');
c.trigger('everything');
stopListening() can also be used to selectively stop listening based on the event, model, or callback handler.
If you use on and off and remove views and their corresponding models at the same time, there are generally no problems. But a problem arises when you remove a view that had registered to be notified about events on a model, but you don’t remove the model or call off to remove the view’s event handler. Since the model has a reference to the view’s callback function, the JavaScript garbage collector cannot remove the view from memory. This is called a “ghost view” and is a form of memory leak which is common since the models generally tend to outlive the corresponding views during an application’s lifecycle. For details on the topic and a solution, check this excellent article by Derick Bailey.
Practically, every on called on an object also requires an off to be called in order for the garbage collector to do its job. listenTo() changes that, allowing Views to bind to Model notifications and unbind from all of them with just one call - stopListening().
The default implementation of View.remove() makes a call to stopListening(), ensuring that any listeners bound using listenTo() are unbound before the view is destroyed.
var view = new Backbone.View();
var b = _.extend({}, Backbone.Events);

view.listenTo(b, 'all', function(){ console.log(true); });
b.trigger('anything');

view.listenTo(b, 'all', function(){ console.log(false); });
view.remove(); // stopListening() implicitly called
b.trigger('anything');
// logs: trueWithin a View, there are two types of events you can listen for: DOM events and events triggered using the Event API. It is important to understand the differences in how views bind to these events and the context in which their callbacks are invoked.
DOM events can be bound to using the View’s events property or using jQuery.on(). Within callbacks bound using the events property, this refers to the View object; whereas any callbacks bound directly using jQuery will have this set to the handling DOM element by jQuery. All DOM event callbacks are passed an event object by jQuery. See delegateEvents() in the Backbone documentation for additional details.
Event API events are bound as described in this section. If the event is bound using on() on the observed object, a context parameter can be passed as the third argument. If the event is bound using listenTo() then within the callback this refers to the listener. The arguments passed to Event API callbacks depends on the type of event. See the Catalog of Events in the Backbone documentation for details.
The following example illustrates these differences:
<div id="todo">
    <input type='checkbox' />
</div>
var View = Backbone.View.extend({
el: '#todo',
// bind to DOM event using events property
events: {
'click [type="checkbox"]': 'clicked',
},
initialize: function () {
// bind to DOM event using jQuery
this.$el.click(this.jqueryClicked);
// bind to API event
this.on('apiEvent', this.callback);
},
// 'this' is view
clicked: function(event) {
console.log("events handler for " + this.el.outerHTML);
this.trigger('apiEvent', event.type);
},
// 'this' is handling DOM element
jqueryClicked: function(event) {
console.log("jQuery handler for " + this.outerHTML);
},
callback: function(eventType) {
console.log("event type was " + eventType);
}
});
var view = new View();In Backbone, routers provide a way for you to connect URLs (either hash fragments, or real) to parts of your application. Any piece of your application that you want to be bookmarkable, shareable, and back-button-able, needs a URL.
Some examples of routes using the hash mark may be seen below:
http://example.com/#about
http://example.com/#search/seasonal-horns/page2
An application will usually have at least one route mapping a URL route to a function that determines what happens when a user reaches that route. This relationship is defined as follows:
'route' : 'mappedFunction'Let’s define our first router by extending Backbone.Router. For the purposes of this guide, we’re going to continue pretending we’re creating a complex todo application (something like a personal organizer/planner) that requires a complex TodoRouter.
Note the inline comments in the code example below as they continue our lesson on routers.
var TodoRouter = Backbone.Router.extend({
    /* define the route and function maps for this router */
    routes: {
        "about" : "showAbout",
        /* Sample usage: http://example.com/#about */

        "todo/:id" : "getTodo",
        /* This is an example of using a ":param" variable which allows us to match
        any of the components between two URL slashes */
        /* Sample usage: http://example.com/#todo/5 */

        "search/:query" : "searchTodos",
        /* We can also define multiple routes that are bound to the same map function,
        in this case searchTodos(). Note below how we're optionally passing in a
        reference to a page number if one is supplied */
        /* Sample usage: http://example.com/#search/job */

        "search/:query/p:page" : "searchTodos",
        /* As we can see, URLs may contain as many ":param"s as we wish */
        /* Sample usage: http://example.com/#search/job/p1 */

        "todos/:id/download/*documentPath" : "downloadDocument",
        /* This is an example of using a *splat. Splats are able to match any number of
        URL components and can be combined with ":param"s*/
        /* Sample usage: http://example.com/#todos/5/download/files/Meeting_schedule.doc */

        /* If you wish to use splats for anything beyond default routing, it's probably a good
        idea to leave them at the end of a URL otherwise you may need to apply regular
        expression parsing on your fragment */

        "*other"    : "defaultRoute"
        /* This is a default route that also uses a *splat. Consider the
        default route a wildcard for URLs that are either not matched or where
        the user has incorrectly typed in a route path manually */
        /* Sample usage: http://example.com/# <anything> */,

        "optional(/:item)": "optionalItem",
        "named/optional/(y:z)": "namedOptionalItem"
        /* Router URLs also support optional parts via parentheses, without having
           to use a regex.  */
    },

    showAbout: function(){
    },

    getTodo: function(id){
        /*
        Note that the id matched in the above route will be passed to this function
        */
        console.log("You are trying to reach todo " + id);
    },

    searchTodos: function(query, page){
        var page_number = page || 1;
        console.log("Page number: " + page_number + " of the results for todos containing the word: " + query);
    },

    downloadDocument: function(id, path){
    },

    defaultRoute: function(other){
        console.log('Invalid. You attempted to reach:' + other);
    }
});

/* Now that we have a router setup, we need to instantiate it */

var myTodoRouter = new TodoRouter();
Backbone offers an opt-in for HTML5 pushState support via window.history.pushState. This permits you to define routes such as http://backbonejs.org/just/an/example. This will be supported with automatic degradation when a user’s browser doesn’t support pushState. Note that it is vastly preferred if you’re capable of also supporting pushState on the server side, although it is a little more difficult to implement.
Is there a limit to the number of routers I should be using?
Andrew de Andrade has pointed out that DocumentCloud, the creators of Backbone, usually only use a single router in most of their applications. You’re very likely to not require more than one or two routers in your own projects; the majority of your application routing can be kept organized in a single router without it getting unwieldy.
Next, we need to initialize Backbone.history as it handles hashchange events in our application. This will automatically handle routes that have been defined and trigger callbacks when they’ve been accessed.
The Backbone.history.start() method will simply tell Backbone that it’s okay to begin monitoring all hashchange events as follows:
var TodoRouter = Backbone.Router.extend({
  /* define the route and function maps for this router */
  routes: {
    "about" : "showAbout",
    "search/:query" : "searchTodos",
    "search/:query/p:page" : "searchTodos"
  },

  showAbout: function(){},

  searchTodos: function(query, page){
    var page_number = page || 1;
    console.log("Page number: " + page_number + " of the results for todos containing the word: " + query);
  }
});

var myTodoRouter = new TodoRouter();

Backbone.history.start();

// Go to and check console:
// http://localhost/#search/job/p3   logs: Page number: 3 of the results for todos containing the word: job
// http://localhost/#search/job      logs: Page number: 1 of the results for todos containing the word: job
// etc.
Note: To run the last example, you’ll need to create a local development environment and test project, which we will cover later on in the book.
If you would like to update the URL to reflect the application state at a particular point, you can use the router’s .navigate() method. By default, it simply updates your URL fragment without triggering the hashchange event:
// Let's imagine we would like a specific fragment (edit) once a user opens a single todo
var TodoRouter = Backbone.Router.extend({
  routes: {
    "todo/:id": "viewTodo",
    "todo/:id/edit": "editTodo"
    // ... other routes
  },

  viewTodo: function(id){
    console.log("View todo requested.");
    this.navigate("todo/" + id + '/edit'); // updates the fragment for us, but doesn't trigger the route
  },

  editTodo: function(id) {
    console.log("Edit todo opened.");
  }
});

var myTodoRouter = new TodoRouter();

Backbone.history.start();

// Go to: http://localhost/#todo/4
//
// URL is updated to: http://localhost/#todo/4/edit
// but editTodo() function is not invoked even though location we end up is mapped to it.
//
// logs: View todo requested.
It is also possible for Router.navigate() to trigger the route along with updating the URL fragment by passing the trigger:true option.
Note: This usage is discouraged. The recommended usage is the one described above which creates a bookmarkable URL when your application transitions to a specific state.
var TodoRouter = Backbone.Router.extend({
  routes: {
    "todo/:id": "viewTodo",
    "todo/:id/edit": "editTodo"
    // ... other routes
  },

  viewTodo: function(id){
    console.log("View todo requested.");
    this.navigate("todo/" + id + '/edit', {trigger: true}); // updates the fragment and triggers the route as well
  },

  editTodo: function(id) {
    console.log("Edit todo opened.");
  }
});

var myTodoRouter = new TodoRouter();

Backbone.history.start();

// Go to: http://localhost/#todo/4
//
// URL is updated to: http://localhost/#todo/4/edit
// and this time editTodo() function is invoked.
//
// logs:
// View todo requested.
// Edit todo opened.
A “route” event is also triggered on the router in addition to being fired on Backbone.history.
Backbone.history.on('route', onRoute);

// Trigger 'route' event on router instance."
router.on('route', function(name, args) {
  console.log(name === 'routeEvent');
});

location.replace('http://example.com#route-event/x');
Backbone.history.checkUrl();We previously discussed how Backbone supports RESTful persistence via its fetch() and create() methods on Collections and save(), and delete() methods on Models. Now we are going to take a closer look at Backbone’s sync method which underlies these operations.
The Backbone.sync method is an integral part of Backbone.js. It assumes a jQuery-like $.ajax() method, so HTTP parameters are organized based on jQuery’s API. Since some legacy servers may not support JSON-formatted requests and HTTP PUT and DELETE operations, Backbone can be configured to emulate these capabilities using the two configuration variables shown below with their default values:
Backbone.emulateHTTP = false; // set to true if server cannot handle HTTP PUT or HTTP DELETE
Backbone.emulateJSON = false; // set to true if server cannot handle application/json requests
The inline Backbone.emulateHTTP option should be set to true if extended HTTP methods are not supported by the server. The Backbone.emulateJSON option should be set to true if the server does not understand the MIME type for JSON.
// Create a new library collection
var Library = Backbone.Collection.extend({
    url : function() { return '/library'; }
});

// Define attributes for our model
var attrs = {
    title  : "The Tempest",
    author : "Bill Shakespeare",
    length : 123
};

// Create a new Library instance
var library = new Library;

// Create a new instance of a model within our collection
library.create(attrs, {wait: false});

// Update with just emulateHTTP
library.first().save({id: '2-the-tempest', author: 'Tim Shakespeare'}, {
  emulateHTTP: true
});

// Check the ajaxSettings being used for our request
console.log(this.ajaxSettings.url === '/library/2-the-tempest'); // true
console.log(this.ajaxSettings.type === 'POST'); // true
console.log(this.ajaxSettings.contentType === 'application/json'); // true

// Parse the data for the request to confirm it is as expected
var data = JSON.parse(this.ajaxSettings.data);
console.log(data.id === '2-the-tempest');  // true
console.log(data.author === 'Tim Shakespeare'); // true
console.log(data.length === 123); // true
Similarly, we could just update using emulateJSON:
library.first().save({id: '2-the-tempest', author: 'Tim Shakespeare'}, {
  emulateJSON: true
});

console.log(this.ajaxSettings.url === '/library/2-the-tempest'); // true
console.log(this.ajaxSettings.type === 'PUT'); // true
console.log(this.ajaxSettings.contentType ==='application/x-www-form-urlencoded'); // true

var data = JSON.parse(this.ajaxSettings.data.model);
console.log(data.id === '2-the-tempest');
console.log(data.author ==='Tim Shakespeare');
console.log(data.length === 123);
Backbone.sync is called every time Backbone tries to read, save, or delete models. It uses jQuery or Zepto’s $.ajax() implementations to make these RESTful requests, however this can be overridden as per your needs.
Overriding Backbone.sync
The sync function may be overridden globally as Backbone.sync, or at a finer-grained level, by adding a sync function to a Backbone collection or to an individual model.
Since all persistence is handled by the Backbone.sync function, an alternative persistence layer can be used by simply overriding Backbone.sync with a function that has the same signature:
Backbone.sync = function(method, model, options) {
};
The methodMap below is used by the standard sync implementation to map the method parameter to an HTTP operation and illustrates the type of action required by each method argument:
var methodMap = {
  'create': 'POST',
  'update': 'PUT',
  'patch':  'PATCH',
  'delete': 'DELETE',
  'read':   'GET'
};
If we wanted to replace the standard sync implementation with one that simply logged the calls to sync, we could do this:
var id_counter = 1;
Backbone.sync = function(method, model) {
  console.log("I've been passed " + method + " with " + JSON.stringify(model));
  if(method === 'create'){ model.set('id', id_counter++); }
};
Note that we assign a unique id to any created models.
The Backbone.sync method is intended to be overridden to support other persistence backends. The built-in method is tailored to a certain breed of RESTful JSON APIs - Backbone was originally extracted from a Ruby on Rails application, which uses HTTP methods like PUT in the same way.
The sync method is called with three parameters:
Implementing a new sync method can use the following pattern:
Backbone.sync = function(method, model, options) {

  function success(result) {
    // Handle successful results from MyAPI
    if (options.success) {
      options.success(result);
    }
  }

  function error(result) {
    // Handle error results from MyAPI
    if (options.error) {
      options.error(result);
    }
  }

  options || (options = {});

  switch (method) {
    case 'create':
      return MyAPI.create(model, success, error);

    case 'update':
      return MyAPI.update(model, success, error);

    case 'patch':
      return MyAPI.patch(model, success, error);

    case 'delete':
      return MyAPI.destroy(model, success, error);

    case 'read':
      if (model.attributes[model.idAttribute]) {
        return MyAPI.find(model, success, error);
      } else {
        return MyAPI.findAll(model, success, error);
      }
  }
};
This pattern delegates API calls to a new object (MyAPI), which could be a Backbone-style class that supports events. This can be safely tested separately, and potentially used with libraries other than Backbone.
There are quite a few sync implementations out there. The following examples are all available on GitHub:
The official Backbone.js documentation states:
Backbone’s only hard dependency is either Underscore.js ( >= 1.4.3) or Lo-Dash. For RESTful persistence, history support via Backbone.Router and DOM manipulation with Backbone.View, include json2.js, and either jQuery ( >= 1.7.0) or Zepto.
What this translates to is that if you require working with anything beyond models, you will need to include a DOM manipulation library such as jQuery or Zepto. Underscore is primarily used for its utility methods (which Backbone relies upon heavily) and json2.js for legacy browser JSON support if Backbone.sync is used.
In this chapter we have introduced you to the components you will be using to build applications with Backbone: Models, Views, Collections, and Routers. We’ve also explored the Events mix-in that Backbone uses to enhance all components with publish-subscribe capabilities and seen how it can be used with arbitrary objects. Finally, we saw how Backbone leverages the Underscore.js and jQuery/Zepto APIs to add rich manipulation and persistence features to Backbone Collections and Models.
Backbone has many operations and options beyond those we have covered here and is always evolving, so be sure to visit the official documentation for more details and the latest features. In the next chapter you will start to get your hands dirty as we walk you through implementation of your first Backbone application.
现在我们已经学完基本概念,让我们开始写第一个Backbone.js应用。我们将开发一个Backbone Todo List应用,在TodoMVC.com可以看到。这是应用非常简单,技术上包含绑定(binding),解析model数据,路由(routing)和模板渲染,可以借此机会说明下Backbone的一些核心特性。
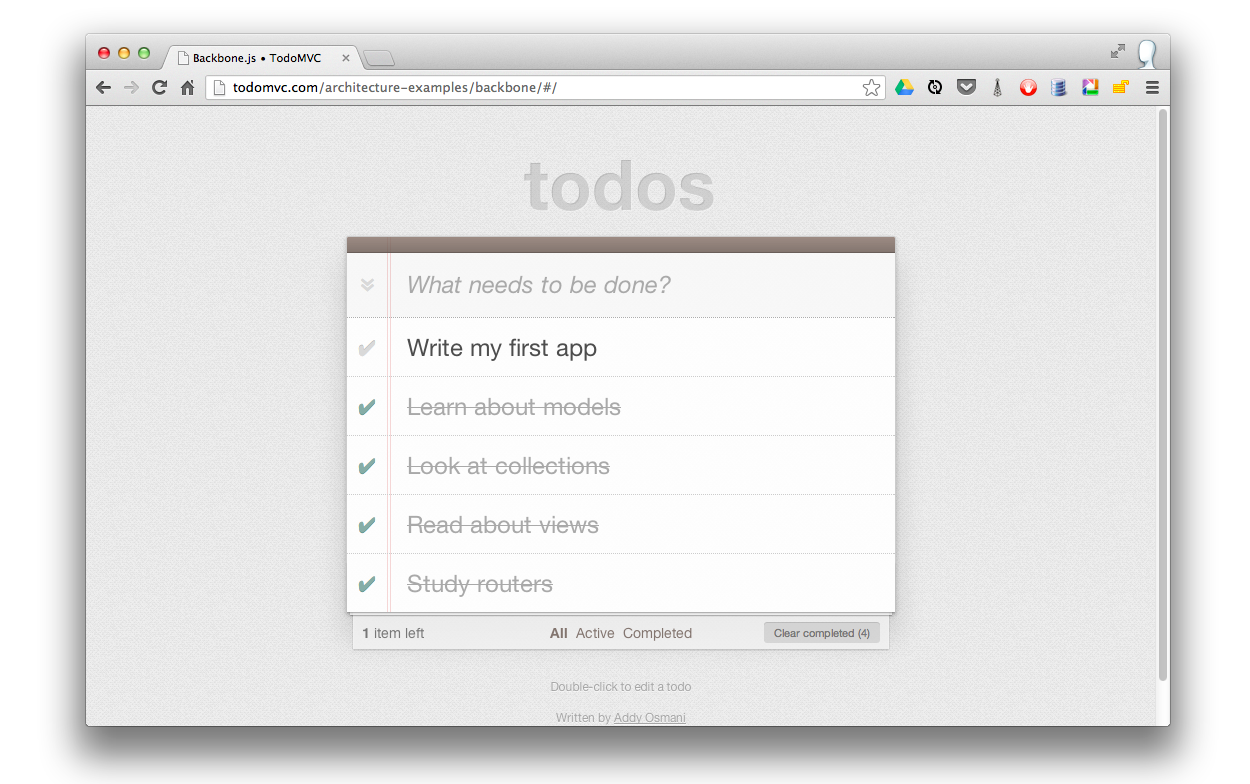
我们先站在一个较高的架构角度想想我们需要些什么东西。
Todo model来描述todo项实体TodoList collection对todos的持久化保存基本上是经典的CRUD方法。让我们开始吧!
We’ll place all of our HTML in a single file named index.html.
First, we’ll set up the header and the basic application dependencies: jQuery, Underscore, Backbone.js and the Backbone LocalStorage adapter.
<!doctype html>
<html lang="en">
<head>
  <meta charset="utf-8">
  <meta http-equiv="X-UA-Compatible" content="IE=edge,chrome=1">
  <title>Backbone.js • TodoMVC</title>
  <link rel="stylesheet" href="assets/base.css">
</head>
<body>
  <script type="text/template" id="item-template"></script>
  <script type="text/template" id="stats-template"></script>
  <script src="js/lib/jquery.min.js"></script>
  <script src="js/lib/underscore-min.js"></script>
  <script src="js/lib/backbone-min.js"></script>
  <script src="js/lib/backbone.localStorage.js"></script>
  <script src="js/models/todo.js"></script>
  <script src="js/collections/todos.js"></script>
  <script src="js/views/todos.js"></script>
  <script src="js/views/app.js"></script>
  <script src="js/routers/router.js"></script>
  <script src="js/app.js"></script>
</body>
</html>
In addition to the aforementioned dependencies, note that a few other application-specific files are also loaded. These are organized into folders representing their application responsibilities: models, views, collections, and routers. An app.js file is present to house central initialization code.
Note: If you want to follow along, create a directory structure as demonstrated in index.html:
You will also need base.css and bg.png, which should live in an assets directory. And remember that you can see a demo of the final application at TodoMVC.com.
We will be creating the application JavaScript files during the tutorial. Don’t worry about the two ‘text/template’ script elements - we will replace those soon!
Now let’s populate the body of index.html. We’ll need an <input> for creating new todos, a <ul id="todo-list" /> for listing the actual todos, and a footer where we can later insert statistics and links for performing operations such as clearing completed todos. We’ll add the following markup immediately inside our body tag before the script elements:
  <section id="todoapp">
    <header id="header">
      <h1>todos</h1>
      <input id="new-todo" placeholder="What needs to be done?" autofocus>
    </header>
    <section id="main">
      <input id="toggle-all" type="checkbox">
      <label for="toggle-all">Mark all as complete</label>
      <ul id="todo-list"></ul>
    </section>
    <footer id="footer"></footer>
  </section>
  <div id="info">
    <p>Double-click to edit a todo</p>
    <p>Written by <a href="https://github.com/addyosmani">Addy Osmani</a></p>
    <p>Part of <a href="http://todomvc.com">TodoMVC</a></p>
</div>To complete index.html, we need to add the templates which we will use to dynamically create HTML by injecting model data into their placeholders. One way of including templates in the page is by using custom script tags. These don’t get evaluated by the browser, which just interprets them as plain text. Underscore micro-templating can then access the templates, rendering fragments of HTML.
We’ll start by filling in the #item-template which will be used to display individual todo items.
  <!-- index.html -->

  <script type="text/template" id="item-template">
    <div class="view">
      <input class="toggle" type="checkbox" <%= completed ? 'checked' : '' %>>
      <label><%- title %></label>
      <button class="destroy"></button>
    </div>
    <input class="edit" value="<%- title %>">
  </script>
The template tags in the above markup, such as <%= and <%-, are specific to Underscore.js and are documented on the Underscore site. In your own applications, you have a choice of template libraries, such as Mustache or Handlebars. Use whichever you prefer, Backbone doesn’t mind.
We also need to define the #stats-template template which we will use to populate the footer.
  <!-- index.html -->

  <script type="text/template" id="stats-template">
    <span id="todo-count"><strong><%= remaining %></strong> <%= remaining === 1 ? 'item' : 'items' %> left</span>
    <ul id="filters">
      <li>
        <a class="selected" href="#/">All</a>
      </li>
      <li>
        <a href="#/active">Active</a>
      </li>
      <li>
        <a href="#/completed">Completed</a>
      </li>
    </ul>
    <% if (completed) { %>
    <button id="clear-completed">Clear completed (<%= completed %>)</button>
    <% } %>
  </script>
The #stats-template displays the number of remaining incomplete items and contains a list of hyperlinks which will be used to perform actions when we implement our router. It also contains a button which can be used to clear all of the completed items.
Now that we have all the HTML that we will need, we’ll start implementing our application by returning to the fundamentals: a Todo model.
The Todo model is remarkably straightforward. First, a todo has two attributes: a title stores a todo item’s title and a completed status indicates if it’s complete. These attributes are passed as defaults, as shown below:
  // js/models/todo.js

  var app = app || {};

  // Todo Model
  // ----------
  // Our basic **Todo** model has `title`, `order`, and `completed` attributes.

  app.Todo = Backbone.Model.extend({

    // Default attributes ensure that each todo created has `title` and `completed` keys.
    defaults: {
      title: '',
      completed: false
    },

    // Toggle the `completed` state of this todo item.
    toggle: function() {
      this.save({
        completed: !this.get('completed')
      });
    }

  });
Second, the Todo model has a toggle() method through which a Todo item’s completion status can be set and simultaneously persisted.
Next, a TodoList collection is used to group our models. The collection uses the LocalStorage adapter to override Backbone’s default sync() operation with one that will persist our Todo records to HTML5 Local Storage. Through local storage, they’re saved between page requests.
  // js/collections/todos.js

  var app = app || {};

  // Todo Collection
  // ---------------

  // The collection of todos is backed by *localStorage* instead of a remote
  // server.
  var TodoList = Backbone.Collection.extend({

    // Reference to this collection's model.
    model: app.Todo,

    // Save all of the todo items under the `"todos-backbone"` namespace.
    localStorage: new Backbone.LocalStorage('todos-backbone'),

    // Filter down the list of all todo items that are finished.
    completed: function() {
      return this.filter(function( todo ) {
        return todo.get('completed');
      });
    },

    // Filter down the list to only todo items that are still not finished.
    remaining: function() {
      return this.without.apply( this, this.completed() );
    },

    // We keep the Todos in sequential order, despite being saved by unordered
    // GUID in the database. This generates the next order number for new items.
    nextOrder: function() {
      if ( !this.length ) {
        return 1;
      }
      return this.last().get('order') + 1;
    },

    // Todos are sorted by their original insertion order.
    comparator: function( todo ) {
      return todo.get('order');
    }
  });

  // Create our global collection of **Todos**.
  app.Todos = new TodoList();
The collection’s completed() and remaining() methods return an array of finished and unfinished todos, respectively.
A nextOrder() method implements a sequence generator while a comparator() sorts items by their insertion order.
Note: this.filter, this.without and this.last are Underscore methods that are mixed in to Backbone.Collection so that the reader knows how to find out more about them.
Let’s examine the core application logic which resides in the views. Each view supports functionality such as edit-in-place, and therefore contains a fair amount of logic. To help organize this logic, we’ll use the element controller pattern. The element controller pattern consists of two views: one controls a collection of items while the other deals with each individual item.
In our case, an AppView will handle the creation of new todos and rendering of the initial todo list. Instances of TodoView will be associated with each individual Todo record. Todo instances can handle editing, updating, and destroying their associated todo.
To keep things short and simple, we won’t be implementing all of the application’s features in this tutorial, we’ll just cover enough to get you started. Even so, there is a lot for us to cover in AppView, so we’ll split our discussion into two sections.
  // js/views/app.js

  var app = app || {};

  // The Application
  // ---------------

  // Our overall **AppView** is the top-level piece of UI.
  app.AppView = Backbone.View.extend({

    // Instead of generating a new element, bind to the existing skeleton of
    // the App already present in the HTML.
    el: '#todoapp',

    // Our template for the line of statistics at the bottom of the app.
    statsTemplate: _.template( $('#stats-template').html() ),

    // At initialization we bind to the relevant events on the `Todos`
    // collection, when items are added or changed.
    initialize: function() {
      this.allCheckbox = this.$('#toggle-all')[0];
      this.$input = this.$('#new-todo');
      this.$footer = this.$('#footer');
      this.$main = this.$('#main');

      this.listenTo(app.Todos, 'add', this.addOne);
      this.listenTo(app.Todos, 'reset', this.addAll);
    },

    // Add a single todo item to the list by creating a view for it, and
    // appending its element to the `<ul>`.
    addOne: function( todo ) {
      var view = new app.TodoView({ model: todo });
      $('#todo-list').append( view.render().el );
    },

    // Add all items in the **Todos** collection at once.
    addAll: function() {
      this.$('#todo-list').html('');
      app.Todos.each(this.addOne, this);
    }

  });
A few notable features are present in our initial version of AppView, including a statsTemplate, an initialize method that’s implicitly called on instantiation, and several view-specific methods.
An el (element) property stores a selector targeting the DOM element with an ID of todoapp. In the case of our application, el refers to the matching <section id="todoapp" /> element in index.html.
The call to _.template uses Underscore’s micro-templating to construct a statsTemplate object from our #stats-template. We will use this template later when we render our view.
Now let’s take a look at the initialize function. First, it’s using jQuery to cache the elements it will be using into local properties (recall that this.$() finds elements relative to this.$el). Then it’s binding to two events on the Todos collection: add and reset. Since we’re delegating handling of updates and deletes to the TodoView view, we don’t need to worry about those here. The two pieces of logic are:
When an add event is fired the addOne() method is called and passed the new model. addOne() creates an instance of TodoView view, renders it, and appends the resulting element to our Todo list.
When a reset event occurs (i.e., we update the collection in bulk as happens when the Todos are loaded from Local Storage), addAll() is called, which iterates over all of the Todos currently in our collection and fires addOne() for each item.
Note that we were able to use this within addAll() to refer to the view because listenTo() implicitly set the callback’s context to the view when it created the binding.
Now, let’s add some more logic to complete our AppView!
  // js/views/app.js

  var app = app || {};

  // The Application
  // ---------------

  // Our overall **AppView** is the top-level piece of UI.
  app.AppView = Backbone.View.extend({

    // Instead of generating a new element, bind to the existing skeleton of
    // the App already present in the HTML.
    el: '#todoapp',

    // Our template for the line of statistics at the bottom of the app.
    statsTemplate: _.template( $('#stats-template').html() ),

    // New
    // Delegated events for creating new items, and clearing completed ones.
    events: {
      'keypress #new-todo': 'createOnEnter',
      'click #clear-completed': 'clearCompleted',
      'click #toggle-all': 'toggleAllComplete'
    },

    // At initialization we bind to the relevant events on the `Todos`
    // collection, when items are added or changed. Kick things off by
    // loading any preexisting todos that might be saved in *localStorage*.
    initialize: function() {
      this.allCheckbox = this.$('#toggle-all')[0];
      this.$input = this.$('#new-todo');
      this.$footer = this.$('#footer');
      this.$main = this.$('#main');

      this.listenTo(app.Todos, 'add', this.addOne);
      this.listenTo(app.Todos, 'reset', this.addAll);

      // New
      this.listenTo(app.Todos, 'change:completed', this.filterOne);
      this.listenTo(app.Todos,'filter', this.filterAll);
      this.listenTo(app.Todos, 'all', this.render);

      app.Todos.fetch();
    },

    // New
    // Re-rendering the App just means refreshing the statistics -- the rest
    // of the app doesn't change.
    render: function() {
      var completed = app.Todos.completed().length;
      var remaining = app.Todos.remaining().length;

      if ( app.Todos.length ) {
        this.$main.show();
        this.$footer.show();

        this.$footer.html(this.statsTemplate({
          completed: completed,
          remaining: remaining
        }));

        this.$('#filters li a')
          .removeClass('selected')
          .filter('[href="#/' + ( app.TodoFilter || '' ) + '"]')
          .addClass('selected');
      } else {
        this.$main.hide();
        this.$footer.hide();
      }

      this.allCheckbox.checked = !remaining;
    },

    // Add a single todo item to the list by creating a view for it, and
    // appending its element to the `<ul>`.
    addOne: function( todo ) {
      var view = new app.TodoView({ model: todo });
      $('#todo-list').append( view.render().el );
    },

    // Add all items in the **Todos** collection at once.
    addAll: function() {
      this.$('#todo-list').html('');
      app.Todos.each(this.addOne, this);
    },

    // New
    filterOne : function (todo) {
      todo.trigger('visible');
    },

    // New
    filterAll : function () {
      app.Todos.each(this.filterOne, this);
    },


    // New
    // Generate the attributes for a new Todo item.
    newAttributes: function() {
      return {
        title: this.$input.val().trim(),
        order: app.Todos.nextOrder(),
        completed: false
      };
    },

    // New
    // If you hit return in the main input field, create new Todo model,
    // persisting it to localStorage.
    createOnEnter: function( event ) {
      if ( event.which !== ENTER_KEY || !this.$input.val().trim() ) {
        return;
      }

      app.Todos.create( this.newAttributes() );
      this.$input.val('');
    },

    // New
    // Clear all completed todo items, destroying their models.
    clearCompleted: function() {
      _.invoke(app.Todos.completed(), 'destroy');
      return false;
    },

    // New
    toggleAllComplete: function() {
      var completed = this.allCheckbox.checked;

      app.Todos.each(function( todo ) {
        todo.save({
          'completed': completed
        });
      });
    }
  });
We have added the logic for creating new todos, editing them, and filtering them based on their completed status.
events hash containing declarative callbacks for our DOM events. It binds those events to the following methods:createOnEnter(): Creates a new Todo model and persists it in localStorage when a user hits enter inside the <input/> field. Also resets the main <input/> field value to prepare it for the next entry. The model is populated by newAttributes(), which returns an object literal composed of the title, order, and completed state of the new item. Note that this is referring to the view and not the DOM element since the callback was bound using the events hash.clearCompleted(): Removes the items in the todo list that have been marked as completed when the user clicks the clear-completed checkbox (this checkbox will be in the footer populated by the #stats-template).toggleAllComplete(): Allows a user to mark all of the items in the todo list as completed by clicking the toggle-all checkbox.
initialize(): We’ve bound callbacks to several additional events:filterOne() callback on the Todos collection for a change:completed event. This listens for changes to the completed flag for any model in the collection. The affected todo is passed to the callback which triggers a custom visible event on the model.filterAll() callback for a filter event, which works a little similar to addOne() and addAll(). It’s responsibility is to toggle which todo items are visible based on the filter currently selected in the UI (all, completed or remaining) via calls to filterOne().We’ve used the special all event to bind any event triggered on the Todos collection to the view’s render method (discussed below).
The initialize() method completes by fetching the previously saved todos from localStorage.
render(): Several things are happening in our render() method:app.TodoFilter, which will be set by our router, is being used to apply the class ‘selected’ to the link corresponding to the currently selected filter. This will result in conditional CSS styling being applied to that filter.Now let’s look at the TodoView view. This will be in charge of individual Todo records, making sure the view updates when the todo does. To enable this functionality, we will add event listeners to the view that listen for events on an individual todo’s HTML representation.
  // js/views/todos.js

  var app = app || {};

  // Todo Item View
  // --------------

  // The DOM element for a todo item...
  app.TodoView = Backbone.View.extend({

    //... is a list tag.
    tagName: 'li',

    // Cache the template function for a single item.
    template: _.template( $('#item-template').html() ),

    // The DOM events specific to an item.
    events: {
      'dblclick label': 'edit',
      'keypress .edit': 'updateOnEnter',
      'blur .edit': 'close'
    },

    // The TodoView listens for changes to its model, re-rendering. Since there's
    // a one-to-one correspondence between a **Todo** and a **TodoView** in this
    // app, we set a direct reference on the model for convenience.
    initialize: function() {
      this.listenTo(this.model, 'change', this.render);
    },

    // Re-renders the titles of the todo item.
    render: function() {
      this.$el.html( this.template( this.model.toJSON() ) );
      this.$input = this.$('.edit');
      return this;
    },

    // Switch this view into `"editing"` mode, displaying the input field.
    edit: function() {
      this.$el.addClass('editing');
      this.$input.focus();
    },

    // Close the `"editing"` mode, saving changes to the todo.
    close: function() {
      var value = this.$input.val().trim();

      if ( value ) {
        this.model.save({ title: value });
      }

      this.$el.removeClass('editing');
    },

    // If you hit `enter`, we're through editing the item.
    updateOnEnter: function( e ) {
      if ( e.which === ENTER_KEY ) {
        this.close();
      }
    }
  });
In the initialize() constructor, we set up a listener that monitors a todo model’s change event. As a result, when the todo gets updated, the application will re-render the view and visually reflect its changes. Note that the model passed in the arguments hash by our AppView is automatically available to us as this.model.
In the render() method, we render our Underscore.js #item-template, which was previously compiled into this.template using Underscore’s _.template() method. This returns an HTML fragment that replaces the content of the view’s element (an li element was implicitly created for us based on the tagName property). In other words, the rendered template is now present under this.el and can be appended to the todo list in the user interface. render() finishes by caching the input element within the instantiated template into this.input.
Our events hash includes three callbacks:
edit(): changes the current view into editing mode when a user double-clicks on an existing item in the todo list. This allows them to change the existing value of the item’s title attribute.updateOnEnter(): checks that the user has hit the return/enter key and executes the close() function.close(): trims the value of the current text in our <input/> field, ensuring that we don’t process it further if it does not contain any text (e.g ‘’). If a valid value has been provided, we save the changes to the current todo model and close editing mode by removing the corresponding CSS class.So now we have two views: AppView and TodoView. The former needs to be instantiated on page load so its code gets executed. This can be accomplished through jQuery’s ready() utility, which will execute a function when the DOM is loaded.
  // js/app.js

  var app = app || {};
  var ENTER_KEY = 13;

  $(function() {

    // Kick things off by creating the **App**.
    new app.AppView();

});Let’s pause and ensure that the work we’ve done so far functions as intended.
If you are following along, open file://*path*/index.html in your browser and monitor its console. If all is well, you shouldn’t see any JavaScript errors other than regarding the router.js file that we haven’t created yet. The todo list should be blank as we haven’t yet created any todos. Plus, there is some additional work we’ll need to do before the user interface fully functions.
However, a few things can be tested through the JavaScript console.
In the console, add a new todo item: window.app.Todos.create({ title: 'My first Todo item'}); and hit return.

If all is functioning properly, this should log the new todo we’ve just added to the todos collection. The newly created todo is also saved to Local Storage and will be available on page refresh.
window.app.Todos.create() executes a collection method (Collection.create(attributes, [options])) which instantiates a new model item of the type passed into the collection definition, in our case app.Todo:
  // from our js/collections/todos.js

  var TodoList = Backbone.Collection.extend({

      model: app.Todo // the model type used by collection.create() to instantiate new model in the collection
      ...
  )};
Run the following in the console to check it out:
var secondTodo = window.app.Todos.create({ title: 'My second Todo item'});
secondTodo instanceof app.Todo // returns true
Now refresh the page and we should be able to see the fruits of our labour.
The todos added through the console should still appear in the list since they are populated from the Local Storage. Also, we should be able to create a new todo by typing a title and pressing enter.
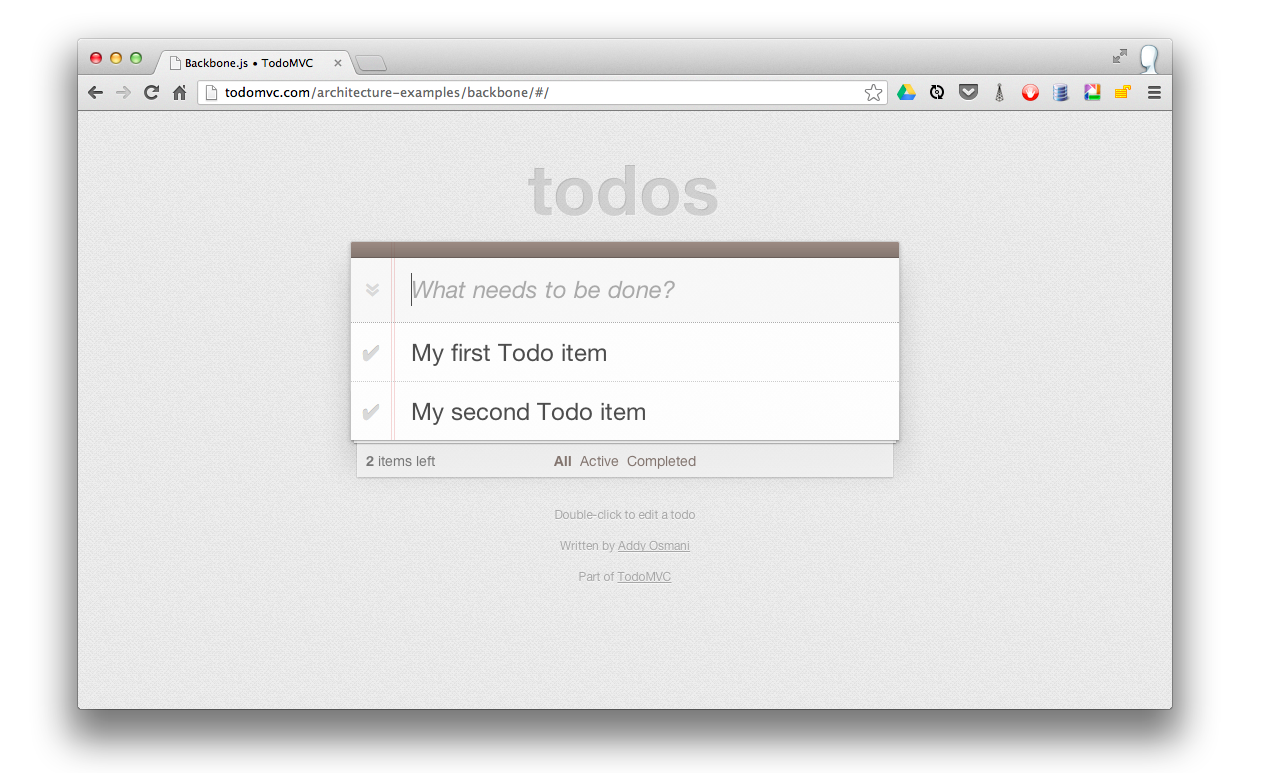
Excellent, we’re making great progress, but what about completing and deleting todos?
The next part of our tutorial is going to cover completing and deleting todos. These two actions are specific to each Todo item, so we need to add this functionality to the TodoView view. We will do so by adding togglecompleted() and clear() methods along with corresponding entries in the events hash.
  // js/views/todos.js

  var app = app || {};

  // Todo Item View
  // --------------

  // The DOM element for a todo item...
  app.TodoView = Backbone.View.extend({

    //... is a list tag.
    tagName: 'li',

    // Cache the template function for a single item.
    template: _.template( $('#item-template').html() ),

    // The DOM events specific to an item.
    events: {
      'click .toggle': 'togglecompleted', // NEW
      'dblclick label': 'edit',
      'click .destroy': 'clear',           // NEW
      'keypress .edit': 'updateOnEnter',
      'blur .edit': 'close'
    },

    // The TodoView listens for changes to its model, re-rendering. Since there's
    // a one-to-one correspondence between a **Todo** and a **TodoView** in this
    // app, we set a direct reference on the model for convenience.
    initialize: function() {
      this.listenTo(this.model, 'change', this.render);
      this.listenTo(this.model, 'destroy', this.remove);        // NEW
      this.listenTo(this.model, 'visible', this.toggleVisible); // NEW
    },

    // Re-render the titles of the todo item.
    render: function() {
      this.$el.html( this.template( this.model.toJSON() ) );

      this.$el.toggleClass( 'completed', this.model.get('completed') ); // NEW
      this.toggleVisible();                                             // NEW

      this.$input = this.$('.edit');
      return this;
    },

    // NEW - Toggles visibility of item
    toggleVisible : function () {
      this.$el.toggleClass( 'hidden',  this.isHidden());
    },

    // NEW - Determines if item should be hidden
    isHidden : function () {
      var isCompleted = this.model.get('completed');
      return ( // hidden cases only
        (!isCompleted && app.TodoFilter === 'completed')
        || (isCompleted && app.TodoFilter === 'active')
      );
    },

    // NEW - Toggle the `"completed"` state of the model.
    togglecompleted: function() {
      this.model.toggle();
    },

    // Switch this view into `"editing"` mode, displaying the input field.
    edit: function() {
      this.$el.addClass('editing');
      this.$input.focus();
    },

    // Close the `"editing"` mode, saving changes to the todo.
    close: function() {
      var value = this.$input.val().trim();

      if ( value ) {
        this.model.save({ title: value });
      } else {
        this.clear(); // NEW
      }

      this.$el.removeClass('editing');
    },

    // If you hit `enter`, we're through editing the item.
    updateOnEnter: function( e ) {
      if ( e.which === ENTER_KEY ) {
        this.close();
      }
    },

    // NEW - Remove the item, destroy the model from *localStorage* and delete its view.
    clear: function() {
      this.model.destroy();
    }
  });
The key part of this is the two event handlers we’ve added, a togglecompleted event on the todo’s checkbox, and a click event on the todo’s <button class="destroy" /> button.
Let’s look at the events that occur when we click the checkbox for a todo item:
togglecompleted() function is invoked which calls toggle() on the todo model.toggle() toggles the completed status of the todo and calls save() on the model.change event on the model which is bound to our TodoView’s render() method. We’ve added a statement in render() which toggles the completed class on the element depending on the model’s completed state. The associated CSS changes the color of the title text and strikes a line through it when the todo is completed.change:completed event on the model which is handled by the AppView’s filterOne() method. If we look back at the AppView, we see that filterOne() will trigger a visible event on the model. This is used in conjunction with the filtering in our routes and collections so that we only display an item if its completed state falls in line with the current filter. In our update to the TodoView, we bound the model’s visible event to the toggleVisible() method. This method uses the new isHidden() method to determine if the todo should be visible and updates it accordingly.Now let’s look at what happens when we click on a todo’s destroy button:
clear() method is invoked which calls destroy() on the todo model.destroy event is triggered.destroy event to the view’s inherited remove() method. This method deletes the view and automatically removes the associated element from the DOM. Since we used listenTo() to bind the view’s listeners to its model, remove() also unbinds the listening callbacks from the model ensuring that a memory leak does not occur.destroy() also removes the model from the Todos collection, which triggers a remove event on the collection.render() method bound to all events on the Todos collection, that view is rendered and the stats in the footer are updated.That’s all there is to it!
If you want to see an example of those, see the complete source.
Finally, we move on to routing, which will allow us to easily filter the list of items that are active as well as those which have been completed. We’ll be supporting the following routes:
#/ (all - default)
#/active
#/completed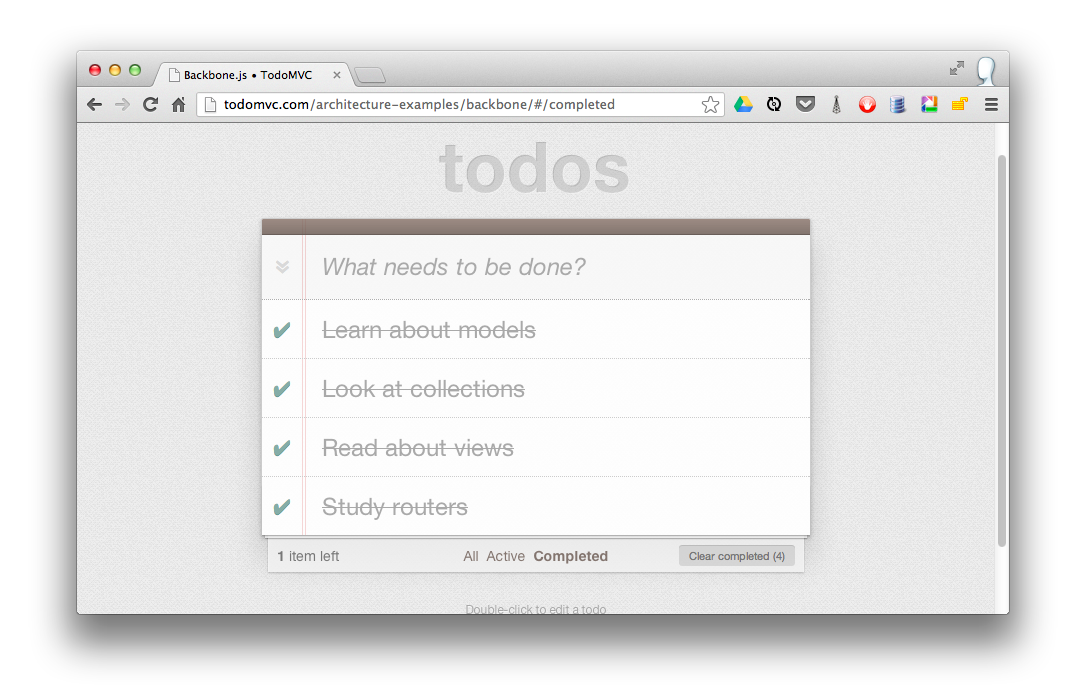
When the route changes, the todo list will be filtered on a model level and the selected class on the filter links in the footer will be toggled as described above. When an item is updated while a filter is active it will be updated accordingly (e.g., if the filter is active and the item is checked, it will be hidden). The active filter is persisted on reload.
  // js/routers/router.js

  // Todo Router
  // ----------

  var Workspace = Backbone.Router.extend({
    routes:{
      '*filter': 'setFilter'
    },

    setFilter: function( param ) {
      // Set the current filter to be used
      if (param) {
        param = param.trim();
      }
      app.TodoFilter = param || '';

      // Trigger a collection filter event, causing hiding/unhiding
      // of Todo view items
      app.Todos.trigger('filter');
    }
  });

  app.TodoRouter = new Workspace();
  Backbone.history.start();
Our router uses a *splat to set up a default route which passes the string after ‘#/’ in the URL to setFilter() which sets window.app.TodoFilter to that string.
As we can see in the line window.app.Todos.trigger('filter'), once the filter has been set, we simply trigger ‘filter’ on our Todos collection to toggle which items are visible and which are hidden. Recall that our AppView’s filterAll() method is bound to the collection’s filter event and that any event on the collection will cause the AppView to re-render.
Finally, we create an instance of our router and call Backbone.history.start() to route the initial URL during page load.
We’ve now built our first complete Backbone.js application. The latest version of the full app can be viewed online at any time and the sources are readily available via TodoMVC.
Later on in the book, we’ll learn how to further modularize this application using RequireJS, swap out our persistence layer to a database back-end, and finally unit test the application with a few different testing frameworks.
While our first application gave us a good taste of how Backbone.js applications are made, most real-world applications will want to communicate with a back-end of some sort. Let’s reinforce what we have already learned with another example, but this time we will also create a RESTful API for our application to talk to.
In this exercise we will build a library application for managing digital books using Backbone. For each book we will store the title, author, date of release, and some keywords. We’ll also show a picture of the cover.
First we need to create a folder structure for our project. To keep the front-end and back-end separate, we will create a folder called site for our client in the project root. Within it we will create css, img, and js directories.
As with the last example we will split our JavaScript files by their function, so under the js directory create folders named lib, models, collections, and views. Your directory hierarchy should look like this:
site/
    css/
    img/
    js/
        collections/
        lib/
        models/
        views/
Download the Backbone, Underscore, and jQuery libraries and copy them to your js/lib folder. We need a placeholder image for the book covers. Save this image to your site/img folder:
Just like before we need to load all of our dependencies in the site/index.html file:
<!DOCTYPE html>
<html lang="en">
    <head>
        <meta charset="UTF-8"/>
        <title>Backbone.js Library</title>
        <link rel="stylesheet" href="css/screen.css">
    </head>
    <body>
        <script src="js/lib/jquery.min.js"></script>
        <script src="js/lib/underscore-min.js"></script>
        <script src="js/lib/backbone-min.js"></script>
        <script src="js/models/book.js"></script>
        <script src="js/collections/library.js"></script>
        <script src="js/views/book.js"></script>
        <script src="js/views/library.js"></script>
        <script src="js/app.js"></script>
    </body>
</html>
We should also add in the HTML for the user interface. We’ll want a form for adding a new book so add the following immediately inside the body element:
<div id="books">
    <form id="addBook" action="#">
        <div>
            <label for="coverImage">CoverImage: </label><input id="coverImage" type="file" />
            <label for="title">Title: </label><input id="title" type="text" />
            <label for="author">Author: </label><input id="author" type="text" />
            <label for="releaseDate">Release date: </label><input id="releaseDate" type="text" />
            <label for="keywords">Keywords: </label><input id="keywords" type="text" />
            <button id="add">Add</button>
        </div>
    </form>
</div>
and we’ll need a template for displaying each book which should be placed before the script tags:
<script id="bookTemplate" type="text/template">
    <img src="<%= coverImage %>"/>
    <ul>
        <li><%= title %></li>
        <li><%= author %></li>
        <li><%= releaseDate %></li>
        <li><%= keywords %></li>
    </ul>

    <button class="delete">Delete</button>
</script>
To see what this will look like with some data in it, go ahead and add a manually filled-in book to the books div.
<div class="bookContainer">
    <img src="img/placeholder.png"/>
    <ul>
        <li>Title</li>
        <li>Author</li>
        <li>Release Date</li>
        <li>Keywords</li>
    </ul>

    <button class="delete">Delete</button>
</div>
Open this file in a browser and it should look something like this:
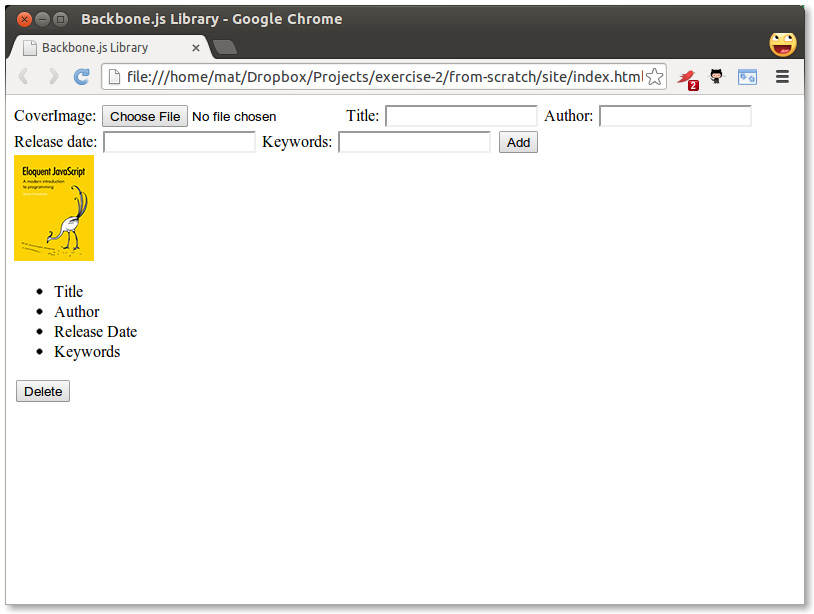
Not so great. This is not a CSS tutorial, but we still need to do some formatting. Create a file named screen.css in your site/css folder:
body {
    background-color: #eee;
}

.bookContainer {
    outline: 1px solid #aaa;
    width: 350px;
    height: 130px;
    background-color: #fff;
    float: left;
    margin: 5px;
}

.bookContainer img {
    float: left;
    margin: 10px;
}

.bookContainer ul {
    list-style-type: none;
    margin-bottom: 0;
}

.bookContainer button {
    float: right;
    margin: 10px;
}

#addBook label {
    width: 100px;
    margin-right: 10px;
    text-align: right;
    line-height: 25px;
}

#addBook label, #addBook input {
    display: block;
    margin-bottom: 10px;
    float: left;
}

#addBook label[for="title"], #addBook label[for="releaseDate"] {
    clear: both;
}

#addBook button {
    display: block;
    margin: 5px 20px 10px 10px;
    float: right;
    clear: both;
}

#addBook div {
    width: 550px;
}

#addBook div:after {
    content: "";
    display: block;
    height: 0;
    visibility: hidden;
    clear: both;
    font-size: 0;
    line-height: 0;
}
Now it looks a bit better:
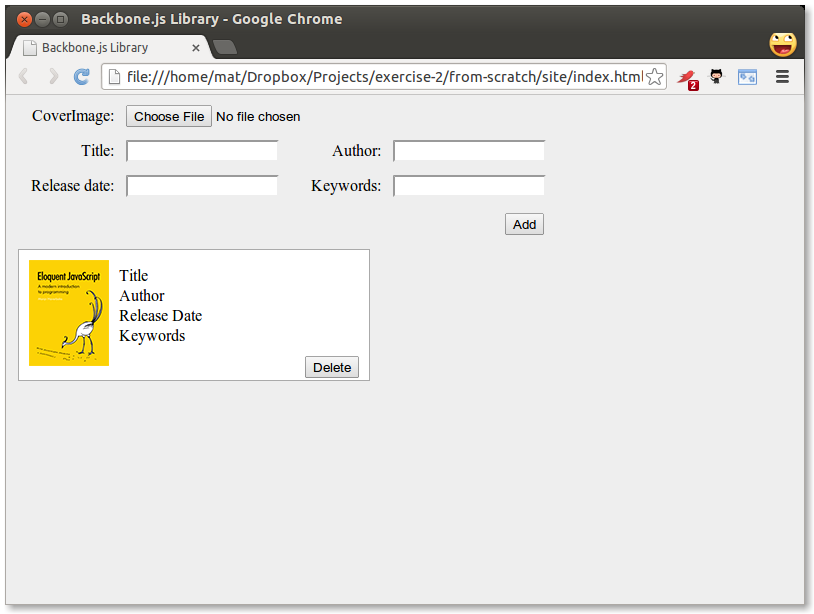
So this is what we want the final result to look like, but with more books. Go ahead and copy the bookContainer div a few more times if you would like to see what it looks like. Now we are ready to start developing the actual application.
First, we’ll need a model of a book and a collection to hold the list. These are both very simple, with the model only declaring some defaults:
// site/js/models/book.js

var app = app || {};

app.Book = Backbone.Model.extend({
    defaults: {
        coverImage: 'img/placeholder.png',
        title: 'No title',
        author: 'Unknown',
        releaseDate: 'Unknown',
        keywords: 'None'
    }
});
// site/js/collections/library.js
var app = app || {};
app.Library = Backbone.Collection.extend({
model: app.Book
});Next, in order to display books we’ll need a view:
// site/js/views/book.js

var app = app || {};

app.BookView = Backbone.View.extend({
    tagName: 'div',
    className: 'bookContainer',
    template: _.template( $( '#bookTemplate' ).html() ),

    render: function() {
        //this.el is what we defined in tagName. use $el to get access to jQuery html() function
        this.$el.html( this.template( this.model.toJSON() ) );

        return this;
    }
});
We’ll also need a view for the list itself:
// site/js/views/library.js

var app = app || {};

app.LibraryView = Backbone.View.extend({
    el: '#books',

    initialize: function( initialBooks ) {
        this.collection = new app.Library( initialBooks );
        this.render();
    },

    // render library by rendering each book in its collection
    render: function() {
        this.collection.each(function( item ) {
            this.renderBook( item );
        }, this );
    },

    // render a book by creating a BookView and appending the
    // element it renders to the library's element
    renderBook: function( item ) {
        var bookView = new app.BookView({
            model: item
        });
        this.$el.append( bookView.render().el );
    }
});
Note that in the initialize function we accept an array of data that we pass to the app.Library constructor. We’ll use this to populate our collection with some sample data so that we can see everything is working correctly. Finally, we have the entry point for our code, along with the sample data:
// site/js/app.js

var app = app || {};

$(function() {
    var books = [
        { title: 'JavaScript: The Good Parts', author: 'Douglas Crockford', releaseDate: '2008', keywords: 'JavaScript Programming' },
        { title: 'The Little Book on CoffeeScript', author: 'Alex MacCaw', releaseDate: '2012', keywords: 'CoffeeScript Programming' },
        { title: 'Scala for the Impatient', author: 'Cay S. Horstmann', releaseDate: '2012', keywords: 'Scala Programming' },
        { title: 'American Psycho', author: 'Bret Easton Ellis', releaseDate: '1991', keywords: 'Novel Splatter' },
        { title: 'Eloquent JavaScript', author: 'Marijn Haverbeke', releaseDate: '2011', keywords: 'JavaScript Programming' }
    ];

    new app.LibraryView( books );
});
Our app just passes the sample data to a new instance of app.LibraryView that it creates. Since the initialize() constructor in LibraryView invokes the view’s render() method, all the books in the library will be displayed. Since we are passing our entry point as a callback to jQuery (in the form of its $ alias), the function will execute when the DOM is ready.
If you view index.html in a browser you should see something like this:
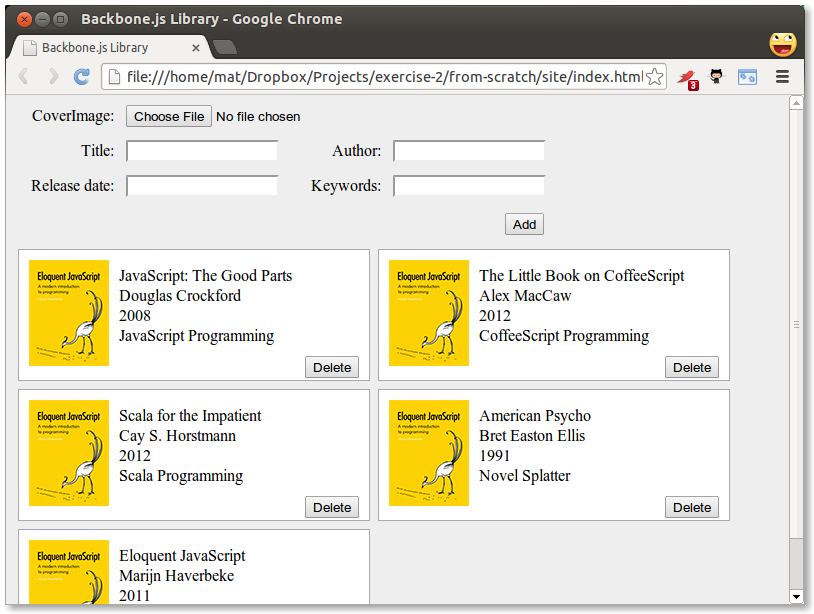
This is a complete Backbone application, though it doesn’t yet do anything interesting.
Now we’ll add some functionality to the useless form at the top and the delete buttons on each book.
When the user clicks the add button we want to take the data in the form and use it to create a new model. In the LibraryView we need to add an event handler for the click event:
events:{
    'click #add':'addBook'
},

addBook: function( e ) {
    e.preventDefault();

    var formData = {};

    $( '#addBook div' ).children( 'input' ).each( function( i, el ) {
        if( $( el ).val() != '' )
        {
            formData[ el.id ] = $( el ).val();
        }
    });

    this.collection.add( new app.Book( formData ) );
},
We select all the input elements of the form that have a value and iterate over them using jQuery’s each. Since we used the same names for ids in our form as the keys on our Book model we can simply store them directly in the formData object. We then create a new Book from the data and add it to the collection. We skip fields without a value so that the defaults will be applied.
Backbone passes an event object as a parameter to the event-handling function. This is useful for us in this case since we don’t want the form to actually submit and reload the page. Adding a call to preventDefault on the event in the addBook function takes care of this for us.
Now we just need to make the view render again when a new model is added. To do this, we put
this.listenTo( this.collection, 'add', this.renderBook );in the initialize function of LibraryView.
Now you should be ready to take the application for a spin.
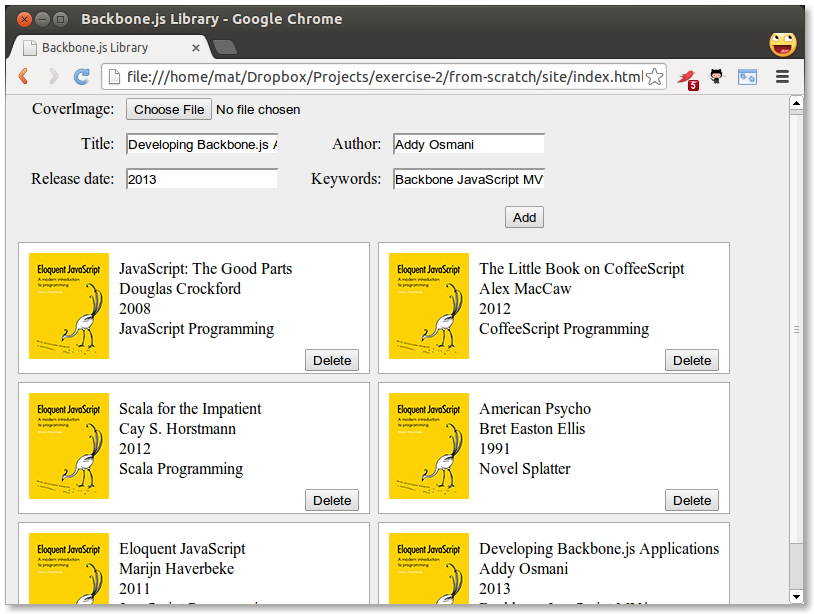
You may notice that the file input for the cover image isn’t working, but that is left as an exercise to the reader.
Next, we need to wire up the delete button. Set up the event handler in the BookView:
    events: {
        'click .delete': 'deleteBook'
    },

    deleteBook: function() {
        //Delete model
        this.model.destroy();

        //Delete view
        this.remove();
    },
You should now be able to add and remove books from the library.
Now we need to make a small detour and set up a server with a REST api. Since this is a JavaScript book we will use JavaScript to create the server using node.js. If you are more comfortable in setting up a REST server in another language, this is the API you need to conform to:
url             HTTP Method  Operation
/api/books      GET          Get an array of all books
/api/books/:id  GET          Get the book with id of :id
/api/books      POST         Add a new book and return the book with an id attribute added
/api/books/:id  PUT          Update the book with id of :id
/api/books/:id  DELETE       Delete the book with id of :id
The outline for this section looks like this:
Download and install node.js from nodejs.org. The node package manager (npm) will be installed as well.
Download and install MongoDB from mongodb.org. There are detailed installation guides on the website.
Create a file called package.json in the root of your project. It should look like
{
    "name": "backbone-library",
    "version": "0.0.1",
    "description": "A simple library application using the Backbone framework",
    "dependencies": {
        "express": "~3.1.0",
        "path": "~0.4.9",
        "mongoose": "~3.5.5"
    }
}
Amongst other things, this file tells npm what the dependencies are for our project. On the command line, from the root of your project, type:
npm installYou should see npm fetch the dependencies that we listed in our package.json and save them within a folder called node_modules.
Your folder structure should look something like this:
node_modules/
  .bin/
  express/
  mongoose/
  path/
site/
  css/
  img/
  js/
  index.html
package.json
Create a file named server.js in the project root containing the following code:
// Module dependencies.
var application_root = __dirname,
    express = require( 'express' ), //Web framework
    path = require( 'path' ), //Utilities for dealing with file paths
    mongoose = require( 'mongoose' ); //MongoDB integration

//Create server
var app = express();

// Configure server
app.configure( function() {
    //parses request body and populates request.body
    app.use( express.bodyParser() );

    //checks request.body for HTTP method overrides
    app.use( express.methodOverride() );

    //perform route lookup based on url and HTTP method
    app.use( app.router );

    //Where to serve static content
    app.use( express.static( path.join( application_root, 'site') ) );

    //Show all errors in development
    app.use( express.errorHandler({ dumpExceptions: true, showStack: true }));
});

//Start server
var port = 4711;
app.listen( port, function() {
    console.log( 'Express server listening on port %d in %s mode', port, app.settings.env );
});
We start off by loading the modules required for this project: Express for creating the HTTP server, Path for dealing with file paths, and mongoose for connecting with the database. We then create an Express server and configure it using an anonymous function. This is a pretty standard configuration and for our application we don’t actually need the methodOverride part. It is used for issuing PUT and DELETE HTTP requests directly from a form, since forms normally only support GET and POST. Finally, we start the server by running the listen function. The port number used, in this case 4711, could be any free port on your system. I simply used 4711 since it is unlikely to have been used by anything else. We are now ready to run our first server:
node server.jsIf you open a browser on http://localhost:4711 you should see something like this:

This is where we left off in Part 2, but we are now running on a server instead of directly from the files. Great job! We can now start defining routes (URLs) that the server should react to. This will be our REST API. Routes are defined by using app followed by one of the HTTP verbs get, put, post, and delete, which corresponds to Create, Read, Update and Delete. Let us go back to server.js and define a simple route:
// Routes
app.get( '/api', function( request, response ) {
    response.send( 'Library API is running' );
});
The get function takes a URL as the first parameter and a function as the second. The function will be called with request and response objects. Now you can restart node and go to our specified URL:
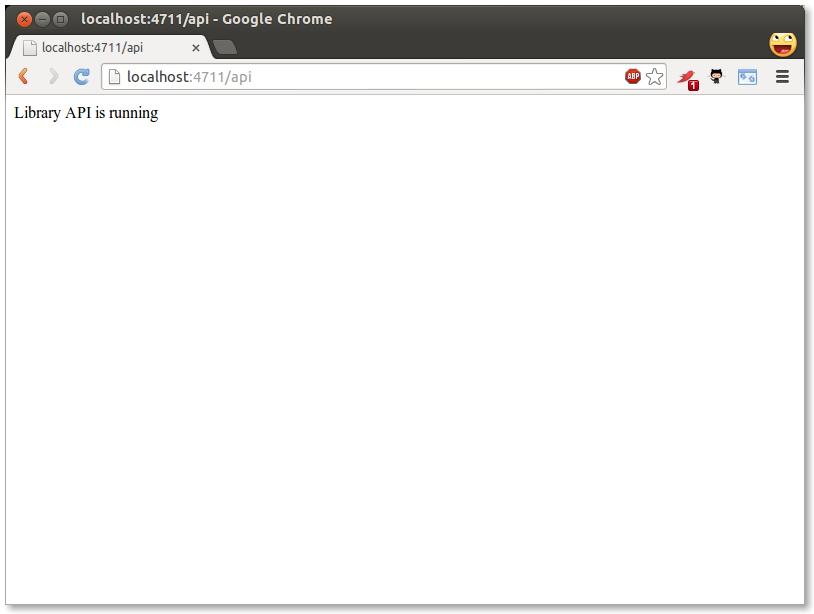
Fantastic. Now, since we want to store our data in MongoDB, we need to define a schema. Add this to server.js:
//Connect to database
mongoose.connect( 'mongodb://localhost/library_database' );

//Schemas
var Book = new mongoose.Schema({
    title: String,
    author: String,
    releaseDate: Date
});

//Models
var BookModel = mongoose.model( 'Book', Book );
As you can see, schema definitions are quite straight forward. They can be more advanced, but this will do for us. I also extracted a model (BookModel) from Mongo. This is what we will be working with. Next up, we define a GET operation for the REST API that will return all books:
//Get a list of all books
app.get( '/api/books', function( request, response ) {
    return BookModel.find( function( err, books ) {
        if( !err ) {
            return response.send( books );
        } else {
            return console.log( err );
        }
    });
});
The find function of Model is defined like this: function find (conditions, fields, options, callback) – but since we want a function that returns all books we only need the callback parameter. The callback will be called with an error object and an array of found objects. If there was no error we return the array of objects to the client using the send function of the response object, otherwise we log the error to the console.
To test our API we need to do a little typing in a JavaScript console. Restart node and go to localhost:4711 in your browser. Open up the JavaScript console. If you are using Google Chrome, go to View->Developer->JavaScript Console. If you are using Firefox, install Firebug and go to View->Firebug. Most other browsers will have a similar console. In the console type the following:
jQuery.get( '/api/books/', function( data, textStatus, jqXHR ) {
    console.log( 'Get response:' );
    console.dir( data );
    console.log( textStatus );
    console.dir( jqXHR );
});
…and press enter and you should get something like this:
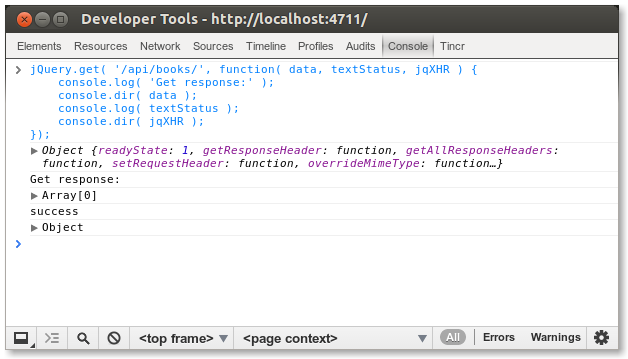
Here I used jQuery to make the call to our REST API, since it was already loaded on the page. The returned array is obviously empty, since we have not put anything into the database yet. Let’s go and create a POST route that enables adding new items in server.js:
//Insert a new book
app.post( '/api/books', function( request, response ) {
    var book = new BookModel({
        title: request.body.title,
        author: request.body.author,
        releaseDate: request.body.releaseDate
    });
    book.save( function( err ) {
        if( !err ) {
            return console.log( 'created' );
        } else {
            return console.log( err );
        }
    });
    return response.send( book );
});
We start by creating a new BookModel, passing an object with title, author, and releaseDate attributes. The data are collected from request.body. This means that anyone calling this operation in the API needs to supply a JSON object containing the title, author, and releaseDate attributes. Actually, the caller can omit any or all attributes since we have not made any of them mandatory.
We then call the save function on the BookModel passing in a callback in the same way as with the previous get route. Finally, we return the saved BookModel. The reason we return the BookModel and not just “success” or similar string is that when the BookModel is saved it will get an _id attribute from MongoDB, which the client needs when updating or deleting a specific book. Let’s try it out again. Restart node and go back to the console and type:
jQuery.post( '/api/books', {
    'title': 'JavaScript the good parts',
    'author': 'Douglas Crockford',
    'releaseDate': new Date( 2008, 4, 1 ).getTime()
}, function(data, textStatus, jqXHR) {
    console.log( 'Post response:' );
    console.dir( data );
    console.log( textStatus );
    console.dir( jqXHR );
});
..and then
jQuery.get( '/api/books/', function( data, textStatus, jqXHR ) {
    console.log( 'Get response:' );
    console.dir( data );
    console.log( textStatus );
    console.dir( jqXHR );
});
You should now get a one-element array back from our server. You may wonder about this line:
'releaseDate': new Date(2008, 4, 1).getTime()MongoDB expects dates in UNIX time format (milliseconds from the start of Jan 1st 1970 UTC), so we have to convert dates before posting. The object we get back however, contains a JavaScript Date object. Also note the _id attribute of the returned object.
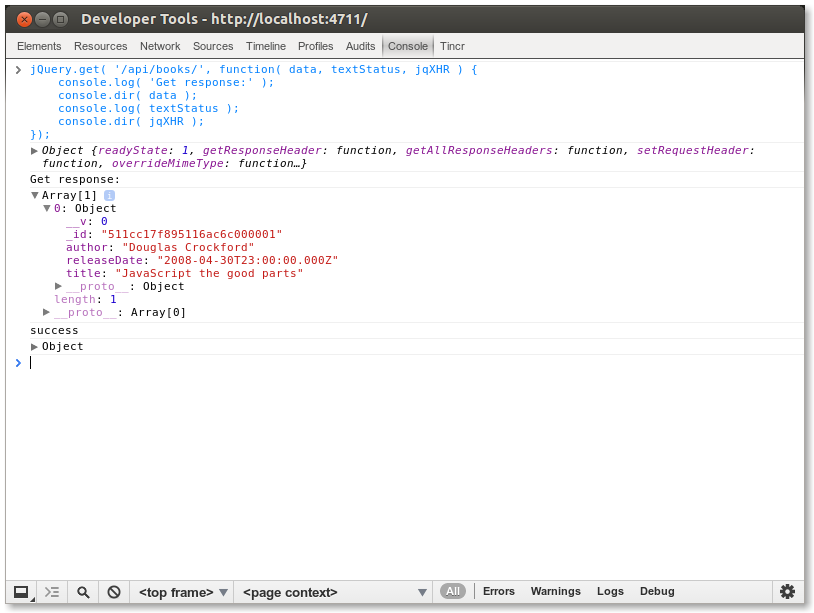
Let’s move on to creating a GET request that retrieves a single book in server.js:
//Get a single book by id
app.get( '/api/books/:id', function( request, response ) {
    return BookModel.findById( request.params.id, function( err, book ) {
        if( !err ) {
            return response.send( book );
        } else {
            return console.log( err );
        }
    });
});
Here we use colon notation (:id) to tell Express that this part of the route is dynamic. We also use the findById function on BookModel to get a single result. If you restart node, you can get a single book by adding the id previously returned to the URL like this:
jQuery.get( '/api/books/4f95a8cb1baa9b8a1b000006', function( data, textStatus, jqXHR ) {
    console.log( 'Get response:' );
    console.dir( data );
    console.log( textStatus );
    console.dir( jqXHR );
});
Let’s create the PUT (update) function next:
//Update a book
app.put( '/api/books/:id', function( request, response ) {
    console.log( 'Updating book ' + request.body.title );
    return BookModel.findById( request.params.id, function( err, book ) {
        book.title = request.body.title;
        book.author = request.body.author;
        book.releaseDate = request.body.releaseDate;

        return book.save( function( err ) {
            if( !err ) {
                console.log( 'book updated' );
            } else {
                console.log( err );
            }
            return response.send( book );
        });
    });
});
This is a little larger than previous ones, but is also pretty straight forward – we find a book by id, update its properties, save it, and send it back to the client.
To test this we need to use the more general jQuery ajax function. Again, in these examples you will need to replace the id property with one that matches an item in your own database:
jQuery.ajax({
    url: '/api/books/4f95a8cb1baa9b8a1b000006',
    type: 'PUT',
    data: {
        'title': 'JavaScript The good parts',
        'author': 'The Legendary Douglas Crockford',
        'releaseDate': new Date( 2008, 4, 1 ).getTime()
    },
    success: function( data, textStatus, jqXHR ) {
        console.log( 'Post response:' );
        console.dir( data );
        console.log( textStatus );
        console.dir( jqXHR );
    }
});
Finally we create the delete route:
//Delete a book
app.delete( '/api/books/:id', function( request, response ) {
    console.log( 'Deleting book with id: ' + request.params.id );
    return BookModel.findById( request.params.id, function( err, book ) {
        return book.remove( function( err ) {
            if( !err ) {
                console.log( 'Book removed' );
                return response.send( '' );
            } else {
                console.log( err );
            }
        });
    });
});
…and try it out:
jQuery.ajax({
    url: '/api/books/4f95a5251baa9b8a1b000001',
    type: 'DELETE',
    success: function( data, textStatus, jqXHR ) {
        console.log( 'Post response:' );
        console.dir( data );
        console.log( textStatus );
        console.dir( jqXHR );
    }
});
So now our REST API is complete – we have support for all four HTTP verbs. What’s next? Well, until now I have left out the keywords part of our books. This is a bit more complicated since a book could have several keywords and we don’t want to represent them as a string, but rather an array of strings. To do that we need another schema. Add a Keywords schema right above our Book schema:
//Schemas
var Keywords = new mongoose.Schema({
    keyword: String
});
To add a sub schema to an existing schema we use brackets notation like so:
var Book = new mongoose.Schema({
    title: String,
    author: String,
    releaseDate: Date,
    keywords: [ Keywords ]                       // NEW
});
Also update POST and PUT:
//Insert a new book
app.post( '/api/books', function( request, response ) {
    var book = new BookModel({
        title: request.body.title,
        author: request.body.author,
        releaseDate: request.body.releaseDate,
        keywords: request.body.keywords       // NEW
    });
    book.save( function( err ) {
        if( !err ) {
            return console.log( 'created' );
        } else {
            return console.log( err );
        }
    });
    return response.send( book );
});

//Update a book
app.put( '/api/books/:id', function( request, response ) {
    console.log( 'Updating book ' + request.body.title );
    return BookModel.findById( request.params.id, function( err, book ) {
        book.title = request.body.title;
        book.author = request.body.author;
        book.releaseDate = request.body.releaseDate;
        book.keywords = request.body.keywords; // NEW

        return book.save( function( err ) {
            if( !err ) {
                console.log( 'book updated' );
            } else {
                console.log( err );
            }
            return response.send( book );
        });
    });
});
There we are, that should be all we need, now we can try it out in the console:
jQuery.post( '/api/books', {
    'title': 'Secrets of the JavaScript Ninja',
    'author': 'John Resig',
    'releaseDate': new Date( 2008, 3, 12 ).getTime(),
    'keywords':[
        { 'keyword': 'JavaScript' },
        { 'keyword': 'Reference' }
    ]
}, function( data, textStatus, jqXHR ) {
    console.log( 'Post response:' );
    console.dir( data );
    console.log( textStatus );
    console.dir( jqXHR );
});
You now have a fully functional REST server that we can hook into from our front-end.
In this part we will cover connecting our Backbone application to the server through the REST API.
As we mentioned in chapter 3 Backbone Basics, we can retrieve models from a server using collection.fetch() by setting collection.url to be the URL of the API endpoint. Let’s update the Library collection to do that now:
var app = app || {};

app.Library = Backbone.Collection.extend({
    model: app.Book,
    url: '/api/books'     // NEW
});
This results in the default implementation of Backbone.sync assuming that the API looks like this:
url             HTTP Method  Operation
/api/books      GET          Get an array of all books
/api/books/:id  GET          Get the book with id of :id
/api/books      POST         Add a new book and return the book with an id attribute added
/api/books/:id  PUT          Update the book with id of :id
/api/books/:id  DELETE       Delete the book with id of :id
To have our application retrieve the Book models from the server on page load we need to update the LibraryView. The Backbone documentation recommends inserting all models when the page is generated on the server side, rather than fetching them from the client side once the page is loaded. Since this chapter is trying to give you a more complete picture of how to communicate with a server, we will go ahead and ignore that recommendation. Go to the LibraryView declaration and update the initialize function as follows:
initialize: function() {
    this.collection = new app.Library();
    this.collection.fetch({reset: true}); // NEW
    this.render();

    this.listenTo( this.collection, 'add', this.renderBook );
    this.listenTo( this.collection, 'reset', this.render ); // NEW
},
Now that we are populating our Library from the database using this.collection.fetch(), the initialize() function no longer takes a set of sample data as an argument and doesn’t pass anything to the app.Library constructor. You can now remove the sample data from site/js/app.js, which should reduce it to a single statement which creates the LibraryView:
// site/js/app.js

var app = app || {};

$(function() {
    new app.LibraryView();
});
We have also added a listener on the reset event. We need to do this since the models are fetched asynchronously after the page is rendered. When the fetch completes, Backbone fires the reset event, as requested by the reset: true option, and our listener re-renders the view. If you reload the page now you should see all books that are stored on the server:
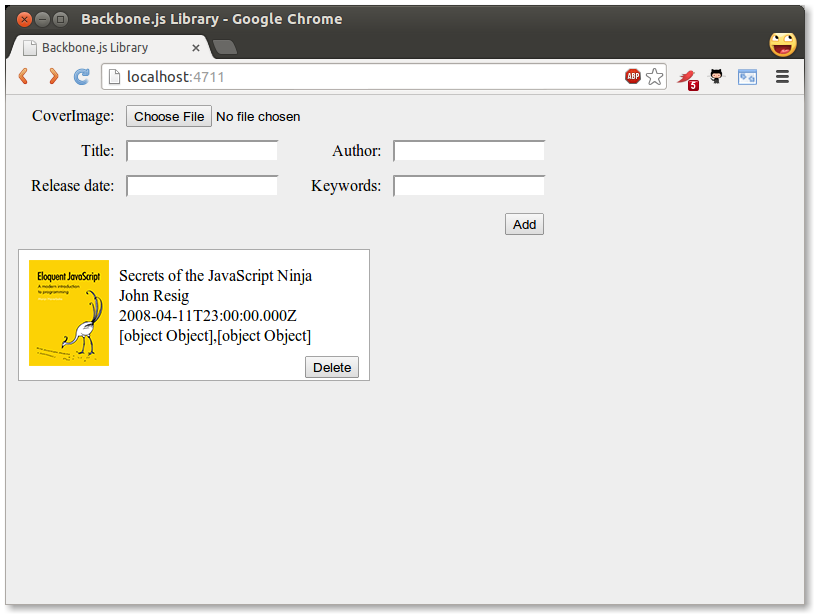
As you can see the date and keywords look a bit weird. The date delivered from the server is converted into a JavaScript Date object and when applied to the underscore template it will use the toString() function to display it. There isn’t very good support for formatting dates in JavaScript so we will use the dateFormat jQuery plugin to fix this. Go ahead and download it from here and put it in your site/js/lib folder. Update the book template so that the date is displayed with:
<li><%= $.format.date( new Date( releaseDate ), 'MMMM yyyy' ) %></li>and add a script element for the plugin
<script src="js/lib/jquery-dateFormat-1.0.js"></script>Now the date on the page should look a bit better. How about the keywords? Since we are receiving the keywords in an array we need to execute some code that generates a string of separated keywords. To do that we can omit the equals character in the template tag which will let us execute code that doesn’t display anything:
<li><% _.each( keywords, function( keyobj ) {%> <%= keyobj.keyword %><% } ); %></li>Here I iterate over the keywords array using the Underscore each function and print out every single keyword. Note that I display the keyword using the <%= tag. This will display the keywords with spaces between them.
Reloading the page again should look quite decent:

Now go ahead and delete a book and then reload the page: Tadaa! the deleted book is back! Not cool, why is this? This happens because when we get the BookModels from the server they have an _id attribute (notice the underscore), but Backbone expects an id attribute (no underscore). Since no id attribute is present, Backbone sees this model as new and deleting a new model doesn’t need any synchronization.
To fix this we can use the parse function of Backbone.Model. The parse function let’s you edit the server response before it is passed to the Model constructor. Add a parse method to the Book model:
parse: function( response ) {
    response.id = response._id;
    return response;
}
Simply copy the value of _id to the needed id attribute. If you reload the page you will see that models are actually deleted on the server when you press the delete button.
Another, simpler way of making Backbone recognize _id as its unique identifier is to set the idAttribute of the model to _id.
If you now try to add a new book using the form you’ll notice that it is a similar story to delete – models won’t get persisted on the server. This is because Backbone.Collection.add doesn’t automatically sync, but it is easy to fix. In the LibraryView we find in views/library.js change the line reading:
this.collection.add( new Book( formData ) );…to:
this.collection.create( formData );Now newly created books will get persisted. Actually, they probably won’t if you enter a date. The server expects a date in UNIX timestamp format (milliseconds since Jan 1, 1970). Also, any keywords you enter won’t be stored since the server expects an array of objects with the attribute ‘keyword’.
We’ll start by fixing the date issue. We don’t really want the users to manually enter a date in a specific format, so we’ll use the standard datepicker from jQuery UI. Go ahead and create a custom jQuery UI download containing datepicker from here. Add the css theme to site/css/ and the JavaScript to site/js/lib. Link to them in index.html:
<link rel="stylesheet" href="css/cupertino/jquery-ui-1.10.0.custom.css">“cupertino” is the name of the style I chose when downloading jQuery UI.
The JavaScript file must be loaded after jQuery.
<script src="js/lib/jquery.min.js"></script>
<script src="js/lib/jquery-ui-1.10.0.custom.min.js"></script>
Now in app.js, bind a datepicker to our releaseDate field:
var app = app || {};

$(function() {
    $( '#releaseDate' ).datepicker();
    new app.LibraryView();
});
You should now be able to pick a date when clicking in the releaseDate field:
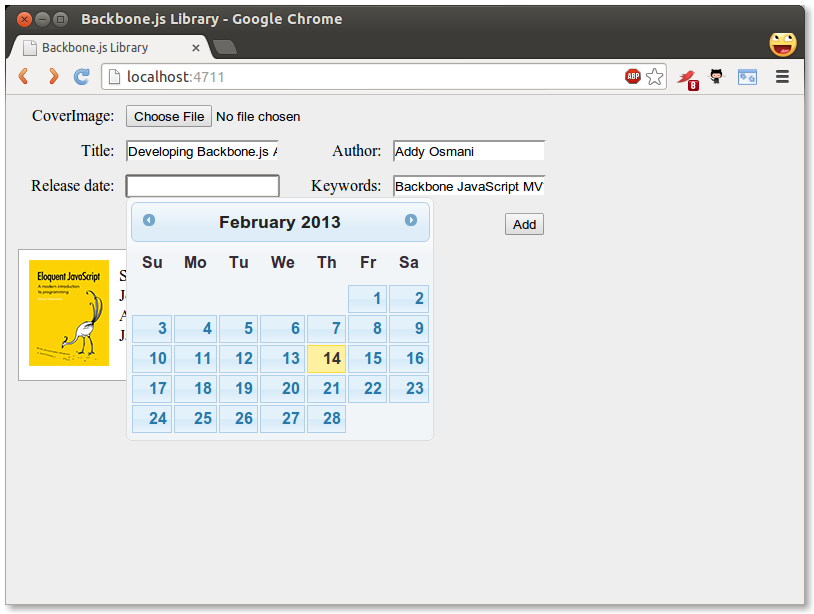
Finally, we have to make sure that the form input is properly transformed into our storage format. Change the addBook function in LibraryView to:
addBook: function( e ) {
    e.preventDefault();

    var formData = {};

    $( '#addBook div' ).children( 'input' ).each( function( i, el ) {
        if( $( el ).val() != '' )
        {
            if( el.id === 'keywords' ) {
                formData[ el.id ] = [];
                _.each( $( el ).val().split( ' ' ), function( keyword ) {
                    formData[ el.id ].push({ 'keyword': keyword });
                });
            } else if( el.id === 'releaseDate' ) {
                formData[ el.id ] = $( '#releaseDate' ).datepicker( 'getDate' ).getTime();
            } else {
                formData[ el.id ] = $( el ).val();
            }
        }
    });

    this.collection.create( formData );
},
Our change adds two checks to the form input fields. First, we’re checking if the current element is the keywords input field, in which case we’re splitting the string on each space and creating an array of keyword objects.
Then we’re checking if the current element is the releaseDate input field, in which case we’re calling datePicker(“getDate”) which returns a Date object. We then use the getTime function on that to get the time in milliseconds.
Now you should be able to add new books with both a release date and keywords!
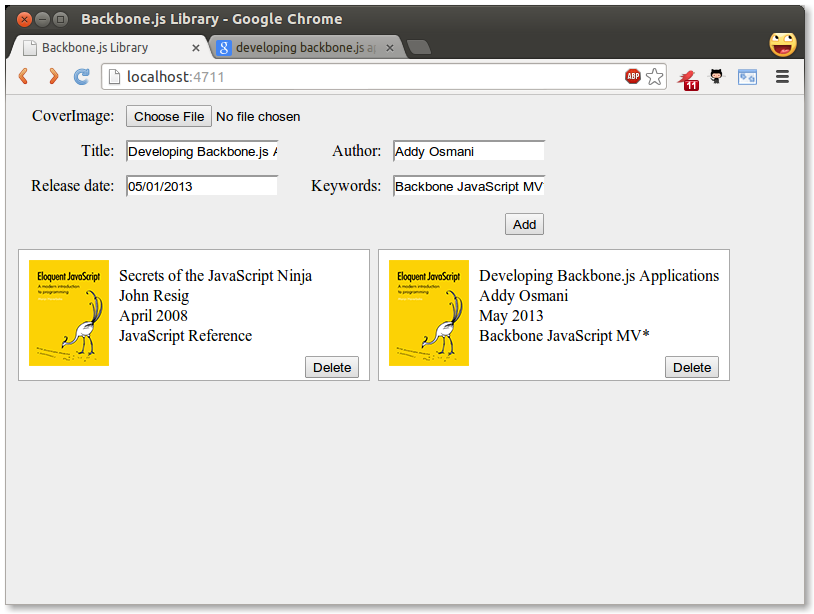
In this chapter we made our application persistent by binding it to a server using a REST API. We also looked at some problems that might occur when serializing and deserializing data and their solutions. We looked at the dateFormat and the datepicker jQuery plugins and how to do some more advanced things in our Underscore templates. The code is available here.
Backbone is flexible, simple, and powerful. However, you may find that the complexity of the application you are working on requires more than what it provides out of the box. There are certain concerns which it just doesn’t address directly as one of it’s goals is to be minimalist.
Take for example Views, which provide a default render method which does nothing and produces no real results when called, despite most implementations using it to generate the HTML that the view manages. Also, Models and Collections have no built-in way of handling nested hierarchies - if you require this functionality, you need to write it yourself or use a plugin.
In these cases, there are many existing Backbone plugins which can provide advanced solutions for large-scale Backbone apps. A fairly complete list of plugins and frameworks available can be found on the Backbone wiki. Using these add-ons, there is enough for applications of most sizes to be completed successfully.
In this section of the book we will look at two popular Backbone add-ons: MarionetteJS and Thorax.
By Derick Bailey & Addy Osmani
As we’ve seen, Backbone provides a great set of building blocks for our JavaScript applications. It gives us the core constructs that are needed to build small to mid-sized apps, organize jQuery DOM events, or create single page apps that support mobile devices and large scale enterprise needs. But Backbone is not a complete framework. It’s a set of building blocks that leaves much of the application design, architecture, and scalability to the developer, including memory management, view management, and more.
MarionetteJS (a.k.a Backbone.Marionette) provides many of the features that the non-trivial application developer needs, above what Backbone itself provides. It is a composite application library that aims to simplify the construction of large scale applications. It does this by providing a collection of common design and implementation patterns found in the applications that the creator, Derick Bailey, and many other contributors have been using to build Backbone apps.
Marionette’s key benefits include:
Marionette follows a similar philosophy to Backbone in that it provides a suite of components that can be used independently of each other, or used together to create significant advantages for us as developers. But it steps above the structural components of Backbone and provides an application layer, with more than a dozen components and building blocks.
Marionette’s components range greatly in the features they provide, but they all work together to create a composite application layer that can both reduce boilerplate code and provide a much needed application structure. Its core components include various and specialized view types that take the boilerplate out of rendering common Backbone.Model and Backbone.Collection scenarios; an Application object and Module architecture to scale applications across sub-applications, features and files; integration of a command pattern, event aggregator, and request/response mechanism; and many more object types that can be extended in a myriad of ways to create an architecture that facilitates an application’s specific needs.
In spite of the large number of constructs that Marionette provides, though, you’re not required to use all of it just because you want to use some of it. Much like Backbone itself, you can pick and choose which features you want to use and when. This allows you to work with other Backbone frameworks and plugins very easily. It also means that you are not required to engage in an all-or-nothing migration to begin using Marionette.
Consider the code that it typically requires to render a view with Backbone and Underscore template. We need a template to render, which can be placed in the DOM directly, and we need the JavaScript that defines a view that uses the template and populates it with data from a model.
<script type="text/html" id="my-view-template">
  <div class="row">
    <label>First Name:</label>
    <span><%= firstName %></span>
  </div>
  <div class="row">
    <label>Last Name:</label>
    <span><%= lastName %></span>
  </div>
  <div class="row">
    <label>Email:</label>
    <span><%= email %></span>
  </div>
</script>
var MyView = Backbone.View.extend({
template: $('#my-view-template').html(),
render: function(){
// compile the Underscore.js template
var compiledTemplate = _.template(this.template);
// render the template with the model data
var data = this.model.toJSON();
var html = compiledTemplate(data);
// populate the view with the rendered html
this.$el.html(html);
}
});Once this is in place, you need to create an instance of your view and pass your model into it. Then you can take the view’s el and append it to the DOM in order to display the view.
var Derick = new Person({
  firstName: 'Derick',
  lastName: 'Bailey',
  email: 'derickbailey@example.com'
});

var myView = new MyView({
  model: Derick
})

myView.render();

$('#content').html(myView.el)
This is a standard set up for defining, building, rendering, and displaying a view with Backbone. This is also what we call “boilerplate code” - code that is repeated over and over and over again, across every project and every implementation with the same functionality. It gets to be tedious and repetitious very quickly.
Enter Marionette’s ItemView - a simple way to reduce the boilerplate of defining a view.
All of Marionette’s view types - with the exception of Marionette.View - include a built-in render method that handles the core rendering logic for you. We can take advantage of this by changing the MyView instance to inherit from one of these rather than Backbone.View. Instead of having to provide our own render method for the view, we can let Marionette render it for us. We’ll still use the same Underscore.js template and rendering mechanism, but the implementation of this is hidden behind the scenes. Thus, we can reduce the amount of code needed for this view.
var MyView = Marionette.ItemView.extend({
  template: '#my-view-template'
});
And that’s it - that’s all you need to get the exact same behaviour as the previous view implementation. Just replace Backbone.View.extend with Marionette.ItemView.extend, then get rid of the render method. You can still create the view instance with a model, call the render method on the view instance, and display the view in the DOM the same way that we did before. But the view definition has been reduced to a single line of configuration for the template.
In addition to the reduction of code needed to define a view, Marionette includes some advanced memory management in all of its views, making the job of cleaning up a view instance and it’s event handlers easy.
Consider the following view implementation:
var ZombieView = Backbone.View.extend({
  template: '#my-view-template',

  initialize: function(){

    // bind the model change to re-render this view
    this.model.on('change', this.render, this);

  },

  render: function(){

    // This alert is going to demonstrate a problem
    alert('We`re rendering the view');

  }
});
If we create two instances of this view using the same variable name for both instances, and then change a value in the model, how many times will we see the alert box?
var Person = Backbone.Model.extend({
  defaults: {
    "firstName": "Jeremy",
    "lastName": "Ashkenas",
    "email":    "jeremy@example.com"
  }
});

var Derick = new Person({
  firstName: 'Derick',
  lastName: 'Bailey',
  email: 'derick@example.com'
});


// create the first view instance
var zombieView = new ZombieView({
  model: Derick
});

// create a second view instance, re-using
// the same variable name to store it
zombieView = new ZombieView({
  model: Derick
});

Derick.set('email', 'derickbailey@example.com');
Since we’re re-using the same zombieView variable for both instances, the first instance of the view will fall out of scope immediately after the second is created. This allows the JavaScript garbage collector to come along and clean it up, which should mean the first view instance is no longer active and no longer going to respond to the model’s “change” event.
But when we run this code, we end up with the alert box showing up twice!
The problem is caused by the model event binding in the view’s initialize method. Whenever we pass this.render as the callback method to the model’s on event binding, the model itself is being given a direct reference to the view instance. Since the model is now holding a reference to the view instance, replacing the zombieView variable with a new view instance is not going to let the original view fall out of scope. The model still has a reference, therefore the view is still in scope.
Since the original view is still in scope, and the second view instance is also in scope, changing data on the model will cause both view instances to respond.
Fixing this is easy, though. You just need to call stopListening when the view is done with its work and ready to be closed. To do this, add a close method to the view.
var ZombieView = Backbone.View.extend({
  template: '#my-view-template',

  initialize: function(){
    // bind the model change to re-render this view
    this.listenTo(this.model, 'change', this.render);
  },

  close: function(){
    // unbind the events that this view is listening to
    this.stopListening();
  },

  render: function(){

    // This alert is going to demonstrate a problem
    alert('We`re rendering the view');

  }
});
Then call close on the first instance when it is no longer needed, and only one view instance will remain alive. For more information about the listenTo and stopListening functions, see the earlier Backbone Basics chapter and Derick’s post on Managing Events As Relationships, Not Just Resources.
var Jeremy = new Person({
  firstName: 'Jeremy',
  lastName: 'Ashkenas',
  email: 'jeremy@example.com'
});

// create the first view instance
var zombieView = new ZombieView({
  model: Person
})
zombieView.close(); // double-tap the zombie

// create a second view instance, re-using
// the same variable name to store it
zombieView = new ZombieView({
  model: Person
})

Person.set('email', 'jeremyashkenas@example.com');
Now we only see one alert box when this code runs.
Rather than having to manually remove these event handlers, though, we can let Marionette do it for us.
var ZombieView = Marionette.ItemView.extend({
  template: '#my-view-template',

  initialize: function(){

    // bind the model change to re-render this view
    this.listenTo(this.model, 'change', this.render);

  },

  render: function(){

    // This alert is going to demonstrate a problem
    alert('We`re rendering the view');

  }
});
Notice in this case we are using a method called listenTo. This method comes from Backbone.Events, and is available in all objects that mix in Backbone.Events - including most Marionette objects. The listenTo method signature is similar to that of the on method, with the exception of passing the object that triggers the event as the first parameter.
Marionette’s views also provide a close event, in which the event bindings that are set up with the listenTo are automatically removed. This means we no longer need to define a close method directly, and when we use the listenTo method, we know that our events will be removed and our views will not turn into zombies.
But how do we automate the call to close on a view, in the real application? When and where do we call that? Enter the Marionette.Region - an object that manages the lifecycle of an individual view.
After a view is created, it typically needs to be placed in the DOM so that it becomes visible. This is usually done with a jQuery selector and setting the html() of the resulting object:
var Joe = new Person({
  firstName: 'Joe',
  lastName: 'Bob',
  email: 'joebob@example.com'
});

var myView = new MyView({
  model: Joe
})

myView.render();

// show the view in the DOM
$('#content').html(myView.el)
This, again, is boilerplate code. We shouldn’t have to manually call render and manually select the DOM elements to show the view. Furthermore, this code doesn’t lend itself to closing any previous view instance that might be attached to the DOM element we want to populate. And we’ve seen the danger of zombie views already.
To solve these problems, Marionette provides a Region object - an object that manages the lifecycle of individual views, displayed in a particular DOM element.
// create a region instance, telling it which DOM element to manage
var myRegion = new Marionette.Region({
  el: '#content'
});

// show a view in the region
var view1 = new MyView({ /* ... */ });
myRegion.show(view1);

// somewhere else in the code,
// show a different view
var view2 = new MyView({ /* ... */ });
myRegion.show(view2);
There are several things to note, here. First, we’re telling the region what DOM element to manage by specifying an el in the region instance. Second, we’re no longer calling the render method on our views. And lastly, we’re not calling close on our view, either, though this is getting called for us.
When we use a region to manage the lifecycle of our views, and display the views in the DOM, the region itself handles these concerns. By passing a view instance into the show method of the region, it will call the render method on the view for us. It will then take the resulting el of the view and populate the DOM element.
The next time we call the show method of the region, the region remembers that it is currently displaying a view. The region calls the close method on the view, removes it from the DOM, and then proceeds to run the render & display code for the new view that was passed in.
Since the region handles calling close for us, and we’re using the listenTo event binder in our view instance, we no longer have to worry about zombie views in our application.
Regions are not limited to just Marionette views, though. Any valid Backbone.View can be managed by a Marionette.Region. If your view happens to have a close method, it will be called when the view is closed. If not, the Backbone.View built-in method, remove, will be called instead.
Having learned about Marionette’s high-level concepts, let’s explore refactoring the Todo application we created in our first exercise to use it. The complete code for this application can be found in Derick’s TodoMVC fork.
Our final implementation will be visually and functionally equivalent to the original app, as seen below.
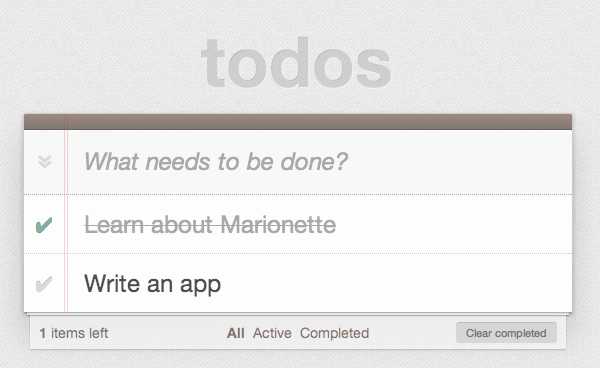
First, we define an application object representing our base TodoMVC app. This will contain initialization code and define the default layout regions for our app.
TodoMVC.js:
var TodoMVC = new Marionette.Application();

TodoMVC.addRegions({
  header : '#header',
  main   : '#main',
  footer : '#footer'
});

TodoMVC.on('initialize:after', function(){
  Backbone.history.start();
});
Regions are used to manage the content that’s displayed within specific elements, and the addRegions method on the TodoMVC object is just a shortcut for creating Region objects. We supply a jQuery selector for each region to manage (e.g., #header, #main, and #footer) and then tell the region to show various Backbone views within that region.
Once the application object has been initialized, we call Backbone.history.start() to route the initial URL.
Next, we define our Layouts. A layout is a specialized type of view that directly extends Marionette.ItemView. This means it’s intended to render a single template and may or may not have a model (or item) associated with the template.
One of the main differences between a Layout and an ItemView is that the layout contains regions. When defining a Layout, we supply it with both a template and the regions that the template contains. After rendering the layout, we can display other views within the layout using the regions that were defined.
In our TodoMVC Layout module below, we define Layouts for:
This captures some of the view logic that was previously in our AppView and TodoView.
Note that Marionette modules (such as the below) offer a simple module system which is used to create privacy and encapsulation in Marionette apps. These certainly don’t have to be used however, and later on in this section we’ll provide links to alternative implementations using RequireJS + AMD instead.
TodoMVC.Layout.js:
TodoMVC.module('Layout', function(Layout, App, Backbone, Marionette, $, _){

  // Layout Header View
  // ------------------

  Layout.Header = Marionette.ItemView.extend({
    template : '#template-header',

    // UI bindings create cached attributes that
    // point to jQuery selected objects
    ui : {
      input : '#new-todo'
    },

    events : {
      'keypress #new-todo':   'onInputKeypress'
    },

    onInputKeypress : function(evt) {
      var ENTER_KEY = 13;
      var todoText = this.ui.input.val().trim();

      if ( evt.which === ENTER_KEY && todoText ) {
        this.collection.create({
          title : todoText
        });
        this.ui.input.val('');
      }
    }
  });

  // Layout Footer View
  // ------------------


  Layout.Footer = Marionette.Layout.extend({
    template : '#template-footer',

    // UI bindings create cached attributes that
    // point to jQuery selected objects
    ui : {
      count   : '#todo-count strong',
      filters : '#filters a'
    },

    events : {
      'click #clear-completed' : 'onClearClick'
    },

    initialize : function() {
      this.listenTo(App.vent, 'todoList:filter', this.updateFilterSelection);
      this.listenTo(this.collection, 'all', this.updateCount);
    },

    onRender : function() {
      this.updateCount();
    },

    updateCount : function() {
      var count = this.collection.getActive().length;
      this.ui.count.html(count);

      if (count === 0) {
        this.$el.parent().hide();
      } else {
        this.$el.parent().show();
      }
    },

    updateFilterSelection : function(filter) {
      this.ui.filters
        .removeClass('selected')
        .filter('[href="#' + filter + '"]')
        .addClass('selected');
    },

    onClearClick : function() {
      var completed = this.collection.getCompleted();
      completed.forEach(function destroy(todo) {
        todo.destroy();
      });
    }
  });

});
Next, we tackle application routing and workflow, such as controlling Layouts in the page which can be shown or hidden.
Recall how Backbone routes trigger methods within the Router as shown below in our original Workspace router from our first exercise:
  var Workspace = Backbone.Router.extend({
    routes:{
      '*filter': 'setFilter'
    },

    setFilter: function( param ) {
      // Set the current filter to be used
      window.app.TodoFilter = param.trim() || '';

      // Trigger a collection filter event, causing hiding/unhiding
      // of Todo view items
      window.app.Todos.trigger('filter');
    }
  });
Marionette uses the concept of an AppRouter to simplify routing. This reduces the boilerplate for handling route events and allows routers to be configured to call methods on an object directly. We configure our AppRouter using appRoutes which replaces the '*filter': 'setFilter' route defined in our original router and invokes a method on our Controller.
The TodoList Controller, also found in this next code block, handles some of the remaining visibility logic originally found in AppView and TodoView, albeit using very readable Layouts.
TodoMVC.TodoList.js:
TodoMVC.module('TodoList', function(TodoList, App, Backbone, Marionette, $, _){

  // TodoList Router
  // ---------------
  //
  // Handle routes to show the active vs complete todo items

  TodoList.Router = Marionette.AppRouter.extend({
    appRoutes : {
      '*filter': 'filterItems'
    }
  });

  // TodoList Controller (Mediator)
  // ------------------------------
  //
  // Control the workflow and logic that exists at the application
  // level, above the implementation detail of views and models

  TodoList.Controller = function(){
    this.todoList = new App.Todos.TodoList();
  };

  _.extend(TodoList.Controller.prototype, {

    // Start the app by showing the appropriate views
    // and fetching the list of todo items, if there are any
    start: function(){
      this.showHeader(this.todoList);
      this.showFooter(this.todoList);
      this.showTodoList(this.todoList);

      this.todoList.fetch();
    },

    showHeader: function(todoList){
      var header = new App.Layout.Header({
        collection: todoList
      });
      App.header.show(header);
    },

    showFooter: function(todoList){
      var footer = new App.Layout.Footer({
        collection: todoList
      });
      App.footer.show(footer);
    },

    showTodoList: function(todoList){
      App.main.show(new TodoList.Views.ListView({
        collection : todoList
      }));
    },

    // Set the filter to show complete or all items
    filterItems: function(filter){
      App.vent.trigger('todoList:filter', filter.trim() || '');
    }
  });

  // TodoList Initializer
  // --------------------
  //
  // Get the TodoList up and running by initializing the mediator
  // when the the application is started, pulling in all of the
  // existing Todo items and displaying them.

  TodoList.addInitializer(function(){

    var controller = new TodoList.Controller();
    new TodoList.Router({
      controller: controller
    });

    controller.start();

  });

});In this particular app, note that Controllers don’t add a great deal to the overall workflow. In general, Marionette’s philosophy on routers is that they should be an afterthought in the implementation of applications. Quite often, we’ve seen developers abuse Backbone’s routing system by making it the sole controller of the entire application workflow and logic.
This inevitably leads to mashing every possible combination of code into the router methods - view creation, model loading, coordinating different parts of the app, etc. Developers such as Derick view this as a violation of the single-responsibility principle (SRP) and separation of concerns.
Backbone’s router and history exist to deal with a specific aspect of browsers - managing the forward and back buttons. Marionette’s philosophy is that it should be limited to that, with the code that gets executed by the navigation being somewhere else. This allows the application to be used with or without a router. We can call a controller’s “show” method from a button click, from an application event handler, or from a router, and we will end up with the same application state no matter how we called that method.
Derick has written extensively about his thoughts on this topic, which you can read more about on his blog:
Our next task is defining the actual views for individual Todo items and lists of items in our TodoMVC application. For this, we make use of Marionette’s CompositeViews. The idea behind a CompositeView is that it represents a visualization of a composite or hierarchical structure of leaves (or nodes) and branches.
Think of these views as being a hierarchy of parent-child models, and recursive by default. The same CompositeView type will be used to render each item in a collection that is handled by the composite view. For non-recursive hierarchies, we are able to override the item view by defining an itemView attribute.
For our Todo List Item View, we define it as an ItemView, then our Todo List View is a CompositeView where we override the itemView setting and tell it to use the Todo List item View for each item in the collection.
TodoMVC.TodoList.Views.js
TodoMVC.module('TodoList.Views', function(Views, App, Backbone, Marionette, $, _){

  // Todo List Item View
  // -------------------
  //
  // Display an individual todo item, and respond to changes
  // that are made to the item, including marking completed.

  Views.ItemView = Marionette.ItemView.extend({
      tagName : 'li',
      template : '#template-todoItemView',

      ui : {
        edit : '.edit'
      },

      events : {
        'click .destroy' : 'destroy',
        'dblclick label' : 'onEditClick',
        'keypress .edit' : 'onEditKeypress',
        'click .toggle'  : 'toggle'
      },

      initialize : function() {
        this.listenTo(this.model, 'change', this.render);
      },

      onRender : function() {
        this.$el.removeClass('active completed');
        if (this.model.get('completed')) this.$el.addClass('completed');
        else this.$el.addClass('active');
      },

      destroy : function() {
        this.model.destroy();
      },

      toggle  : function() {
        this.model.toggle().save();
      },

      onEditClick : function() {
        this.$el.addClass('editing');
        this.ui.edit.focus();
      },

      onEditKeypress : function(evt) {
        var ENTER_KEY = 13;
        var todoText = this.ui.edit.val().trim();

        if ( evt.which === ENTER_KEY && todoText ) {
          this.model.set('title', todoText).save();
          this.$el.removeClass('editing');
        }
      }
  });

  // Item List View
  // --------------
  //
  // Controls the rendering of the list of items, including the
  // filtering of active vs completed items for display.

  Views.ListView = Marionette.CompositeView.extend({
      template : '#template-todoListCompositeView',
      itemView : Views.ItemView,
      itemViewContainer : '#todo-list',

      ui : {
        toggle : '#toggle-all'
      },

      events : {
        'click #toggle-all' : 'onToggleAllClick'
      },

      initialize : function() {
        this.listenTo(this.collection, 'all', this.update);
      },

      onRender : function() {
        this.update();
      },

      update : function() {
        function reduceCompleted(left, right) { return left && right.get('completed'); }
        var allCompleted = this.collection.reduce(reduceCompleted,true);
        this.ui.toggle.prop('checked', allCompleted);

        if (this.collection.length === 0) {
          this.$el.parent().hide();
        } else {
          this.$el.parent().show();
        }
      },

      onToggleAllClick : function(evt) {
        var isChecked = evt.currentTarget.checked;
        this.collection.each(function(todo){
          todo.save({'completed': isChecked});
        });
      }
  });

  // Application Event Handlers
  // --------------------------
  //
  // Handler for filtering the list of items by showing and
  // hiding through the use of various CSS classes

  App.vent.on('todoList:filter',function(filter) {
    filter = filter || 'all';
    $('#todoapp').attr('class', 'filter-' + filter);
  });

});
At the end of the last code block, you will also notice an event handler using vent. This is an event aggregator that allows us to handle filterItem triggers from our TodoList controller.
Finally, we define the model and collection for representing our Todo items. These are semantically not very different from the original versions we used in our first exercise and have been re-written to better fit in with Derick’s preferred style of coding.
Todos.js:
TodoMVC.module('Todos', function(Todos, App, Backbone, Marionette, $, _){

  // Todo Model
  // ----------

  Todos.Todo = Backbone.Model.extend({
    localStorage: new Backbone.LocalStorage('todos-backbone'),

    defaults: {
      title     : '',
      completed : false,
      created   : 0
    },

    initialize : function() {
      if (this.isNew()) this.set('created', Date.now());
    },

    toggle  : function() {
      return this.set('completed', !this.isCompleted());
    },

    isCompleted: function() {
      return this.get('completed');
    }
  });

  // Todo Collection
  // ---------------

  Todos.TodoList = Backbone.Collection.extend({
    model: Todos.Todo,

    localStorage: new Backbone.LocalStorage('todos-backbone'),

    getCompleted: function() {
      return this.filter(this._isCompleted);
    },

    getActive: function() {
      return this.reject(this._isCompleted);
    },

    comparator: function( todo ) {
      return todo.get('created');
    },

    _isCompleted: function(todo){
      return todo.isCompleted();
    }
  });

});
We finally kick-start everything off in our application index file, by calling start on our main application object:
Initialization:
      $(function(){
        // Start the TodoMVC app (defined in js/TodoMVC.js)
        TodoMVC.start();
      });
And that’s it!
Derick feels that maintainability largely comes down to modularity, separating responsibilities (Single Responsibility Principle and Separation of Concerns) by using patterns to keep concerns from being mixed together. It can, however, be difficult to simply extract things into separate modules for the sake of extraction, abstraction, or dividing the concept down into its simplest parts.
The Single Responsibility Principle (SRP) tells us quite the opposite - that we need to understand the context in which things change. What parts always change together, in this system? What parts can change independently? Without knowing this, we won’t know what pieces should be broken out into separate components and modules versus put together into the same module or object.
The way Derick organizes his apps into modules is by creating a breakdown of concepts at each level. A higher level module is a higher level of concern - an aggregation of responsibilities. Each responsibility is broken down into an expressive API set that is implemented by lower level modules (Dependency Inversion Principle). These are coordinated through a mediator - which he typically refers to as the Controller in a module.
The way Derick organizes his files also plays directly into maintainability and he has also written posts about the importance of keeping a sane application folder structure that I recommend reading:
Marionette is a flexible framework, much like Backbone itself. It offers a wide variety of tools to help create and organize an application architecture on top of Backbone, but like Backbone itself, it doesn’t dictate that you have to use all of its pieces in order to use any of them.
The flexibility and versatility in Marionette is easiest to understand by examining three variations of TodoMVC implemented with it that have been created for comparison purposes:
The simple version: This version of TodoMVC shows some raw use of Marionette’s various view types, an application object, and the event aggregator. The objects that are created are added directly to the global namespace and are fairly straightforward. This is a great example of how Marionette can be used to augment existing code without having to re-write everything around Marionette.
The RequireJS version: Using Marionette with RequireJS helps to create a modularized application architecture - a tremendously important concept in scaling JavaScript applications. RequireJS provides a powerful set of tools that can be leveraged to great advantage, making Marionette even more flexible than it already is.
The Marionette module version: RequireJS isn’t the only way to create a modularized application architecture, though. For those that wish to build applications in modules and namespaces, Marionette provides a built-in module and namespacing structure. This example application takes the simple version of the application and re-writes it into a namespaced application architecture, with an application controller (mediator / workflow object) that brings all of the pieces together.
Marionette certainly provides its share of opinions on how a Backbone application should be architected. The combination of modules, view types, event aggregator, application objects, and more, can be used to create a very powerful and flexible architecture based on these opinions.
But as you can see, Marionette isn’t a completely rigid, “my way or the highway” framework. It provides many elements of an application foundation that can be mixed and matched with other architectural styles, such as AMD or namespacing, or provide simple augmentation to existing projects by reducing boilerplate code for rendering views.
This flexibility creates a much greater opportunity for Marionette to provide value to you and your projects, as it allows you to scale the use of Marionette with your application’s needs.
This is just the tip of the proverbial iceberg for Marionette, even for the ItemView and Region objects that we’ve explored. There is far more functionality, more features, and more flexibility and customizability that can be put to use in both of these objects. Then we have the other dozen or so components that Marionette provides, each with their own set of behaviors built in, customization and extension points, and more.
To learn more about Marionette’s components, the features they provide and how to use them, check out the Marionette documentation, links to the wiki, to the source code, the project core contributors, and much more at http://marionettejs.com.
By Ryan Eastridge & Addy Osmani
Part of Backbone’s appeal is that it provides structure but is generally un-opinionated, in particular when it comes to views. Thorax makes an opinionated decision to use Handlebars as its templating solution. Some of the patterns found in Marionette are found in Thorax as well. Marionette exposes most of these patterns as JavaScript APIs while in Thorax they are often exposed as template helpers. This chapter assumes the reader has knowledge of Handlebars.
Thorax was created by Ryan Eastridge and Kevin Decker to create Walmart’s mobile web application. This chapter is limited to Thorax’s templating features and patterns implemented in Thorax that you can utilize in your application regardless of whether you choose to adopt Thorax. To learn more about other features implemented in Thorax and to download boilerplate projects visit the Thorax website.
In Backbone, when creating a new view, options passed are merged into any default options already present on a view and are exposed via this.options for later reference.
Thorax.View differs from Backbone.View in that there is no options object. All arguments passed to the constructor become properties of the view, which in turn become available to the template:
    var view = new Thorax.View({
        greeting: 'Hello',
        template: Handlebars.compile('{{greeting}} World!')
    });
    view.appendTo('body');
In most examples in this chapter a template property will be specified. In larger projects including the boilerplate projects provided on the Thorax website a name property would instead be used and a template of the same file name in your project would automatically be assigned to the view.
If a model is set on a view, its attributes also become available to the template:
var view = new Thorax.View({
    model: new Thorax.Model({key: 'value'}),
    template: Handlebars.compile('{{key}}')
});The view helper allows you to embed other views within a view. Child views can be specified as properties of the view:
    var parent = new Thorax.View({
        child: new Thorax.View(...),
        template: Handlebars.compile('{{view child}}')
    });
Or the name of a child view to initialize as well as any optional properties you wish to pass. In this case the child view must have previously been created with extend and given a name property:
    var ChildView = Thorax.View.extend({
        name: 'child',
        template: ...
    });

    var parent = new Thorax.View({
        template: Handlebars.compile('{{view "child" key="value"}}')
    });
The view helper may also be used as a block helper, in which case the block will be assigned as the template property of the child view:
    {{#view child}}
        child will have this block
        set as its template property
    {{/view}}
Handlebars is string based, while Backbone.View instances have a DOM el. Since we are mixing metaphors, the embedding of views works via a placeholder mechanism where the view helper in this case adds the view passed to the helper to a hash of children, then injects placeholder HTML into the template such as:
<div data-view-placeholder-cid="view2"></div>Then once the parent view is rendered, we walk the DOM in search of all the placeholders we created, replacing them with the child views’ els:
    this.$el.find('[data-view-placeholder-cid]').forEach(function(el) {
        var cid = el.getAttribute('data-view-placeholder-cid'),
            view = this.children[cid];
        view.render();
        $(el).replaceWith(view.el);
}, this);One of the most useful constructs in Thorax is Handlebars.registerViewHelper (not to be confused with Handlebars.registerHelper). This method will register a new block helper that will create and embed a HelperView instance with its template set to the captured block. A HelperView instance is different from that of a regular child view in that its context will be that of the parent’s in the template. Like other child views it will have a parent property set to that of the declaring view. Many of the built-in helpers in Thorax including the collection helper are created in this manner.
A simple example would be an on helper that re-rendered the generated HelperView instance each time an event was triggered on the declaring / parent view:
Handlebars.registerViewHelper('on', function(eventName, helperView) {
    helperView.parent.on(eventName, function() {
        helperView.render();
    });
});
An example use of this would be to have a counter that would increment each time a button was clicked. This example makes use of the button helper in Thorax which simply makes a button that calls a method when clicked:
    {{#on "incremented"}}{{i}}{/on}}
    {{#button trigger="incremented"}}Add{{/button}}
And the corresponding view class:
    new Thorax.View({
        events: {
            incremented: function() {
                ++this.i;
            }
        },
        initialize: function() {
            this.i = 0;
        },
        template: ...
});The collection helper creates and embeds a CollectionView instance, creating a view for each item in a collection, updating when items are added, removed, or changed in the collection. The simplest usage of the helper would look like:
    {{#collection kittens}}
      <li>{{name}}</li>
    {{/collection}}
And the corresponding view:
    new Thorax.View({
      kittens: new Thorax.Collection(...),
      template: ...
    });
The block in this case will be assigned as the template for each item view created, and the context will be the attributes of the given model. This helper accepts options that can be arbitrary HTML attributes, a tag option to specify the type of tag containing the collection, or any of the following:
item-template - A template to display for each model. If a block is specified it will become the item-templateitem-view - A view class to use when each item view is createdempty-template - A template to display when the collection is empty. If an inverse / else block is specified it will become the empty-templateempty-view - A view to display when the collection is emptyOptions and blocks can be used in combination, in this case creating a KittenView class with a template set to the captured block for each kitten in the collection:
    {{#collection kittens item-view="KittenView" tag="ul"}}
      <li>{{name}}</li>
    {{else}}
      <li>No kittens!</li>
    {{/collection}}
Note that multiple collections can be used per view, and collections can be nested. This is useful when there are models that contain collections that contain models that contain…
    {{#collection kittens}}
      <h2>{{name}}</h2>
      <p>Kills:</p>
      {{#collection miceKilled tag="ul"}}
        <li>{{name}}</li>
      {{/collection}}
{{/collection}}Thorax makes heavy use of custom HTML data attributes to operate. While some make sense only within the context of Thorax, several are quite useful to have in any Backbone project for writing other functions against, or for general debugging. In order to add some to your views in non-Thorax projects, override the setElement method in your base view class:
  MyApplication.View = Backbone.View.extend({
    setElement: function() {
        var response = Backbone.View.prototype.setElement.apply(this, arguments);
        this.name && this.$el.attr('data-view-name', this.name);
        this.$el.attr('data-view-cid', this.cid);
        this.collection && this.$el.attr('data-collection-cid', this.collection.cid);
        this.model && this.$el.attr('data-model-cid', this.model.cid);
        return response;
    }
  });
In addition to making your application more immediately comprehensible in the inspector, it’s now possible to extend jQuery / Zepto with functions to lookup the closest view, model or collection to a given element. In order to make it work you have to save references to each view created in your base view class by overriding the _configure method:
    MyApplication.View = Backbone.View.extend({
        _configure: function() {
            Backbone.View.prototype._configure.apply(this, arguments);
            Thorax._viewsIndexedByCid[this.cid] = this;
        },
        dispose: function() {
            Backbone.View.prototype.dispose.apply(this, arguments);
            delete Thorax._viewsIndexedByCid[this.cid];
        }
    });
Then we can extend jQuery / Zepto:
    $.fn.view = function() {
        var el = $(this).closest('[data-view-cid]');
        return el && Thorax._viewsIndexedByCid[el.attr('data-view-cid')];
    };

    $.fn.model = function(view) {
        var $this = $(this),
            modelElement = $this.closest('[data-model-cid]'),
            modelCid = modelElement && modelElement.attr('[data-model-cid]');
        if (modelCid) {
            var view = $this.view();
            return view && view.model;
        }
        return false;
    };
Now instead of storing references to models randomly throughout your application to lookup when a given DOM event occurs you can use $(element).model(). In Thorax, this can particularly useful in conjunction with the collection helper which generates a view class (with a model property) for each model in the collection. An example template:
    {{#collection kittens tag="ul"}}
      <li>{{name}}</li>
    {{/collection}}
And the corresponding view class:
    Thorax.View.extend({
      events: {
        'click li': function(event) {
          var kitten = $(event.target).model();
          console.log('Clicked on ' + kitten.get('name'));
        }
      },
      kittens: new Thorax.Collection(...),
      template: ...
    });
A common anti-pattern in Backbone applications is to assign a className to a single view class. Consider using the data-view-name attribute as a CSS selector instead, saving CSS classes for things that will be used multiple times:
  [data-view-name="child"] {

}No Backbone related tutorial would be complete without a todo application. A Thorax implementation of TodoMVC is available, in addition to this far simpler example composed of this single Handlebars template:
  {{#collection todos tag="ul"}}
    <li{{#if done}} class="done"{{/if}}>
      <input type="checkbox" name="done"{{#if done}} checked="checked"{{/if}}>
      <span>{{item}}</span>
    </li>
  {{/collection}}
  <form>
    <input type="text">
    <input type="submit" value="Add">
  </form>
and the corresponding JavaScript:
  var todosView = Thorax.View({
      todos: new Thorax.Collection(),
      events: {
          'change input[type="checkbox"]': function(event) {
              var target = $(event.target);
              target.model().set({done: !!target.attr('checked')});
          },
          'submit form': function(event) {
              event.preventDefault();
              var input = this.$('input[type="text"]');
              this.todos.add({item: input.val()});
              input.val('');
          }
      },
      template: '...'
  });
  todosView.appendTo('body');
In this section, we will review a number of common problems developers often experience once they’ve started to work on relatively non-trivial projects using Backbone.js, as well as present potential solutions.
Perhaps the most frequent of these questions surround how to do more with Views. If you are interested in discovering how to work with nested Views, learn about view disposal and inheritance, this section will hopefully have you covered.
Problem
What is the best approach for rendering and appending nested Views (or Subviews) in Backbone.js?
Solution 1
Since pages are composed of nested elements and Backbone views correspond to elements within the page, nesting views is an intuitive approach to managing a hierarchy of elements.
The best way to combine views is simply using:
this.$('.someContainer').append(innerView.el);which just relies on jQuery. We could use this in a real example as follows:
...
initialize : function () {
    //...
},

render : function () {

    this.$el.empty();

    this.innerView1 = new Subview({options});
    this.innerView2 = new Subview({options});

    this.$('.inner-view-container')
        .append(this.innerView1.el)
        .append(this.innerView2.el);
}
Solution 2
Beginners sometimes also try using setElement to solve this problem, however keep in mind that using this method is an easy way to shoot yourself in the foot. Avoid using this approach when the first solution is a viable option:
// Where we have previously defined a View, SubView
// in a parent View we could do:

...
initialize : function () {

    this.innerView1 = new Subview({options});
    this.innerView2 = new Subview({options});
},

render : function () {

    this.$el.html(this.template());

    this.innerView1.setElement('.some-element1').render();
    this.innerView2.setElement('.some-element2').render();
}
Here we are creating subviews in the parent view’s initialize() method and rendering the subviews in the parent’s render() method. The elements managed by the subviews exist in the parent’s template and the View.setElement() method is used to re-assign the element associated with each subview.
setElement() changes a view’s element, including re-delegating event handlers by removing them from the old element and binding them to the new element. Note that setElement() returns the view, allowing us to chain the call to render().
This works and has some positive qualities: you don’t need to worry about maintaining the order of your DOM elements when appending, views are initialized early, and the render() method doesn’t need to take on too many responsibilities at once.
Unfortunately, downsides are that you can’t set the tagName property of subviews and events need to be re-delegated. The first solution doesn’t suffer from this problem.
Solution 3
One more possible solution to this problem could be written:
var OuterView = Backbone.View.extend({
    initialize: function() {
        this.inner = new InnerView();
    },

    render: function() {
        this.$el.html(template); // or this.$el.empty() if you have no template
        this.$el.append(this.inner.$el);
        this.inner.render();
    }
});

var InnerView = Backbone.View.extend({
    render: function() {
        this.$el.html(template);
        this.delegateEvents();
    }
});
This tackles a few specific design decisions:
Note that InnerView needs to call View.delegateEvents() to bind its event handlers to its new DOM since it is replacing the content of its element.
Solution 4
A better solution, which is more clean but has the potential to affect performance is:
var OuterView = Backbone.View.extend({
    initialize: function() {
        this.render();
    },

    render: function() {
        this.$el.html(template); // or this.$el.empty() if you have no template
        this.inner = new InnerView();
        this.$el.append(this.inner.$el);
    }
});

var InnerView = Backbone.View.extend({
    initialize: function() {
        this.render();
    },

    render: function() {
        this.$el.html(template);
    }
});
If multiple views need to be nested at particular locations in a template, a hash of child views indexed by child view cids’ should be created. In the template, use a custom HTML attribute named data-view-cid to create placeholder elements for each view to embed. Once the template has been rendered and its output appended to the parent view’s $el, each placeholder can be queried for and replaced with the child view’s el.
A sample implementation containing a single child view could be written:
var OuterView = Backbone.View.extend({
    initialize: function() {
        this.children = {};
        this.child = new Backbone.View();
        this.children[this.child.cid] = this.child;
    },

    render: function() {
        this.$el.html('<div data-view-cid="' + this.child.cid + '"></div>');
        _.each(this.children, function(view, cid) {
            this.$('[data-view-cid="' + cid + '"]').replaceWith(view.el);
        }, this);
    }
};
The use of cids (client ids) here is useful because it illustrates separating a model and its views by having views referenced by their instances and not their attributes. It’s quite common to ask for all views that satisfy an attribute on their models, but if you have recursive subviews or repeated views (a common occurrance), you can’t simply ask for views by attributes. That is, unless you specify additional attributes that separate duplicates. Using cids solves this problem as it allows for direct references to views.
Generally speaking, more developers opt for Solution 1 or 5 as:
The Backbone extensions Marionette and Thorax provide logic for nesting views, and rendering collections where each item has an associated view. Marionette provides APIs in JavaScript while Thorax provides APIs via Handlebars template helpers. We will examine both of these in an upcoming chapter.
(Thanks to Lukas and Ian Taylor for these tips).
Problem
What is the best way to manage models in nested views?
Solution
In order to reach attributes on related models in a nested setup, models require some prior knowledge of each other, something which Backbone doesn’t implicitly handle out of the box.
One approach is to make sure each child model has a ‘parent’ attribute. This way you can traverse the nesting first up to the parent and then down to any siblings that you know of. So, assuming we have models modelA, modelB and modelC:
// When initializing modelA, I would suggest setting a link to the parent
// model when doing this, like this:

ModelA = Backbone.Model.extend({

    initialize: function(){
        this.modelB = new modelB();
        this.modelB.parent = this;
        this.modelC = new modelC();
        this.modelC.parent = this;
    }
}
This allows you to reach the parent model in any child model function through this.parent.
Now, we have already discussed a few options for how to construct nested Views using Backbone. For the sake of simplicity, let us imagine that we are creating a new child view ViewB from within the initialize() method of ViewA below. ViewB can reach out over the ViewA model and listen out for changes on any of its nested models.
See inline for comments on exactly what each step is enabling:
// Define View A
ViewA = Backbone.View.extend({

    initialize: function(){
       // Create an instance of View B
       this.viewB = new ViewB();

       // Create a reference back to this (parent) view
       this.viewB.parentView = this;

       // Append ViewB to ViewA
       $(this.el).append(this.viewB.el);
    }
});

// Define View B
ViewB = Backbone.View.extend({

    //...,

    initialize: function(){
        // Listen for changes to the nested models in our parent ViewA
        this.listenTo(this.model.parent.modelB, "change", this.render);
        this.listenTo(this.model.parent.modelC, "change", this.render);

        // We can also call any method on our parent view if it is defined
        // $(this.parentView.el).shake();
    }

});

// Create an instance of ViewA with ModelA
// viewA will create its own instance of ViewB
// from inside the initialize() method
var viewA = new ViewA({ model: ModelA });Problem
How would one render a Parent View from one of its Children?
Solution
In a scenario where you have a view containing another view, such as a photo gallery containing a larger view modal, you may find that you need to render or re-render the parent view from the child. The good news is that solving this problem is quite straight-forward.
The simplest solution is to just use this.parentView.render();.
If however inversion of control is desired, events may be used to provide an equally valid solution.
Say we wish to begin rendering when a particular event has occurred. For the sake of example, let us call this event ‘somethingHappened’. The parent view can bind notifications on the child view to know when the event has occurred. It can then render itself.
In the parent view:
// Parent initialize
this.listenTo(this.childView, 'somethingHappened', this.render);

// Parent removal
this.stopListening(this.childView, 'somethingHappened');
In the child view:
// After the event has occurred
this.trigger('somethingHappened');
The child will trigger a “somethingHappened” event and the parent’s render function will be called.
(Thanks to Tal Bereznitskey for this tip)
Problem
Where your application is setup with multiple Parent and Child Views, it is also common to desire removing any DOM elements associated with such views as well as unbinding any event handlers tied to child elements when you no longer require them.
Solution
The solution in the last question should be enough to handle this use case, but if you require a more explicit example that handles children, we can see one below:
Backbone.View.prototype.close = function() {
    if (this.onClose) {
        this.onClose();
    }
    this.remove();
};

NewView = Backbone.View.extend({
    initialize: function() {
       this.childViews = [];
    },
    renderChildren: function(item) {
        var itemView = new NewChildView({ model: item });
        $(this.el).prepend(itemView.render());
        this.childViews.push(itemView);
    },
    onClose: function() {
      _(this.childViews).each(function(view) {
        view.close();
      });
    }
});

NewChildView = Backbone.View.extend({
    tagName: 'li',
    render: function() {
    }
});
Here, a close() method for views is implemented which disposes of a view when it is no longer needed or needs to be reset.
In most cases, the view removal should not affect any associated models. For example, if you are working on a blogging application and you remove a view with comments, perhaps another view in your app shows a selection of comments and resetting the collection would affect those views as well.
(Thanks to dira for this tip)
Note: You may also be interested in reading the about Marionette Composite Views in the Extensions part of the book.
Problem
Let us say you have a Collection, where each item in the Collection could itself be a Collection. You can render each item in the Collection, and indeed can render any items which themselves are Collections. The problem you might have is how to render HTML that reflects the hierarchical nature of the data structure.
Solution
The most straight-forward way to approach this problem is to use a framework like Derick Bailey’s Backbone.Marionette. In this framework is a type of view called a CompositeView.
The basic idea of a CompositeView is that it can render a model and a collection within the same view.
It can render a single model with a template. It can also take a collection from that model and for each model in that collection, render a view. By default it uses the same composite view type that you’ve defined to render each of the models in the collection. All you have to do is tell the view instance where the collection is, via the initialize method, and you’ll get a recursive hierarchy rendered.
There is a working demo of this in action available online.
And you can get the source code and documentation for Marionette too.
Problem
Backbone doesn’t include support for nested models or collections out of the box, favoring the use of good patterns for modeling your structured data on the client side. How do I work around this?
Solution
As we’ve seen, it’s common to create collections representing groups of models using Backbone. It’s also however common to wish to nest collections within models, depending on the type of application you are working on.
Take for example a Building model that contains many Room models which could sit in a Rooms collection.
You could expose a this.rooms collection for each building, allowing you to lazy-load rooms once a building has been opened.
var Building = Backbone.Model.extend({

    initialize: function(){
        this.rooms = new Rooms;
        this.rooms.url = '/building/' + this.id + '/rooms';
        this.rooms.on("reset", this.updateCounts);
    },

    // ...

});

// Create a new building model
var townHall = new Building;

// once opened, lazy-load the rooms
townHall.rooms.fetch({reset: true});
There are also a number of Backbone plugins which can help with nested data structures, such as Backbone Relational. This plugin handles one-to-one, one-to-many and many-to-one relations between models for Backbone and has some excellent documentation.
Problem
As we learned earlier in the book, the validate method on a Model is called by set (when the validate option is set) and save. It is passed the model attributes updated with the values passed to these methods.
By default, when we define a custom validate method, Backbone passes all of a model’s attributes through this validation each time, regardless of which model attributes are being set.
This means that it can be a challenge to determine which specific fields are being set or validated without being concerned about the others that aren’t being set at the same time.
Solution
To illustrate this problem better, let us look at a typical registration form use case that:
Here is one example of a desired use case:
We have a form where a user focuses and blurs first name, last name, and email HTML input boxes without entering any data. A “this field is required” message should be presented next to each form field.
HTML:
<!doctype html>
<html>
<head>
  <meta charset=utf-8>
  <title>Form Validation - Model#validate</title>
  <script src='http://code.jquery.com/jquery.js'></script>
  <script src='http://underscorejs.org/underscore.js'></script>
  <script src='http://backbonejs.org/backbone.js'></script>
</head>
<body>
  <form>
    <label>First Name</label>
    <input name='firstname'>
    <span data-msg='firstname'></span>
    <br>
    <label>Last Name</label>
    <input name='lastname'>
    <span data-msg='lastname'></span>
    <br>
    <label>Email</label>
    <input name='email'>
    <span data-msg='email'></span>
  </form>
</body>
</html>
Basic validation that could be written using the current Backbone validate method to work with this form could be implemented using something like:
validate: function(attrs) {

    if(!attrs.firstname) return 'first name is empty';
    if(!attrs.lastname) return 'last name is empty';
    if(!attrs.email) return 'email is empty';

}
Unfortunately, this method would trigger a firstname error each time any of the fields were blurred and only an error message next to the first name field would be presented.
One potential solution to the problem is to validate all fields and return all of the errors:
validate: function(attrs) {
  var errors = {};

  if (!attrs.firstname) errors.firstname = 'first name is empty';
  if (!attrs.lastname) errors.lastname = 'last name is empty';
  if (!attrs.email) errors.email = 'email is empty';

  if (!_.isEmpty(errors)) return errors;
}
This can be adapted into a solution that defines a Field model for each input in our form and works within the parameters of our use case as follows:
$(function($) {

  var User = Backbone.Model.extend({
    validate: function(attrs) {
      var errors = this.errors = {};

      if (!attrs.firstname) errors.firstname = 'firstname is required';
      if (!attrs.lastname) errors.lastname = 'lastname is required';
      if (!attrs.email) errors.email = 'email is required';

      if (!_.isEmpty(errors)) return errors;
    }
  });

  var Field = Backbone.View.extend({
    events: {blur: 'validate'},
    initialize: function() {
      this.name = this.$el.attr('name');
      this.$msg = $('[data-msg=' + this.name + ']');
    },
    validate: function() {
      this.model.set(this.name, this.$el.val());
      this.$msg.text(this.model.errors[this.name] || '');
    }
  });

  var user = new User;

  $('input').each(function() {
    new Field({el: this, model: user});
  });

});
This works fine as the solution checks the validation for each attribute individually and sets the message for the correct blurred field. A demo of the above by @braddunbar is also available.
Unfortunately, this solution does perform validation on all fields every time, even though we are only displaying errors for the field that has changed. If we have multiple client-side validation methods, we may not want to have to call each validation method on every attribute every time, so this solution might not be ideal for everyone.
A potentially better alternative to the above is to use @gfranko’s Backbone.validateAll plugin, specifically created to validate specific Model properties (or form fields) without worrying about the validation of any other Model properties (or form fields).
Here is how we would setup a partial User Model and validate method using this plugin for our use case:
// Create a new User Model
var User = Backbone.Model.extend({

      // RegEx Patterns
      patterns: {

          specialCharacters: '[^a-zA-Z 0-9]+',

          digits: '[0-9]',

          email: '^[a-zA-Z0-9._-]+@[a-zA-Z0-9][a-zA-Z0-9.-]*[.]{1}[a-zA-Z]{2,6}$'
      },

    // Validators
      validators: {

          minLength: function(value, minLength) {
            return value.length >= minLength;

          },

          maxLength: function(value, maxLength) {
            return value.length <= maxLength;

          },

          isEmail: function(value) {
            return User.prototype.validators.pattern(value, User.prototype.patterns.email);

          },

          hasSpecialCharacter: function(value) {
            return User.prototype.validators.pattern(value, User.prototype.patterns.specialCharacters);

          },
         ...

    // We can determine which properties are getting validated by
    // checking to see if properties are equal to null

        validate: function(attrs) {

          var errors = this.errors = {};

          if(attrs.firstname != null) {
              if (!attrs.firstname) {
                  errors.firstname = 'firstname is required';
                  console.log('first name isEmpty validation called');
              }

              else if(!this.validators.minLength(attrs.firstname, 2))
                errors.firstname = 'firstname is too short';
              else if(!this.validators.maxLength(attrs.firstname, 15))
                errors.firstname = 'firstname is too large';
              else if(this.validators.hasSpecialCharacter(attrs.firstname)) errors.firstname = 'firstname cannot contain special characters';
          }

          if(attrs.lastname != null) {

              if (!attrs.lastname) {
                  errors.lastname = 'lastname is required';
                  console.log('last name isEmpty validation called');
              }

              else if(!this.validators.minLength(attrs.lastname, 2))
                errors.lastname = 'lastname is too short';
              else if(!this.validators.maxLength(attrs.lastname, 15))
                errors.lastname = 'lastname is too large';
              else if(this.validators.hasSpecialCharacter(attrs.lastname)) errors.lastname = 'lastname cannot contain special characters';

          }
This allows the logic inside of our validate methods to determine which form fields are currently being set/validated, and ignore the model properties that are not being set.
It’s fairly straight-forward to use as well. We can simply define a new Model instance and then set the data on our model using the validateAll option to use the behavior defined by the plugin:
var user = new User();
user.set({ 'firstname': 'Greg' }, {validate: true, validateAll: false});
That’s it. The Backbone.validateAll logic doesn’t override the default Backbone logic by default and so it’s perfectly capable of being used for scenarios where you might care more about field-validation performance as well as those where you don’t. Both solutions presented in this section should work fine however.
As we’ve seen, the validate method Backbone offers is undefined by default and you need to override it with your own custom validation logic to get model validation in place. Often developers run into the issue of implementing this validation as nested ifs and elses, which can become unmaintainable when things get complicated.
Another helpful plugin for Backbone called Backbone.Validation attempts to solve this problem by offering an extensible way to declare validation rules on the model and overrides the validate method behind the scenes.
One of the useful methods this plugin includes is (pseudo) live validation via a preValidate method. This can be used to check on key-press if the input for a model is valid without changing the model itself. You can run any validators for a model attribute by calling the preValidate method, passing it the name of the attribute along with the value you would like validated.
// If the value of the attribute is invalid, a truthy error message is returned
// if not, it returns a falsy value

var errorMsg = user.preValidate('firstname', 'Greg');That said, the most optimal solution to this problem may not be to stick validation in your model attributes. Instead, you could have a function specifically designed for validating a specific form and there are many good JavaScript form validation libraries out there that can help with this.
If you want to stick it on your model, you can also make it a class function:
User.validate = function(formElement) {
//...
};For more information on validation plugins available for Backbone, see the Backbone wiki.
Problem
In instances out of your control, you may have to work around having more than one version of Backbone in the same page. How do you work around this without causing conflicts?
Solution
Like most client-side projects, Backbone’s code is wrapped in an immediately-invoked function expression:
(function(){
// Backbone.js
}).call(this);Several things happen during this configuration stage. A Backbone namespace is created, and multiple versions of Backbone on the same page are supported through the noConflict mode:
var root = this;
var previousBackbone = root.Backbone;
Backbone.noConflict = function() {
root.Backbone = previousBackbone;
return this;
};Multiple versions of Backbone can be used on the same page by calling noConflict like this:
var Backbone19 = Backbone.noConflict();
// Backbone19 refers to the most recently loaded version,
// and `window.Backbone` will be restored to the previously
// loaded versionProblem
How does inheritence work with Backbone? How can I share code between similar models and views? How can I call methods that have been overridden?
Solution
For its inheritance, Backbone internally uses an inherits function inspired by goog.inherits, Google’s implementation from the Closure Library. It’s basically a function to correctly setup the prototype chain.
var inherits = function(parent, protoProps, staticProps) {
...The only major difference here is that Backbone’s API accepts two objects containing instance and static methods.
Following on from this, for inheritance purposes all of Backbone’s objects contain an extend method as follows:
Model.extend = Collection.extend = Router.extend = View.extend = extend;Most development with Backbone is based around inheriting from these objects, and they’re designed to mimic a classical object-oriented implementation.
The above isn’t quite the same as ECMAScript 5’s Object.create, as it’s actually copying properties (methods and values) from one object to another. As this isn’t enough to support Backbone’s inheritance and class model, the following steps are performed:
prototype property of a blank constructor function is assigned with the parent’s prototype, and a new instance of this is set to the child’s prototype property__super__ property are assignedextend can be used for a great deal more and developers who are fans of mixins will like that it can be used for this too. You can define functionality on any custom object, and then quite literally copy & paste all of the methods and attributes from that object to a Backbone one:
For example:
var MyMixin = {
foo: 'bar',
sayFoo: function(){alert(this.foo);}
};
var MyView = Backbone.View.extend({
// ...
});
_.extend(MyView.prototype, MyMixin);
var myView = new MyView();
myView.sayFoo(); //=> 'bar'We can take this further and also apply it to View inheritance. The following is an example of how to extend one View using another:
var Panel = Backbone.View.extend({
});
var PanelAdvanced = Panel.extend({
});Calling Overridden Methods
However, if you have an initialize() method in Panel, then it won’t be called if you also have an initialize() method in PanelAdvanced, so you would have to call Panel’s initialize method explicitly:
var Panel = Backbone.View.extend({
initialize: function(options){
console.log('Panel initialized');
this.foo = 'bar';
}
});
var PanelAdvanced = Panel.extend({
initialize: function(options){
Panel.prototype.initialize.call(this, [options]);
console.log('PanelAdvanced initialized');
console.log(this.foo); // Log: bar
}
});
// We can also inherit PanelAdvaned if needed
var PanelAdvancedExtra = PanelAdvanced.extend({
initialize: function(options){
PanelAdvanced.prototype.initialize.call(this, [options]);
console.log('PanelAdvancedExtra initialized');
}
});
new Panel();
new PanelAdvanced();
new PanelAdvancedExtra();This isn’t the most elegant of solutions because if you have a lot of Views that inherit from Panel, then you’ll have to remember to call Panel’s initialize from all of them.
It’s worth noting that if Panel doesn’t have an initialize method now but you choose to add it in the future, then you’ll need to go to all of the inherited classes in the future and make sure they call Panel’s initialize.
So here’s an alternative way to define Panel so that your inherited views don’t need to call Panel’s initialize method:
var Panel = function (options) {
// put all of Panel's initialization code here
console.log('Panel initialized');
this.foo = 'bar';
Backbone.View.apply(this, [options]);
};
_.extend(Panel.prototype, Backbone.View.prototype, {
// put all of Panel's methods here. For example:
sayHi: function () {
console.log('hello from Panel');
}
});
Panel.extend = Backbone.View.extend;
// other classes then inherit from Panel like this:
var PanelAdvanced = Panel.extend({
initialize: function (options) {
console.log('PanelAdvanced initialized');
console.log(this.foo);
}
});
var panelAdvanced = new PanelAdvanced(); //Logs: Panel initialized, PanelAdvanced initialized, bar
panelAdvanced.sayHi(); // Logs: hello from PanelWhen used appropriately, Underscore’s extend method can save a great deal of time and effort writing redundant code.
(Thanks to Alex Young, Derick Bailey and JohnnyO for the heads up about these tips).
Backbone-Super
Backbone-Super by Lukas Olson adds a _super method to Backbone.Model using John Resig’s Inheritance script. Rather than using Backbone.Model.prototype.set.call as per the Backbone.js documentation, _super can be called instead:
// This is how we normally do it
var OldFashionedNote = Backbone.Model.extend({
set: function(attributes, options) {
// Call parent's method
Backbone.Model.prototype.set.call(this, attributes, options);
// some custom code here
// ...
}
});After including this plugin, you can do the same thing with the following syntax:
// This is how we can do it after using the Backbone-super plugin
var Note = Backbone.Model.extend({
set: function(attributes, options) {
// Call parent's method
this._super(attributes, options);
// some custom code here
// ...
}
});Problem
How do I channel multiple event sources through a single object?
Solution
Using an Event Aggregator. It’s common for developers to think of Mediators when faced with this problem, so let’s explore what an Event Aggregator is, what the Mediator pattern is and how they differ.
Design patterns often differ only in semantics and intent. That is, the language used to describe the pattern is what sets it apart, more than an implementation of that specific pattern. It often comes down to squares vs rectangles vs polygons. You can create the same end result with all three, given the constraints of a square are still met – or you can use polygons to create an infinitely larger and more complex set of things.
When it comes to the Mediator and Event Aggregator patterns, there are some times where it may look like the patterns are interchangeable due to implementation similarities. However, the semantics and intent of these patterns are very different. And even if the implementations both use some of the same core constructs, I believe there is a distinct difference between them. I also believe they should not be interchanged or confused in communication because of the differences.
The core idea of the Event Aggregator, according to Martin Fowler, is to channel multiple event sources through a single object so that other objects needing to subscribe to the events don’t need to know about every event source.
The easiest event aggregator to show is that of Backbone.js – it’s built into the Backbone object directly.
var View1 = Backbone.View.extend({
// ...
events: {
"click .foo": "doIt"
},
doIt: function(){
// trigger an event through the event aggregator
Backbone.trigger("some:event");
}
});
var View2 = Backbone.View.extend({
// ...
initialize: function(){
// subscribe to the event aggregator's event
Backbone.on("some:event", this.doStuff, this);
},
doStuff: function(){
// ...
}
})In this example, the first view is triggering an event when a DOM element is clicked. The event is triggered through Backbone’s built-in event aggregator – the Backbone object. Of course, it’s trivial to create your own event aggregator in Backbone, and there are some key things that we need to keep in mind when using an event aggregator, to keep our code simple.
Did you know that jQuery has a built-in event aggregator? They don’t call it this, but it’s in there and it’s scoped to DOM events. It also happens to look like Backbone’s event aggregator:
$("#mainArticle").on("click", function(e){
// handle click event on any element underneath our #mainArticle element
});This code sets up an event handler function that waits for an unknown number of event sources to trigger a “click” event, and it allows any number of listeners to attach to the events of those event publishers. jQuery just happens to scope this event aggregator to the DOM.
A Mediator is an object that coordinates interactions (logic and behavior) between multiple objects. It makes decisions on when to call which objects, based on the actions (or inaction) of other objects and input.
A Mediator For Backbone
Backbone doesn’t have the idea of a mediator built into it like a lot of other MV* frameworks do. But that doesn’t mean you can’t write one using a single line of code:
var mediator = {};Yes, of course this is just an object literal in JavaScript. Once again, we’re talking about semantics here. The purpose of the mediator is to control the workflow between objects and we really don’t need anything more than an object literal to do this.
var orgChart = {
addNewEmployee: function(){
// getEmployeeDetail provides a view that users interact with
var employeeDetail = this.getEmployeeDetail();
// when the employee detail is complete, the mediator (the 'orgchart' object)
// decides what should happen next
employeeDetail.on("complete", function(employee){
// set up additional objects that have additional events, which are used
// by the mediator to do additional things
var managerSelector = this.selectManager(employee);
managerSelector.on("save", function(employee){
employee.save();
});
});
},
// ...
}This example shows a very basic implementation of a mediator object with Backbone-based objects that can trigger and subscribe to events. I’ve often referred to this type of object as a “workflow” object in the past, but the truth is that it is a mediator. It is an object that handles the workflow between many other objects, aggregating the responsibility of that workflow knowledge into a single object. The result is workflow that is easier to understand and maintain.
There are, without a doubt, similarities between the event aggregator and mediator examples that I’ve shown here. The similarities boil down to two primary items: events and third-party objects. These differences are superficial at best, though. When we dig into the intent of the pattern and see that the implementations can be dramatically different, the nature of the patterns become more apparent.
Both the event aggregator and mediator use events, in the above examples. An event aggregator obviously deals with events – it’s in the name after all. The mediator only uses events because it makes life easy when dealing with Backbone, though. There is nothing that says a mediator must be built with events. You can build a mediator with callback methods, by handing the mediator reference to the child object, or by any of a number of other means.
The difference, then, is why these two patterns are both using events. The event aggregator, as a pattern, is designed to deal with events. The mediator, though, only uses them because it’s convenient.
Both the event aggregator and mediator, by design, use a third-party object to facilitate things. The event aggregator itself is a third-party to the event publisher and the event subscriber. It acts as a central hub for events to pass through. The mediator is also a third party to other objects, though. So where is the difference? Why don’t we call an event aggregator a mediator? The answer largely comes down to where the application logic and workflow is coded.
In the case of an event aggregator, the third party object is there only to facilitate the pass-through of events from an unknown number of sources to an unknown number of handlers. All workflow and business logic that needs to be kicked off is put directly into the the object that triggers the events and the objects that handle the events.
In the case of the mediator, though, the business logic and workflow is aggregated into the mediator itself. The mediator decides when an object should have it’s methods called and attributes updated based on factors that the mediator knows about. It encapsulates the workflow and process, coordinating multiple objects to produce the desired system behaviour. The individual objects involved in this workflow each know how to perform their own task. But it’s the mediator that tells the objects when to perform the tasks by making decisions at a higher level than the individual objects.
An event aggregator facilitates a “fire and forget” model of communication. The object triggering the event doesn’t care if there are any subscribers. It just fires the event and moves on. A mediator, though, might use events to make decisions, but it is definitely not “fire and forget”. A mediator pays attention to a known set of input or activities so that it can facilitate and coordinate additional behavior with a known set of actors (objects).
Understanding the similarities and differences between an event aggregator and mediator is important for semantic reasons. It’s equally as important to understand when to use which pattern, though. The basic semantics and intent of the patterns does inform the question of when, but actual experience in using the patterns will help you understand the more subtle points and nuanced decisions that have to be made.
In general, an event aggregator is used when you either have too many objects to listen to directly, or you have objects that are entirely unrelated.
When two objects have a direct relationship already – say, a parent view and child view – then there might be little benefit in using an event aggregator. Have the child view trigger an event and the parent view can handle the event. This is most commonly seen in Backbone’s Collection and Model, where all Model events are bubbled up to and through it’s parent Collection. A Collection often uses model events to modify the state of itself or other models. Handling “selected” items in a collection is a good example of this.
jQuery’s on method as an event aggregator is a great example of too many objects to listen to. If you have 10, 20 or 200 DOM elements that can trigger a “click” event, it might be a bad idea to set up a listener on all of them individually. This could quickly deteriorate performance of the application and user experience. Instead, using jQuery’s on method allows us to aggregate all of the events and reduce the overhead of 10, 20, or 200 event handlers down to 1.
Indirect relationships are also a great time to use event aggregators. In Backbone applications, it is very common to have multiple view objects that need to communicate, but have no direct relationship. For example, a menu system might have a view that handles the menu item clicks. But we don’t want the menu to be directly tied to the content views that show all of the details and information when a menu item is clicked. Having the content and menu coupled together would make the code very difficult to maintain, in the long run. Instead, we can use an event aggregator to trigger “menu:click:foo” events, and have a “foo” object handle the click event to show it’s content on the screen.
A mediator is best applied when two or more objects have an indirect working relationship, and business logic or workflow needs to dictate the interactions and coordination of these objects.
A wizard interface is a good example of this, as shown with the “orgChart” example, above. There are multiple views that facilitate the entire workflow of the wizard. Rather than tightly coupling the view together by having them reference each other directly, we can decouple them and more explicitly model the workflow between them by introducing a mediator.
The mediator extracts the workflow from the implementation details and creates a more natural abstraction at a higher level, showing us at a much faster glance what that workflow is. We no longer have to dig into the details of each view in the workflow, to see what the workflow actually is.
The crux of the difference between an event aggregator and a mediator, and why these pattern names should not be interchanged with each other, is illustrated best by showing how they can be used together. The menu example for an event aggregator is the perfect place to introduce a mediator as well.
Clicking a menu item may trigger a series of changes throughout an application. Some of these changes will be independent of others, and using an event aggregator for this makes sense. Some of these changes may be internally related to each other, though, and may use a mediator to enact those changes. A mediator, then, could be set up to listen to the event aggregator. It could run it’s logic and process to facilitate and coordinate many objects that are related to each other, but unrelated to the original event source.
var MenuItem = Backbone.View.extend({
events: {
"click .thatThing": "clickedIt"
},
clickedIt: function(e){
e.preventDefault();
// assume this triggers "menu:click:foo"
Backbone.trigger("menu:click:" + this.model.get("name"));
}
});
// ... somewhere else in the app
var MyWorkflow = function(){
Backbone.on("menu:click:foo", this.doStuff, this);
};
MyWorkflow.prototype.doStuff = function(){
// instantiate multiple objects here.
// set up event handlers for those objects.
// coordinate all of the objects into a meaningful workflow.
};In this example, when the MenuItem with the right model is clicked, the “menu:click:foo” event will be triggered. An instance of the “MyWorkflow” object, assuming one is already instantiated, will handle this specific event and will coordinate all of the objects that it knows about, to create the desired user experience and workflow.
An event aggregator and a mediator have been combined to create a much more meaningful experience in both the code and the application itself. We now have a clean separation between the menu and the workflow through an event aggregator and we are still keeping the workflow itself clean and maintainable through the use of a mediator.
There is one overriding point to make in all of this discussion: semantics. Communicating intent and semantics through the use of named patterns is only viable and only valid when all parties in a communication medium understand the language in the same way.
If I say “apple”, what am I talking about? Am I talking about a fruit? Or am I talking about a technology and consumer products company? As Sharon Cichelli says: “semantics will continue to be important, until we learn how to communicate in something other than language”.
When we say an application is modular, we generally mean it’s composed of a set of highly decoupled, distinct pieces of functionality stored in modules. As you probably know, loose coupling facilitates easier maintainability of apps by removing dependencies where possible. When this is implemented efficiently, it’s quite easy to see how changes to one part of a system may affect another.
Unlike some more traditional programming languages, the current iteration of JavaScript (ECMA-262) doesn’t provide developers with the means to import such modules of code in a clean, organized manner.
Instead, developers are left to fall back on variations of the module or object literal patterns combined with script tags or a script loader. With many of these, module scripts are strung together in the DOM with namespaces being described by a single global object where it’s still possible to have name collisions. There’s also no clean way to handle dependency management without some manual effort or third party tools.
Whilst native solutions to these problems may be arriving via ES6 (the next version of the official JavaScript specification) modules proposal, the good news is that writing modular JavaScript has never been easier and you can start doing it today.
In this next part of the book, we’re going to look at how to use AMD modules and RequireJS to cleanly wrap units of code in your application into manageable modules. We’ll also cover an alternate approach called Lumbar which uses routes to determine when modules are loaded.
Partly Contributed by Jack Franklin
RequireJS is a popular script loader written by James Burke - a developer who has been quite instrumental in helping shape the AMD module format, which we’ll discuss shortly. Amongst other things RequireJS helps you to load multiple script files, define modules with or without dependencies, and load in non-script dependencies such as text files.
You might be thinking that there is little benefit to RequireJS. After all, you can simply load in your JavaScript files through multiple <script> tags, which is very straightforward. However, doing it that way has a lot of drawbacks, including increasing the HTTP overhead.
Every time the browser loads in a file you’ve referenced in a <script> tag, it makes an HTTP request to load the file’s contents. It has to make a new HTTP request for each file you want to load, which causes problems.
What tools like RequireJS do is load scripts asynchronously. This means we have to adjust our code slightly, you can’t just swap out <script> elements for a small piece of RequireJS code, but the benefits are very worthwhile:
Dependency management is a challenging subject, in particular when writing JavaScript in the browser. The closest thing we have to dependency management by default is simply making sure we order our <script> tags such that code that depends on code in another file is loaded after the file it depends on. This is not a good approach. As I’ve already discussed, loading multiple files in that way is bad for performance; needing them to be loaded in a certain order is very brittle.
Being able to load code on an as-needed basis is something RequireJS is very good at. Rather than load all our JavaScript code in during initial page load, a better approach is to dynamically load modules when that code is required. This avoids loading all the code when the user first hits your application, consequently speeding up initial load times.
Think about the GMail web client for a moment. When a user initially loads the page on their first visit, Google can simply hide widgets such as the chat module until the user has indicated (by clicking ‘expand’) that they wish to use it. Through dynamic dependency loading, Google could load up the chat module at that time, rather than forcing all users to load it when the page first initializes. This can improve performance and load times and can definitely prove useful when building larger applications. As the codebase for an application grows this becomes even more important.
The important thing to note here is that while it’s absolutely fine to develop applications without a script loader, there are significant benefits to utilizing tools like RequireJS in your application.
RequireJS implements the AMD Specification which defines a method for writing modular code and managing dependencies. The RequireJS website also has a section documenting the reasons behind implementing AMD:
The AMD format comes from wanting a module format that was better than today’s “write a bunch of script tags with implicit dependencies that you have to manually order” and something that was easy to use directly in the browser. Something with good debugging characteristics that did not require server-specific tooling to get started.
As discussed above, the overall goal for the AMD format is to provide a solution for modular JavaScript that developers can use today. The two key concepts you need to be aware of when using it with a script-loader are the define() method for defining modules and the require() method for loading dependencies. define() is used to define named or unnamed modules using the following signature:
define(
module_id /*optional*/,
[dependencies] /*optional*/,
definition function /*function for instantiating the module or object*/
);As you can tell by the inline comments, the module_id is an optional argument which is typically only required when non-AMD concatenation tools are being used (there may be some other edge cases where it’s useful too). When this argument is left out, we call the module ‘anonymous’. When working with anonymous modules, RequireJS will use a module’s file path as its module id, so the adage Don’t Repeat Yourself (DRY) should be applied by omitting the module id in the define() invocation.
The dependencies argument is an array representing all of the other modules that this module depends on and the third argument is a factory that can either be a function that should be executed to instantiate the module or an object.
A barebones module (compatible with RequireJS) could be defined using define() as follows:
// A module ID has been omitted here to make the module anonymous
define(['foo', 'bar'],
// module definition function
// dependencies (foo and bar) are mapped to function parameters
function ( foo, bar ) {
// return a value that defines the module export
// (i.e the functionality we want to expose for consumption)
// create your module here
var myModule = {
doStuff:function(){
console.log('Yay! Stuff');
}
}
return myModule;
});Note: RequireJS is intelligent enough to automatically infer the ‘.js’ extension to your script file names. As such, this extension is generally omitted when specifying dependencies.
There is also a sugared version of define() available that allows you to declare your dependencies as local variables using require(). This will feel familiar to anyone who’s used node, and can be easier to add or remove dependencies. Here is the previous snippet using the alternate syntax:
// A module ID has been omitted here to make the module anonymous
define(function(require){
// module definition function
// dependencies (foo and bar) are defined as local vars
var foo = require('foo'),
bar = require('bar');
// return a value that defines the module export
// (i.e the functionality we want to expose for consumption)
// create your module here
var myModule = {
doStuff:function(){
console.log('Yay! Stuff');
}
}
return myModule;
});The require() method is typically used to load code in a top-level JavaScript file or within a module should you wish to dynamically fetch dependencies. An example of its usage is:
// Consider 'foo' and 'bar' are two external modules
// In this example, the 'exports' from the two modules loaded are passed as
// function arguments to the callback (foo and bar)
// so that they can similarly be accessed
require( ['foo', 'bar'], function ( foo, bar ) {
// rest of your code here
foo.doSomething();
});Addy’s post on Writing Modular JS covers the AMD specification in much more detail. Defining and using modules will be covered in this book shortly when we look at more structured examples of using RequireJS.
Before using RequireJS and Backbone we will first set up a very basic RequireJS project to demonstrate how it works. The first thing to do is to Download RequireJS. When you load in the RequireJS script in your HTML file, you need to also tell it where your main JavaScript file is located. Typically this will be called something like “app.js”, and is the main entry point for your application. You do this by adding in a data-main attribute to the script tag:
<script data-main="app.js" src="lib/require.js"></script>Now, RequireJS will automatically load app.js for you.
In the main JavaScript file that you load with the data-main attribute you can configure how RequireJS loads the rest of your application. This is done by calling require.config, and passing in an object:
require.config({
// your configuration key/values here
baseUrl: "app", // generally the same directory as the script used in a data-main attribute for the top level script
paths: {}, // set up custom paths to libraries, or paths to RequireJS plugins
shim: {}, // used for setting up all Shims (see below for more detail)
});The main reason you’d want to configure RequireJS is to add shims, which we’ll cover next. To see other configuration options available to you, I recommend checking out the RequireJS documentation.
Ideally, each library that we use with RequireJS will come with AMD support. That is, it uses the define method to define the library as a module. However, some libraries - including Backbone and one of its dependencies, Underscore - don’t do this. Fortunately RequireJS comes with a way to work around this.
To demonstrate this, first let’s shim Underscore, and then we’ll shim Backbone too. Shims are very simple to implement:
require.config({
shim: {
'lib/underscore': {
exports: '_'
}
}
});Note that when specifying paths for RequireJS you should omit the .js from the end of script names.
The important line here is exports: '_'. This line tells RequireJS that the script in 'lib/underscore.js' creates a global variable called _ instead of defining a module. Now when we list Underscore as a dependency RequireJS will know to give us the _ global variable as though it was the module defined by that script. We can set up a shim for Backbone too:
require.config({
shim: {
'lib/underscore': {
exports: '_'
},
'lib/backbone': {
deps: ['lib/underscore', 'jquery'],
exports: 'Backbone'
}
}
});Again, that configuration tells RequireJS to return the global Backbone variable that Backbone exports, but this time you’ll notice that Backbone’s dependencies are defined. This means whenever this:
require( 'lib/backbone', function( Backbone ) {...} );Is run, it will first make sure the dependencies are met, and then pass the global Backbone object into the callback function. You don’t need to do this with every library, only the ones that don’t support AMD. For example, jQuery does support it, as of jQuery 1.7.
If you’d like to read more about general RequireJS usage, the RequireJS API docs are incredibly thorough and easy to read.
Typing long paths to file names like lib/backbone can get tedious. RequireJS lets us set up custom paths in our configuration object. Here, whenever I refer to “underscore”, RequireJS will look for the file lib/underscore.js:
require.config({
paths: {
'underscore': 'lib/underscore'
}
});Of course, this can be combined with a shim:
require.config({
paths: {
'underscore': 'lib/underscore'
},
shim: {
'underscore': {
exports: '_'
}
}
});Just make sure that you refer to the custom path in your shim settings, too. Now you can do
require( ['underscore'], function(_) {
// code here
});to shim Underscore but still use a custom path.
Now that we’ve taken a look at how to define AMD modules, let’s review how to go about wrapping components like views and collections so that they can also be easily loaded as dependencies for any parts of your application that require them. At its simplest, a Backbone model may just require Backbone and Underscore.js. These are dependencies, so we can define those when defining the new modules. Note that the following examples presume you have configured RequireJS to shim Backbone and Underscore, as discussed previously.
For example, here is how a model is defined.
define(['underscore', 'backbone'], function(_, Backbone) {
var myModel = Backbone.Model.extend({
// Default attributes
defaults: {
content: 'hello world',
},
// A dummy initialization method
initialize: function() {
},
clear: function() {
this.destroy();
this.view.remove();
}
});
return myModel;
});Note how we alias Underscore.js’s instance to _ and Backbone to just Backbone, making it very trivial to convert non-AMD code over to using this module format. For a view which might require other dependencies such as jQuery, this can similarly be done as follows:
define([
'jquery',
'underscore',
'backbone',
'collections/mycollection',
'views/myview'
], function($, _, Backbone, myCollection, myView){
var AppView = Backbone.View.extend({
...Aliasing to the dollar-sign ($) once again makes it very easy to encapsulate any part of an application you wish using AMD.
Doing it this way makes it easy to organize your Backbone application as you like. It’s recommended to separate modules into folders. For example, individual folders for models, collections, views and so on. RequireJS doesn’t care about what folder structure you use; as long as you use the correct path when using require, it will happily pull in the file.
As part of this chapter I’ve made a very simple Backbone application with RequireJS that you can find on Github. It is a stock application for a manager of a shop. They can add new items and filter down the items based on price, but nothing more. Because it’s so simple it’s easier to focus purely on the RequireJS part of the implementation, rather than deal with complex JavaScript and Backbone logic too.
At the base of this application is the Item model, which describes a single item in the stock. Its implementation is very straight forward:
define( ["lib/backbone"], function ( Backbone ) {
var Item = Backbone.Model.extend({
defaults: {
price: 35,
photo: "http://www.placedog.com/100/100"
}
});
return Item;
});Converting an individual model, collection, view or similar into an AMD, RequireJS compliant one is typically very straight forward. Usually all that’s needed is the first line, calling define, and to make sure that once you’ve defined your object - in this case, the Item model, to return it.
Let’s now set up a view for that individual item:
define( ["lib/backbone"], function ( Backbone ) {
var ItemView = Backbone.View.extend({
tagName: "div",
className: "item-wrap",
template: _.template($("#itemTemplate").html()),
render: function() {
this.$el.html(this.template(this.model.toJSON()));
return this;
}
});
return ItemView;
});This view doesn’t actually depend on the model it will be used with, so again the only dependency is Backbone. Other than that it’s just a regular Backbone view. There’s nothing special going on here, other than returning the object and using define so RequireJS can pick it up. Now let’s make a collection to view a list of items. This time we will need to reference the Item model, so we add it as a dependency:
define(["lib/backbone", "models/item"], function(Backbone, Item) {
var Cart = Backbone.Collection.extend({
model: Item,
initialize: function() {
this.on("add", this.updateSet, this);
},
updateSet: function() {
items = this.models;
}
});
return Cart;
});I’ve called this collection Cart, as it’s a group of items. As the Item model is the second dependency, I can bind the variable Item to it by declaring it as the second argument to the callback function. I can then refer to this within my collection implementation.
Finally, let’s have a look at the view for this collection. (This file is much bigger in the application, but I’ve taken some bits out so it’s easier to examine).
define(["lib/backbone", "models/item", "views/itemview"], function(Backbone, Item, ItemView) {
var ItemCollectionView = Backbone.View.extend({
el: '#yourcart',
initialize: function(collection) {
this.collection = collection;
this.render();
this.collection.on("reset", this.render, this);
},
render: function() {
this.$el.html("");
this.collection.each(function(item) {
this.renderItem(item);
}, this);
},
renderItem: function(item) {
var itemView = new ItemView({model: item});
this.$el.append(itemView.render().el);
},
// more methods here removed
});
return ItemCollectionView;
});There really is nothing to it once you’ve got the general pattern. Define each “object” (a model, view, collection, router or otherwise) through RequireJS, and then specify them as dependencies to other objects that need them. Again, you can find this entire application on Github.
If you’d like to take a look at how others do it, Pete Hawkins’ Backbone Stack repository is a good example of structuring a Backbone application using RequireJS. Greg Franko has also written an overview of how he uses Backbone and Require, and Jeremy Kahn’s post neatly describes his approach. For a look at a full sample application, the Backbone and Require version of the TodoMVC application is a good starting point.
Moving your templates to external files is actually quite straight-forward, whether they are Underscore, Mustache, Handlebars or any other text-based template format. Let’s look at how we do that with RequireJS.
RequireJS has a special plugin called text.js which is used to load in text file dependencies. To use the text plugin, follow these steps:
Download the plugin from http://requirejs.org/docs/download.html#text and place it in either the same directory as your application’s main JS file or a suitable sub-directory.
Next, include the text.js plugin in your initial RequireJS configuration options. In the code snippet below, we assume that RequireJS is being included in our page prior to this code snippet being executed.
require.config( {
paths: {
'text': 'libs/require/text',
},
baseUrl: 'app'
} );text! prefix is used for a dependency, RequireJS will automatically load the text plugin and treat the dependency as a text resource. A typical example of this in action may look like:require(['js/app', 'text!templates/mainView.html'],
function( app, mainView ) {
// the contents of the mainView file will be
// loaded into mainView for usage.
}
);With Underscore.js’s micro-templating (and jQuery) this would typically be:
HTML:
<script type="text/template" id="mainViewTemplate">
<% _.each( person, function( person_item ){ %>
<li><%= person_item.get('name') %></li>
<% }); %>
</script>JS:
var compiled_template = _.template( $('#mainViewTemplate').html() );With RequireJS and the text plugin however, it’s as simple as saving the same template into an external text file (say, mainView.html) and doing the following:
require(['js/app', 'text!templates/mainView.html'],
function(app, mainView){
var compiled_template = _.template( mainView );
}
);That’s it! Now you can apply your template to a view in Backbone with something like:
collection.someview.$el.html( compiled_template( { results: collection.models } ) );All templating solutions will have their own custom methods for handling template compilation, but if you understand the above, substituting Underscore’s micro-templating for any other solution should be fairly trivial.
Once you’re written your application, the next important step is to prepare it for deployment to production. The majority of non-trivial apps are likely to consist of several scripts and so optimizing, minimizing, and concatenating your scripts prior to pushing can reduce the number of scripts your users need to download.
A command-line optimization tool for RequireJS projects called r.js is available to help with this workflow. It offers a number of capabilities, including:
If you find yourself wanting to ship a single file with all dependencies included, r.js can help with this too. Whilst RequireJS does support lazy-loading, your application may be small enough that reducing HTTP requests to a single script file is feasible.
You’ll notice that I mentioned the word ‘specific’ in the first bullet point. The RequireJS optimizer only concatenates module scripts that have been specified as string literals in require and define calls (which you’ve probably used). As clarified by the optimizer docs this means that Backbone modules defined like this:
define(['jquery', 'backbone', 'underscore', 'collections/sample', 'views/test'],
function($, Backbone, _, Sample, Test){
//...
});will combine fine, however dynamic dependencies such as:
var models = someCondition ? ['models/ab', 'models/ac'] : ['models/ba', 'models/bc'];
define(['jquery', 'backbone', 'underscore'].concat(models),
function($, Backbone, _, firstModel, secondModel){
//...
});will be ignored. This is by design as it ensures that dynamic dependency/module loading can still take place even after optimization.
Although the RequireJS optimizer works fine in both Node and Java environments, it’s strongly recommended to run it under Node as it executes significantly faster there.
To get started with r.js, grab it from the RequireJS download page or through NPM. To begin getting our project to build with r.js, we will need to create a new build profile.
Assuming the code for our application and external dependencies are in app/libs, our build.js build profile could simply be:
({
baseUrl: 'app',
out: 'dist/main.js',The paths above are relative to the baseUrl for our project and in our case it would make sense to make this the app folder. The out parameter informs r.js that we want to concatenate everything into a single file called main.js under the dist/ directory. Note that here we do need to add the .js extension to the filename. Earlier, we saw that when referencing modules by filenames, you don’t need to use the .js extension, however this is one case in which you do.
Alternatively, we can specify dir, which will ensure the contents of our app directory are copied into this directory. e.g:
({
baseUrl: 'app',
dir: 'release',
out: 'dist/main.js'Additional options that can be specified such as modules and appDir are not compatible with out, however let’s briefly discuss them in case you do wish to use them.
modules is an array where we can explicitly specify the module names we would like to have optimized.
modules: [
{
name: 'app',
exclude: [
// If you prefer not to include certain
// libs exclude them here
]
}appDir - when specified, ourbaseUrl is relative to this parameter. If appDir is not defined, baseUrl is simply relative to the build.js file.
appDir: './',Back to our build profile, the main parameter is used to specify our main module - we are making use of include here as we’re going to take advantage of Almond - a stripped down loader for RequireJS modules which is useful should you not need to load modules in dynamically.
include: ['libs/almond', 'main'],
wrap: true,include is another array which specifies the modules we want to include in the build. By specifying “main”, r.js will trace over all modules main depends on and will include them. wrap wraps modules which RequireJS needs into a closure so that only what we export is included in the global environment.
paths: {
backbone: 'libs/backbone',
underscore: 'libs/underscore',
jquery: 'libs/jquery',
text: 'libs/text'
}
})The remainder of the build.js file would be a regular paths configuration object. We can compile our project into a target file by running:
node r.js -o build.jswhich should place our compiled project into dist/main.js.
The build profile is usually placed inside the ‘scripts’ or ‘js’ directory of your project. As per the docs, this file can however exist anywhere you wish, but you’ll need to edit the contents of your build profile accordingly.
That’s it. As long as you have UglifyJS/Closure tools setup correctly, r.js should be able to easily optimize your entire Backbone project in just a few key-strokes.
If you would like to learn more about build profiles, James Burke has a heavily commented sample file with all the possible options available.
In this chapter, we’ll look at our first practical Backbone & RequireJS project - how to build a modular Todo application. Similar to exercise 1, the application will allow us to add new todos, edit new todos and clear todo items that have been marked as completed. For a more advanced practical, see the section on mobile Backbone development.
The complete code for the application can can be found in the practicals/modular-todo-app folder of this repo (thanks to Thomas Davis and Jérôme Gravel-Niquet). Alternatively grab a copy of my side-project TodoMVC which contains the sources to both AMD and non-AMD versions.
Writing a modular Backbone application can be a straight-forward process. There are however, some key conceptual differences to be aware of if opting to use AMD as your module format of choice:
Now that we’ve reviewed the basics, let’s take a look at developing our application. For reference, the structure of our app is as follows:
index.html
...js/
main.js
.../models
todo.js
.../views
app.js
todos.js
.../collections
todos.js
.../templates
stats.html
todos.html
../libs
.../backbone
.../jquery
.../underscore
.../require
require.js
text.js
...css/The markup for the application is relatively simple and consists of three primary parts: an input section for entering new todo items (create-todo), a list section to display existing items (which can also be edited in-place) (todo-list) and finally a section summarizing how many items are left to be completed (todo-stats).
<div id="todoapp">
<div class="content">
<div id="create-todo">
<input id="new-todo" placeholder="What needs to be done?" type="text" />
<span class="ui-tooltip-top">Press Enter to save this task</span>
</div>
<div id="todos">
<ul id="todo-list"></ul>
</div>
<div id="todo-stats"></div>
</div>
</div>The rest of the tutorial will now focus on the JavaScript side of the practical.
If you’ve read the earlier chapter on AMD, you may have noticed that explicitly needing to define each dependency a Backbone module (view, collection or other module) may require with it can get a little tedious. This can however be improved.
In order to simplify referencing common paths the modules in our application may use, we use a RequireJS configuration object, which is typically defined as a top-level script file. Configuration objects have a number of useful capabilities, the most useful being mode name-mapping. Name-maps are basically a key:value pair, where the key defines the alias you wish to use for a path and the value represents the true location of the path.
In the code-sample below, you can see some typical examples of common name-maps which include: backbone, underscore, jquery and depending on your choice, the RequireJS text plugin, which assists with loading text assets like templates.
main.js
require.config({
baseUrl:'../',
paths: {
jquery: 'libs/jquery/jquery-min',
underscore: 'libs/underscore/underscore-min',
backbone: 'libs/backbone/backbone-optamd3-min',
text: 'libs/require/text'
}
});
require(['views/app'], function(AppView){
var app_view = new AppView;
});The require() at the end of our main.js file is simply there so we can load and instantiate the primary view for our application (views/app.js). You’ll commonly see both this and the configuration object included in most top-level script files for a project.
In addition to offering name-mapping, the configuration object can be used to define additional properties such as waitSeconds - the number of seconds to wait before script loading times out and locale, should you wish to load up i18n bundles for custom languages. The baseUrl is simply the path to use for module lookups.
For more information on configuration objects, please feel free to check out the excellent guide to them in the RequireJS docs.
Before we dive into AMD-wrapped versions of our Backbone components, let’s review a sample of a non-AMD view. The following view listens for changes to its model (a Todo item) and re-renders if a user edits the value of the item.
var TodoView = Backbone.View.extend({
//... is a list tag.
tagName: 'li',
// Cache the template function for a single item.
template: _.template($('#item-template').html()),
// The DOM events specific to an item.
events: {
'click .check' : 'toggleDone',
'dblclick div.todo-content' : 'edit',
'click span.todo-destroy' : 'clear',
'keypress .todo-input' : 'updateOnEnter'
},
// The TodoView listens for changes to its model, re-rendering. Since there's
// a one-to-one correspondence between a **Todo** and a **TodoView** in this
// app, we set a direct reference on the model for convenience.
initialize: function() {
this.model.on('change', this.render, this);
this.model.view = this;
},
...Note how for templating the common practice of referencing a script by an ID (or other selector) and obtaining its value is used. This of course requires that the template being accessed is implicitly defined in our markup. The following is the ‘embedded’ version of our template being referenced above:
<script type="text/template" id="item-template">
<div class="todo <%= done ? 'done' : '' %>">
<div class="display">
<input class="check" type="checkbox" <%= done ? 'checked="checked"' : '' %> />
<div class="todo-content"></div>
<span class="todo-destroy"></span>
</div>
<div class="edit">
<input class="todo-input" type="text" value="" />
</div>
</div>
</script>Whilst there is nothing wrong with the template itself, once we begin to develop larger applications requiring multiple templates, including them all in our markup on page-load can quickly become both unmanageable and come with performance costs. We’ll look at solving this problem in a minute.
Let’s now take a look at the AMD-version of our view. As discussed earlier, the ‘module’ is wrapped using AMD’s define() which allows us to specify the dependencies our view requires. Using the mapped paths to ‘jquery’ etc. simplifies referencing common dependencies and instances of dependencies are themselves mapped to local variables that we can access (e.g ‘jquery’ is mapped to $).
views/todo.js
define([
'jquery',
'underscore',
'backbone',
'text!templates/todos.html'
], function($, _, Backbone, todosTemplate){
var TodoView = Backbone.View.extend({
//... is a list tag.
tagName: 'li',
// Cache the template function for a single item.
template: _.template(todosTemplate),
// The DOM events specific to an item.
events: {
'click .check' : 'toggleDone',
'dblclick div.todo-content' : 'edit',
'click span.todo-destroy' : 'clear',
'keypress .todo-input' : 'updateOnEnter'
},
// The TodoView listens for changes to its model, re-rendering. Since there's
// a one-to-one correspondence between a **Todo** and a **TodoView** in this
// app, we set a direct reference on the model for convenience.
initialize: function() {
this.model.on('change', this.render, this);
this.model.view = this;
},
// Re-render the contents of the todo item.
render: function() {
this.$el.html(this.template(this.model.toJSON()));
this.setContent();
return this;
},
// Use `jQuery.text` to set the contents of the todo item.
setContent: function() {
var content = this.model.get('content');
this.$('.todo-content').text(content);
this.input = this.$('.todo-input');
this.input.on('blur', this.close);
this.input.val(content);
},
...From a maintenance perspective, there’s nothing logically different in this version of our view, except for how we approach templating.
Using the RequireJS text plugin (the dependency marked text), we can actually store all of the contents for the template we looked at earlier in an external file (todos.html).
templates/todos.html
<div class="todo <%= done ? 'done' : '' %>">
<div class="display">
<input class="check" type="checkbox" <%= done ? 'checked="checked"' : '' %> />
<div class="todo-content"></div>
<span class="todo-destroy"></span>
</div>
<div class="edit">
<input class="todo-input" type="text" value="" />
</div>
</div>There’s no longer a need to be concerned with IDs for the template as we can map its contents to a local variable (in this case todosTemplate). We then simply pass this to the Underscore.js templating function _.template() the same way we normally would have the value of our template script.
Next, let’s look at how to define models as dependencies which can be pulled into collections. Here’s an AMD-compatible model module, which has two default values: a content attribute for the content of a Todo item and a boolean done state, allowing us to trigger whether the item has been completed or not.
models/todo.js
define(['underscore', 'backbone'], function(_, Backbone) {
var TodoModel = Backbone.Model.extend({
// Default attributes for the todo.
defaults: {
// Ensure that each todo created has `content`.
content: 'empty todo...',
done: false
},
initialize: function() {
},
// Toggle the `done` state of this todo item.
toggle: function() {
this.save({done: !this.get('done')});
},
// Remove this Todo from *localStorage* and delete its view.
clear: function() {
this.destroy();
this.view.remove();
}
});
return TodoModel;
});As per other types of dependencies, we can easily map our model module to a local variable (in this case Todo) so it can be referenced as the model to use for our TodosCollection. This collection also supports a simple done() filter for narrowing down Todo items that have been completed and a remaining() filter for those that are still outstanding.
collections/todos.js
define([
'underscore',
'backbone',
'libs/backbone/localstorage',
'models/todo'
], function(_, Backbone, Store, Todo){
var TodosCollection = Backbone.Collection.extend({
// Reference to this collection's model.
model: Todo,
// Save all of the todo items under the `todos` namespace.
localStorage: new Store('todos'),
// Filter down the list of all todo items that are finished.
done: function() {
return this.filter(function(todo){ return todo.get('done'); });
},
// Filter down the list to only todo items that are still not finished.
remaining: function() {
return this.without.apply(this, this.done());
},
...In addition to allowing users to add new Todo items from views (which we then insert as models in a collection), we ideally also want to be able to display how many items have been completed and how many are remaining. We’ve already defined filters that can provide us this information in the above collection, so let’s use them in our main application view.
views/app.js
define([
'jquery',
'underscore',
'backbone',
'collections/todos',
'views/todo',
'text!templates/stats.html'
], function($, _, Backbone, Todos, TodoView, statsTemplate){
var AppView = Backbone.View.extend({
// Instead of generating a new element, bind to the existing skeleton of
// the App already present in the HTML.
el: $('#todoapp'),
// Our template for the line of statistics at the bottom of the app.
statsTemplate: _.template(statsTemplate),
// ...events, initialize() etc. can be seen in the complete file
// Re-rendering the App just means refreshing the statistics -- the rest
// of the app doesn't change.
render: function() {
var done = Todos.done().length;
this.$('#todo-stats').html(this.statsTemplate({
total: Todos.length,
done: Todos.done().length,
remaining: Todos.remaining().length
}));
},
...Above, we map the second template for this project, templates/stats.html to statsTemplate which is used for rendering the overall done and remaining states. This works by simply passing our template the length of our overall Todos collection (Todos.length - the number of Todo items created so far) and similarly the length (counts) for items that have been completed (Todos.done().length) or are remaining (Todos.remaining().length).
The contents of our statsTemplate can be seen below. It’s nothing too complicated, but does use ternary conditions to evaluate whether we should state there’s “1 item” or “2 items” in a particular state.
<% if (total) { %>
<span class="todo-count">
<span class="number"><%= remaining %></span>
<span class="word"><%= remaining == 1 ? 'item' : 'items' %></span> left.
</span>
<% } %>
<% if (done) { %>
<span class="todo-clear">
<a href="#">
Clear <span class="number-done"><%= done %></span>
completed <span class="word-done"><%= done == 1 ? 'item' : 'items' %></span>
</a>
</span>
<% } %>The rest of the source for the Todo app mainly consists of code for handling user and application events, but that rounds up most of the core concepts for this practical.
To see how everything ties together, feel free to grab the source by cloning this repo or browse it online to learn more. I hope you find it helpful!
Note: While this first practical doesn’t use a build profile as outlined in the chapter on using the RequireJS optimizer, we will be using one in the section on building mobile Backbone applications.
This section will discuss a route based approach to module loading as implemented in Lumbar by Kevin Decker. Like RequireJS, Lumbar is also a modular build system, but the pattern it implements for loading routes may be used with any build system.
The specifics of the Lumbar build tool are not discussed in this book. To see a complete Lumbar based project with the loader and build system see Thorax which provides boilerplate projects for various environments including Lumbar.
RequireJS defines dependencies per file, while Lumbar defines a list of files for each module in a central JSON configuration file, outputting a single JavaScript file for each defined module. Lumbar requires that each module (except the base module) define a single router and a list of routes. An example file might look like:
{
"modules": {
"base": {
"scripts": [
"js/lib/underscore.js",
"js/lib/backbone.js",
"etc"
]
},
"pages": {
"scripts": [
"js/routers/pages.js",
"js/views/pages/index.js",
"etc"
],
"routes": {
"": "index",
"contact": "contact"
}
}
}
}Every JavaScript file defined in a module will have a module object in scope which contains the name and routes for the module. In js/routers/pages.js we could define a Backbone router for our pages module like so:
new (Backbone.Router.extend({
routes: module.routes,
index: function() {},
contact: function() {}
}));A little used feature of Backbone.Router is its ability to create multiple routers that listen to the same set of routes. Lumbar uses this feature to create a router that listens to all routes in the application. When a route is matched, this master router checks to see if the needed module is loaded. If the module is already loaded, then the master router takes no action and the router defined by the module will handle the route. If the needed module has not yet been loaded, it will be loaded, then Backbone.history.loadUrl will be called. This reloads the route, causes the master router to take no further action and the router defined in the freshly loaded module to respond.
A sample implementation is provided below. The config object would need to contain the data from our sample configuration JSON file above, and the loader object would need to implement isLoaded and loadModule methods. Note that Lumbar provides all of these implementations, the examples are provided to create your own implementation.
// Create an object that will be used as the prototype
// for our master router
var handlers = {
routes: {}
};
_.each(config.modules, function(module, moduleName) {
if (module.routes) {
// Generate a loading callback for the module
var callbackName = "loader_" moduleName;
handlers[callbackName] = function() {
if (loader.isLoaded(moduleName)) {
// Do nothing if the module is loaded
return;
} else {
//the module needs to be loaded
loader.loadModule(moduleName, function() {
// Module is loaded, reloading the route
// will trigger callback in the module's
// router
Backbone.history.loadUrl();
});
}
};
// Each route in the module should trigger the
// loading callback
_.each(module.routes, function(methodName, route) {
handlers.routes[route] = callbackName;
});
}
});
// Create the master router
new (Backbone.Router.extend(handlers));window.history.pushState support (serving Backbone routes without a hash mark) requires that the server be aware of what URLs your Backbone application will handle, since the user should be able to enter the app at any of those routes (or hit reload after navigating to a pushState URL).
Another advantage to defining all routes in a single location is that the same JSON configuration file provided above could be loaded by the server, listening to each route. A sample implementation in NodeJS and Express:
var fs = require('fs'),
_ = require('underscore'),
express = require('express'),
server = express(),
config = JSON.parse(fs.readFileSync('path/to/config.json'));
_.each(config.modules, function(module, moduleName) {
if (module.routes) {
_.each(module.routes, function(methodName, route) {
server.get(route, function(req, res) {
res.sendFile('public/index.html');
});
});
}
});This assumes that index.html will be serving out your Backbone application. The Backbone.History object can handle the rest of the routing logic as long as a root option is specified. A sample configuration for a simple application that lives at the root might look like:
Backbone.history || (Backbone.history = new Backbone.History());
Backbone.history.start({
pushState: true,
root: '/'
});For more than trivial views, DocumentCloud have a home-built asset packager called Jammit, which has easy integration with Underscore.js templates and can also be used for dependency management.
Jammit expects your JavaScript templates (JST) to live alongside any ERB templates you’re using in the form of .jst files. It packages the templates into a global JST object which can be used to render templates into strings. Making Jammit aware of your templates is straight-forward - just add an entry for something like views/**/*.jst to your app package in assets.yml.
To provide Jammit dependencies you simply write out an assets.yml file that either listed the dependencies in order or used a combination of free capture directories (for example: //.js, templates/.js, and specific files).
A template using Jammit can derive it’s data from the collection object that is passed to it:
this.$el.html(JST.myTemplate({ collection: this.collection }));Pagination is a ubiquitous problem we often find ourselves needing to solve on the web - perhaps most predominantly when working with service APIs and JavaScript-heavy clients which consume them. It’s also a problem that is often under-refined as most of us consider pagination relatively easy to get right. This isn’t however always the case as pagination tends to get more tricky than it initially seems.
Before we dive into solutions for paginating data for your Backbone applications, let’s define exactly what we consider pagination to be:
Pagination is a control system allowing users to browse through pages of search results (or any type of content) which is continued. Search results are the canonical example, but pagination today is found on news sites, blogs, and discussion boards, often in the form of Previous and Next links. More complete pagination systems offer granular control of the specific pages you can navigate to, giving the user more power to find what they are looking for.
It isn’t a problem limited to pages requiring some visual controls for pagination either - sites like Facebook, Pinterest, and Twitter have demonstrated that there are many contexts where infinite paging is also useful. Infinite paging is, of course, when we pre-fetch (or appear to pre-fetch) content from a subsequent page and add it directly to the user’s current page, making the experience feel “infinite”.
Pagination is very context-specific and depends on the content being displayed. In the Google search results, pagination is important as they want to offer you the most relevant set of results in the first 1-2 pages. After that, you might be a little more selective (or random) with the page you choose to navigate to. This differs from cases where you’ll want to cycle through consecutive pages for (e.g., for a news article or blog post).
Pagination is almost certainly content and context-specific, but as Faruk Ates has previously pointed out the principles of good pagination apply no matter what the content or context is. As with everything extensible when it comes to Backbone, you can write your own pagination to address many of these content-specific types of pagination problems. That said, you’ll probably spend quite a bit of time on this and sometimes you just want to use a tried and tested solution that just works.
On this topic, we’re going to go through a set of pagination components I (and a group of contributors) wrote for Backbone.js, which should hopefully come in useful if you’re working on applications which need to page Backbone Collections. They’re part of an extension called Backbone.Paginator.
When working with data on the client-side, the three types of pagination we are most likely to run into are:
Requests to a service layer (API) - For example, query for results containing the term ‘Paul’ - if 5,000 results are available only display 20 results per page (leaving us with 250 possible result pages that can be navigated to).
This problem actually has quite a great deal more to it, such as maintaining persistence of other URL parameters (e.g sort, query, order) which can change based on a user’s search configuration in a UI. One also has to think of a clean way of hooking views up to this pagination so you can easily navigate between pages (e.g., First, Last, Next, Previous, 1,2,3), manage the number of results displayed per page and so on.
Further client-side pagination of data returned - e.g we’ve been returned a JSON response containing 100 results. Rather than displaying all 100 to the user, we only display 20 of these results within a navigable UI in the browser.
Similar to the request problem, client-pagination has its own challenges like navigation once again (Next, Previous, 1,2,3), sorting, order, switching the number of results to display per page and so on.
Infinite results - with services such as Facebook, the concept of numeric pagination is instead replaced with a ‘Load More’ or ‘View More’ button. Triggering this normally fetches the next ‘page’ of N results but rather than replacing the previous set of results loaded entirely, we simply append to them instead.
A request pager which simply appends results in a view rather than replacing on each new fetch is effectively an ‘infinite’ pager.
Let’s now take a look at exactly what we’re getting out of the box:
Backbone.Paginator is a set of opinionated components for paginating collections of data using Backbone.js. It aims to provide both solutions for assisting with pagination of requests to a server (e.g an API) as well as pagination of single-loads of data, where we may wish to further paginate a collection of N results into M pages within a view.

Backbone.Paginator supports two main pagination components:
If you would like to look at examples built using the components included in the project, links to official demos are included below and use the Netflix API so that you can see them working with an actual data source.
In this section we’re going to walk through using the requestPager. You would use this component when working with a service API which itself supports pagination. This component allows users to control the pagination settings for requests to this API (i.e navigate to the next, previous, N pages) via the client-side.
The idea is that pagination, searching, and filtering of data can all be done from your Backbone application without the need for a page reload.
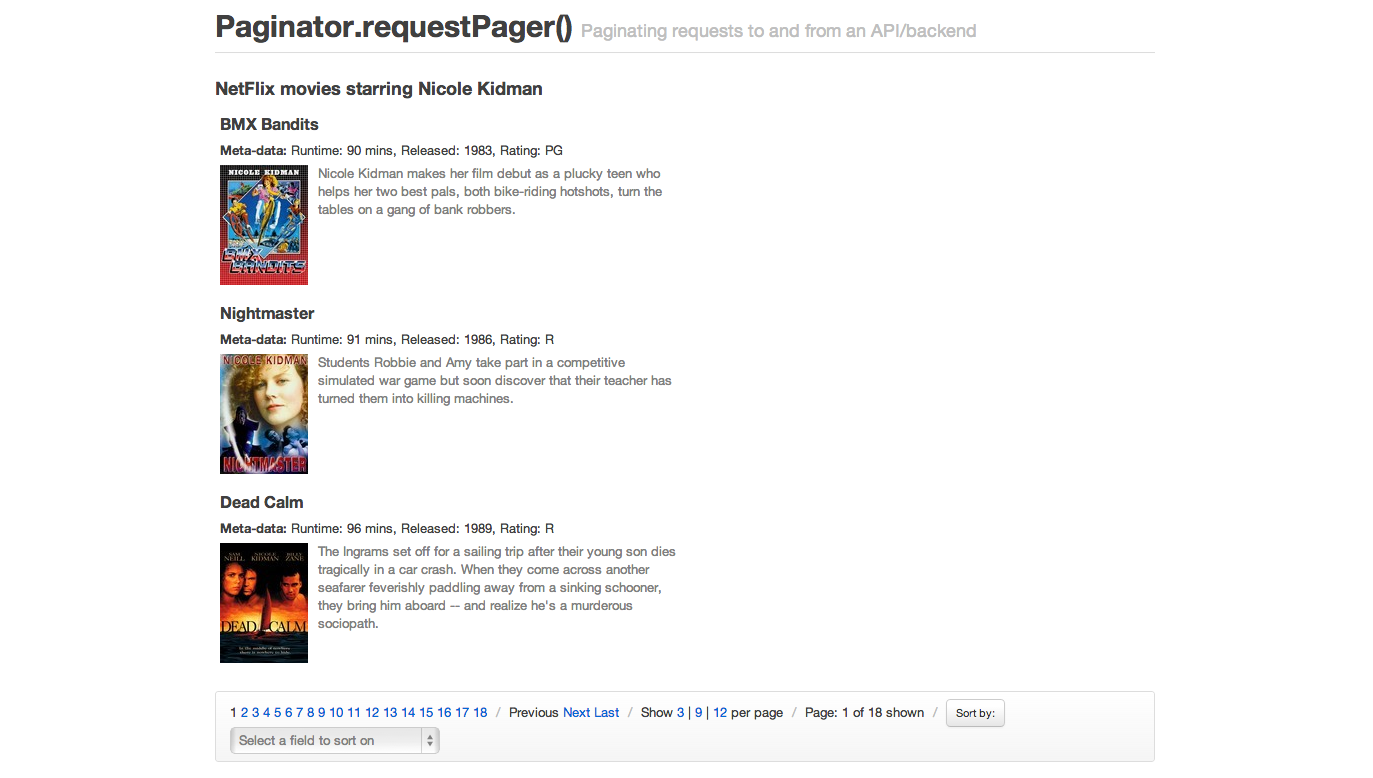
First, we define a new Paginated collection using Backbone.Paginator.requestPager() as follows:
var PaginatedCollection = Backbone.Paginator.requestPager.extend({Within our collection, we then (as normal) specify the model to be used with this collection followed by the URL (or base URL) for the service providing our data (e.g the Netflix API).
model: model,We need to set a base URL. The type of the request is GET by default, and the dataType is jsonp in order to enable cross-domain requests.
paginator_core: {
// the type of the request (GET by default)
type: 'GET',
// the type of reply (jsonp by default)
dataType: 'jsonp',
// the URL (or base URL) for the service
// if you want to have a more dynamic URL, you can make this a function
// that returns a string
url: 'http://odata.netflix.com/Catalog/People(49446)/TitlesActedIn?'
},If you use dataType NOT jsonp, please remove the callback custom parameter inside the server_api configuration.
We need to tell the library how many items per page we would like to see, etc…
paginator_ui: {
// the lowest page index your API allows to be accessed
firstPage: 0,
// which page should the paginator start from
// (also, the actual page the paginator is on)
currentPage: 0,
// how many items per page should be shown
perPage: 3,
// a default number of total pages to query in case the API or
// service you are using does not support providing the total
// number of pages for us.
// 10 as a default in case your service doesn't return the total
totalPages: 10
},Only the base URL won’t be enough for most cases, so you can pass more parameters to the server. Note how you can use functions instead of hardcoded values, and you can also refer to the values you specified in paginator_ui.
server_api: {
// the query field in the request
'$filter': '',
// number of items to return per request/page
'$top': function() { return this.perPage },
// how many results the request should skip ahead to
// customize as needed. For the Netflix API, skipping ahead based on
// page * number of results per page was necessary.
'$skip': function() { return this.currentPage * this.perPage },
// field to sort by
'$orderby': 'ReleaseYear',
// what format would you like to request results in?
'$format': 'json',
// custom parameters
'$inlinecount': 'allpages',
'$callback': 'callback'
},If you use $callback, please ensure that you did use the jsonp as a dataType inside your paginator_core configuration.
The last thing we need to do is configure our collection’s parse() method. We want to ensure we’re returning the correct part of our JSON response containing the data our collection will be populated with, which below is response.d.results (for the Netflix API).
You might also notice that we’re setting this.totalPages to the total page count returned by the API. This allows us to define the maximum number of (result) pages available for the current/last request so that we can clearly display this in the UI. It also allows us to infuence whether clicking say, a ‘next’ button should proceed with a request or not.
parse: function (response) {
// Be sure to change this based on how your results
// are structured (e.g d.results is Netflix specific)
var tags = response.d.results;
//Normally this.totalPages would equal response.d.__count
//but as this particular NetFlix request only returns a
//total count of items for the search, we divide.
this.totalPages = Math.ceil(response.d.__count / this.perPage);
return tags;
}
});
});For your convenience, the following methods are made available for use in your views to interact with the requestPager:
requestPager collection’s methods .goTo(), .nextPage() and .prevPage() are all extensions of the original Backbone Collection.fetch() methods. As so, they all can take the same option object as a parameter.
This option object can use success and error parameters to pass a function to be executed after server answer.
Collection.goTo(n, {
success: function( collection, response ) {
// called is server request success
},
error: function( collection, response ) {
// called if server request fail
}
});To manage callback, you could also use the jqXHR returned by these methods to manage callback.
Collection
.requestNextPage()
.done(function( data, textStatus, jqXHR ) {
// called is server request success
})
.fail(function( data, textStatus, jqXHR ) {
// called if server request fail
})
.always(function( data, textStatus, jqXHR ) {
// do something after server request is complete
});
});If you’d like to add the incoming models to the current collection, instead of replacing the collection’s contents, pass {update: true, remove: false} as options to these methods.
Collection.prevPage({ update: true, remove: false });The clientPager is used to further paginate data that has already been returned by the service API. Say you’ve requested 100 results from the service and wish to split this into 5 pages of paginated results, each containing 20 results at a client level - the clientPager makes it trivial to do this.
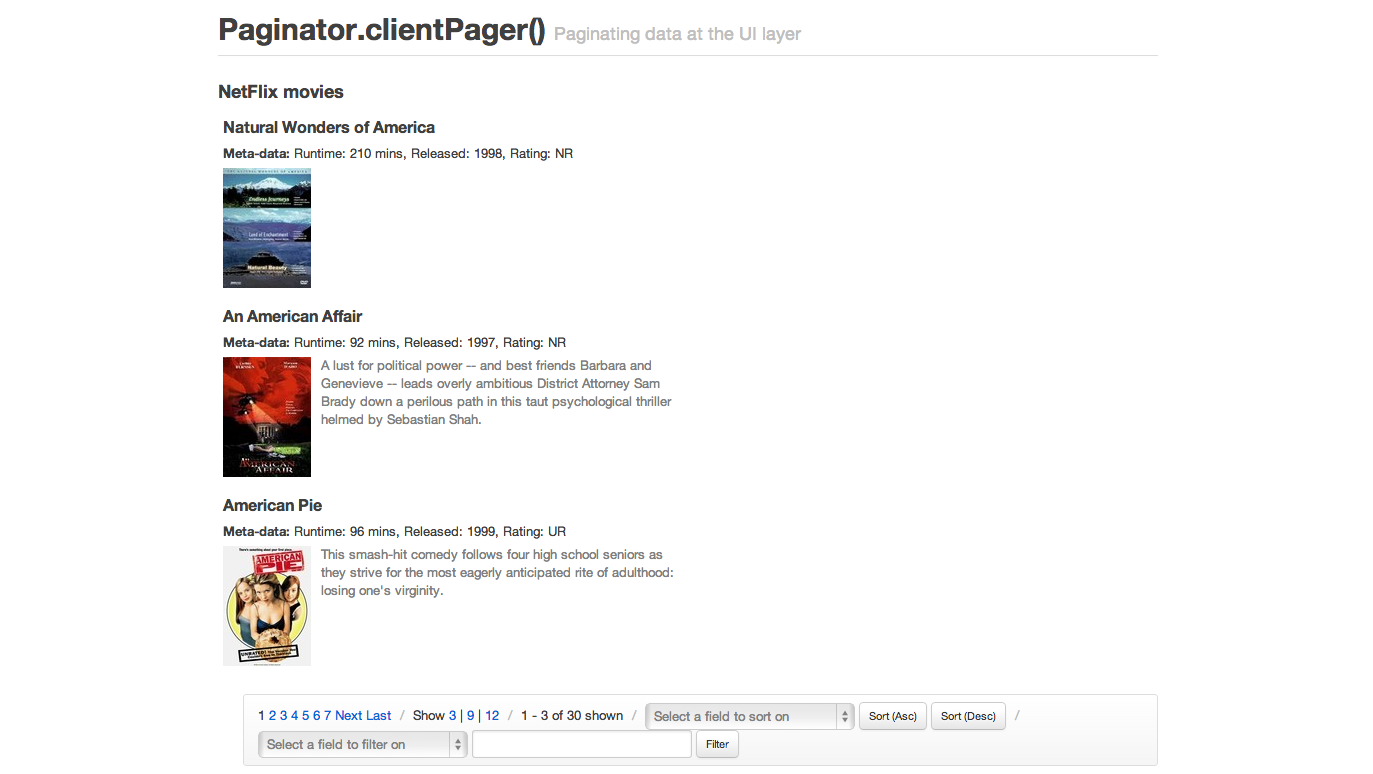
Use the clientPager when you prefer to get results in a single “load” and thus avoid making additional network requests each time your users want to fetch the next “page” of items. As the results have all already been requested, it’s just a case of switching between the ranges of data actually presented to the user.
As with requestPager, let’s first create a new Paginated Backbone.Paginator.clientPager collection, with a model:
var PaginatedCollection = Backbone.Paginator.clientPager.extend({
model: model,We need to set a base URL. The type of the request is GET by default, and the dataType is jsonp in order to enable cross-domain requests.
paginator_core: {
// the type of the request (GET by default)
type: 'GET',
// the type of reply (jsonp by default)
dataType: 'jsonp',
// the URL (or base URL) for the service
url: 'http://odata.netflix.com/v2/Catalog/Titles?&'
},We need to tell the library how many items per page we would like to see, etc…
paginator_ui: {
// the lowest page index your API allows to be accessed
firstPage: 1,
// which page should the paginator start from
// (also, the actual page the paginator is on)
currentPage: 1,
// how many items per page should be shown
perPage: 3,
// a default number of total pages to query in case the API or
// service you are using does not support providing the total
// number of pages for us.
// 10 as a default in case your service doesn't return the total
totalPages: 10,
// The total number of pages to be shown as a pagination
// list is calculated by (pagesInRange * 2) + 1.
pagesInRange: 4
},Only the base URL won’t be enough for most cases, so you can pass more parameters to the server. Note how you can use functions instead of hardcoded values, and you can also refer to the values you specified in paginator_ui.
server_api: {
// the query field in the request
'$filter': 'substringof(\'america\',Name)',
// number of items to return per request/page
'$top': function() { return this.perPage },
// how many results the request should skip ahead to
// customize as needed. For the Netflix API, skipping ahead based on
// page * number of results per page was necessary.
'$skip': function() { return this.currentPage * this.perPage },
// field to sort by
'$orderby': 'ReleaseYear',
// what format would you like to request results in?
'$format': 'json',
// custom parameters
'$inlinecount': 'allpages',
'$callback': 'callback'
},And finally we have our parse() method, which in this case isn’t concerned with the total number of result pages available on the server as we have our own total count of pages for the paginated data in the UI.
parse: function (response) {
var tags = response.d.results;
return tags;
}
});As mentioned, your views can hook into a number of convenience methods to navigate around UI-paginated data. For clientPager these include:
levenshtein method is available.The goTo(), prevPage(), and nextPage() functions do not require the options param since they will be executed synchronously. However, when specified, the success callback will be invoked before the function returns. For example:
nextPage(); // this works just fine!
nextPage({success: function() { }}); // this will call the success functionThe options param exists to preserve (some) interface unification between the requestPaginator and clientPaginator so that they may be used interchangeably in your Backbone.Views.
this.collection.setFilter(
{'Name': {cmp_method: 'levenshtein', max_distance: 7}}
, "Amreican P" // Note the switched 'r' and 'e', and the 'P' from 'Pie'
);Also note that the Levenshtein plugin should be loaded and enabled using the useLevenshteinPlugin variable. Last but not less important: performing Levenshtein comparison returns the distance between two strings. It won’t let you search lengthy text. The distance between two strings means the number of characters that should be added, removed or moved to the left or to the right so the strings get equal. That means that comparing “Something” in “This is a test that could show something” will return 32, which is bigger than comparing “Something” and “ABCDEFG” (9). Use Levenshtein only for short texts (titles, names, etc).
Collection.doFakeFilter(filterFields, filterWords) - returns the models count after fake-applying a call to Collection.setFilter.
Collection.setFieldFilter(rules) - filter each value of each model according to rules that you pass as argument. Example: You have a collection of books with ‘release year’ and ‘author’. You can filter only the books that were released between 1999 and 2003. And then you can add another rule that will filter those books only to authors who’s name start with ‘A’. Possible rules: function, required, min, max, range, minLength, maxLength, rangeLength, oneOf, equalTo, containsAllOf, pattern. Passing this an empty rules set will remove any FieldFilter rules applied.
my_collection.setFieldFilter([
{field: 'release_year', type: 'range', value: {min: '1999', max: '2003'}},
{field: 'author', type: 'pattern', value: new RegExp('A*', 'igm')}
]);
//Rules:
//
//var my_var = 'green';
//
//{field: 'color', type: 'equalTo', value: my_var}
//{field: 'color', type: 'function', value: function(field_value){ return field_value == my_var; } }
//{field: 'color', type: 'required'}
//{field: 'number_of_colors', type: 'min', value: '2'}
//{field: 'number_of_colors', type: 'max', value: '4'}
//{field: 'number_of_colors', type: 'range', value: {min: '2', max: '4'} }
//{field: 'color_name', type: 'minLength', value: '4'}
//{field: 'color_name', type: 'maxLength', value: '6'}
//{field: 'color_name', type: 'rangeLength', value: {min: '4', max: '6'}}
//{field: 'color_name', type: 'oneOf', value: ['green', 'yellow']}
//{field: 'color_name', type: 'pattern', value: new RegExp('gre*', 'ig')}
//{field: 'color_name', type: 'containsAllOf', value: ['green', 'yellow', 'blue']}Collection.setFieldFilter.You can use some variables in your View to represent the actual state of the paginator.
totalUnfilteredRecords - Contains the number of records, including all records filtered in any way. (Only available in clientPager)totalRecords - Contains the number of recordscurrentPage - The actual page were the paginator is at.perPage - The number of records the paginator will show per page.totalPages - The number of total pages.startRecord - The position of the first record shown in the current page (eg 41 to 50 from 2000 records) (Only available in clientPager)endRecord - The position of the last record shown in the current page (eg 41 to 50 from 2000 records) (Only available in clientPager)pagesInRange - The number of pages to be drawn on each side of the current page. So if pagesInRange is 3 and currentPage is 13 you will get the numbers 10, 11, 12, 13(selected), 14, 15, 16.<!-- sample template for pagination UI -->
<script type="text/html" id="tmpServerPagination">
<div class="row-fluid">
<div class="pagination span8">
<ul>
<% _.each (pageSet, function (p) { %>
<% if (currentPage == p) { %>
<li class="active"><span><%= p %></span></li>
<% } else { %>
<li><a href="#" class="page"><%= p %></a></li>
<% } %>
<% }); %>
</ul>
</div>
<div class="pagination span4">
<ul>
<% if (currentPage > firstPage) { %>
<li><a href="#" class="serverprevious">Previous</a></li>
<% }else{ %>
<li><span>Previous</span></li>
<% }%>
<% if (currentPage < totalPages) { %>
<li><a href="#" class="servernext">Next</a></li>
<% } else { %>
<li><span>Next</span></li>
<% } %>
<% if (firstPage != currentPage) { %>
<li><a href="#" class="serverfirst">First</a></li>
<% } else { %>
<li><span>First</span></li>
<% } %>
<% if (totalPages != currentPage) { %>
<li><a href="#" class="serverlast">Last</a></li>
<% } else { %>
<li><span>Last</span></li>
<% } %>
</ul>
</div>
</div>
<span class="cell serverhowmany"> Show <a href="#"
class="selected">18</a> | <a href="#" class="">9</a> | <a href="#" class="">12</a> per page
</span>
<span class="divider">/</span>
<span class="cell first records">
Page: <span class="label"><%= currentPage %></span> of <span class="label"><%= totalPages %></span> shown
</span>
</script>Diacritic.js
A plugin for Backbone.Paginator that replaces diacritic characters (´, ˝, ̏, ˚,~ etc.) with characters that match them most closely. This is particularly useful for filtering.
To enable the plugin, set this.useDiacriticsPlugin to true, as can be seen in the example below:
Paginator.clientPager = Backbone.Collection.extend({
// Default values used when sorting and/or filtering.
initialize: function(){
this.useDiacriticsPlugin = true; // use diacritics plugin if available
...By default, both the clientPager and requestPager will make an initial request to the server in order to populate their internal paging data. In order to avoid this additional request, it may be beneficial to bootstrap your Backbone.Paginator instance from data that already exists in the dom.
Backbone.Paginator.clientPager:
// Extend the Backbone.Paginator.clientPager with your own configuration options
var MyClientPager = Backbone.Paginator.clientPager.extend({paginator_ui: {}});
// Create an instance of your class and populate with the models of your entire collection
var aClientPager = new MyClientPager([{id: 1, title: 'foo'}, {id: 2, title: 'bar'}]);
// Invoke the bootstrap function
aClientPager.bootstrap();Note: If you intend to bootstrap a clientPager, there is no need to specify a ‘paginator_core’ object in your configuration (since you should have already populated the clientPager with the entirety of it’s necessary data)
Backbone.Paginator.requestPager:
// Extend the Backbone.Paginator.requestPager with your own configuration options
var MyRequestPager = Backbone.Paginator.requestPager.extend({paginator_ui: {}});
// Create an instance of your class with the first page of data
var aRequestPager = new MyRequestPager([{id: 1, title: 'foo'}, {id: 2, title: 'bar'}]);
// Invoke the bootstrap function and configure requestPager with 'totalRecords'
aRequestPager.bootstrap({totalRecords: 50});Note: Both the clientPager and requestPager bootstrap function will accept an options param that will be extended by your Backbone.Paginator instance. However the ‘totalRecords’ property will be set implicitly by the clientPager.
More on Backbone bootstrapping
You’re of course free to customize the overall look and feel of the paginators as much as you wish. By default, all sample applications make use of the Twitter Bootstrap for styling links, buttons and drop-downs.
CSS classes are available to style record counts, filters, sorting and more:
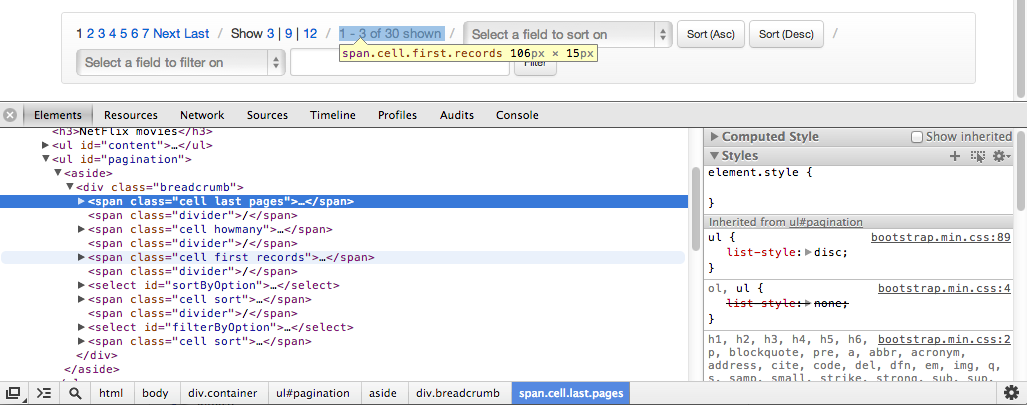
Classes are also available for styling more granular elements like page counts within breadcrumb > pages e.g .page, .page selected:
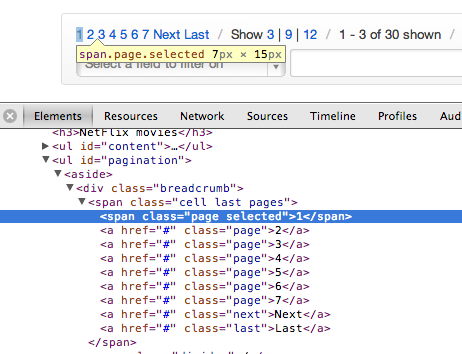
There’s a tremendous amount of flexibility available for styling and as you’re in control of templating too, your paginators can be made to look as visually simple or complex as needed.
Although it’s certainly possible to write your own custom pagination classes to work with Backbone Collections, Backbone.Paginator tries to take care of much of this for you.
It’s highly configurable, avoiding the need to write your own paging when working with Collections of data sourced from your database or API. Use the plugin to help tame large lists of data into more manageable, easily navigatable, paginated lists.
Additionally, if you have any questions about Backbone.Paginator (or would like to help improve it), feel free to post to the project issues list.
Boilerplates provide us a starting point for working on projects. They’re a base for building upon using the minimum required code to get something functional put together. When you’re working on a new Backbone application, a new Model typically only takes a few lines of code to get working.
That alone probably isn’t enough however, as you’ll need a Collection to group those models, a View to render them and perhaps a router if you’re looking to making specific views of your Collection data bookmarkable. If you’re starting on a completely fresh project, you may also need a build process in place to produce an optimized version of your app that can be pushed to production.
This is where boilerplate solutions are useful.Rather than having to manually write out the initial code for each piece of your Backbone app, a boilerplate could do this for you, also ideally taking care of the build process.
Backbone Boilerplate (or just BB) provides just this. It is an excellent set of best practices and utilities for building Backbone.js applications, created by Backbone contributor Tim Branyen. He took the the gotchas, pitfalls and common tasks he ran into while heavily using Backbone to build apps and crafted BB as a result of this experience.
Grunt-BBB or Boilerplate Build Buddy is the companion tool to BB, which offers scaffolding, file watcher and build capabilities. Used together with BB it provides an excellent base for quickly starting new Backbone applications.
Out of the box, BB and Grunt-BBB provide provide us with:
Notes on build tool steps:
To get started we’re going to install Grunt-BBB, which will include Backbone Boilerplate and any third-party dependencies it might need such as the Grunt build tool.
We can install Grunt-bBB via NPM by running:
npm install -g bbbThat’s it. We should now be good to go.
A typical workflow for using grunt-bbb, which we will use later on is:
bbb init)bbb init:module)bbb server)bbb build)bbb release)Let’s create a new directory for our project and run bbb init to kick things off. A number of project sub-directories and files will be stubbed out for us, as shown below:
$ bbb init
Running "init" task
This task will create one or more files in the current directory, based on the
environment and the answers to a few questions. Note that answering "?" to any
question will show question-specific help and answering "none" to most questions
will leave its value blank.
"bbb" template notes:
This tool will help you install, configure, build, and maintain your Backbone
Boilerplate project.
Writing app/app.js...OK
Writing app/config.js...OK
Writing app/main.js...OK
Writing app/router.js...OK
Writing app/styles/index.css...OK
Writing favicon.ico...OK
Writing grunt.js...OK
Writing index.html...OK
Writing package.json...OK
Writing readme.md...OK
Writing test/jasmine/index.html...OK
Writing test/jasmine/spec/example.js...OK
Writing test/jasmine/vendor/jasmine-html.js...OK
Writing test/jasmine/vendor/jasmine.css...OK
Writing test/jasmine/vendor/jasmine.js...OK
Writing test/jasmine/vendor/jasmine_favicon.png...OK
Writing test/jasmine/vendor/MIT.LICENSE...OK
Writing test/qunit/index.html...OK
Writing test/qunit/tests/example.js...OK
Writing test/qunit/vendor/qunit.css...OK
Writing test/qunit/vendor/qunit.js...OK
Writing vendor/h5bp/css/main.css...OK
Writing vendor/h5bp/css/normalize.css...OK
Writing vendor/jam/backbone/backbone.js...OK
Writing vendor/jam/backbone/package.json...OK
Writing vendor/jam/backbone.layoutmanager/backbone.layoutmanager.js...OK
Writing vendor/jam/backbone.layoutmanager/package.json...OK
Writing vendor/jam/jquery/jquery.js...OK
Writing vendor/jam/jquery/package.json...OK
Writing vendor/jam/lodash/lodash.js...OK
Writing vendor/jam/lodash/lodash.min.js...OK
Writing vendor/jam/lodash/lodash.underscore.min.js...OK
Writing vendor/jam/lodash/package.json...OK
Writing vendor/jam/require.config.js...OK
Writing vendor/jam/require.js...OK
Writing vendor/js/libs/almond.js...OK
Writing vendor/js/libs/require.js...OK
Initialized from template "bbb".
Done, without errors.Let’s review what has been generated.
This is a fairly standard stripped-down HTML5 Boilerplate foundation with the notable exception of including RequireJS at the bottom of the page.
<!doctype html>
<html lang="en">
<head>
<meta charset="utf-8">
<meta http-equiv="X-UA-Compatible" content="IE=edge,chrome=1">
<meta name="viewport" content="width=device-width,initial-scale=1">
<title>Backbone Boilerplate</title>
<!-- Application styles. -->
<!--(if target dummy)><!-->
<link rel="stylesheet" href="/app/styles/index.css">
<!--<!(endif)-->
</head>
<body>
<!-- Application container. -->
<main role="main" id="main"></main>
<!-- Application source. -->
<!--(if target dummy)><!-->
<script data-main="/app/config" src="/vendor/js/libs/require.js"></script>
<!--<!(endif)-->
</body>
</html>RequireJS - the AMD (Asynchronous Module Definition) module and script loader - will assist us with managing the modules in our application. We’ve already covered it in the last chapter, but let’s recap what this particular block does in terms of the Boilerplate:
<script data-main="/app/config" src="/vendor/js/libs/require.js"></script>The data-main attribute is used to inform RequireJS to load app/config.js (a configuration object) after it has finished loading itself. You’ll notice that we’ve omitted the .js extension here as RequireJS can automatically add this for us, however it will respect your paths if we do choose to include it regardless. Let’s now look at the config file being referenced.
A RequireJS configuration object allows us to specify aliases and paths for dependencies we’re likely to reference often (e.g., jQuery), bootstrap properties like our base application URL, and shim libraries that don’t support AMD natively.
This is what the config file in Backbone Boilerplate looks like:
// Set the require.js configuration for your application.
require.config({
// Initialize the application with the main application file and the JamJS
// generated configuration file.
deps: ["../vendor/jam/require.config", "main"],
paths: {
// Put paths here.
},
shim: {
// Put shims here.
}
});The first option defined in the above config is deps: ["../vendor/jam/require.config", "main"]. This informs RequireJS to load up additonal RequireJS configuration as well a a main.js file, which is considered the entry point for our application.
You may notice that we haven’t specified any other path information for main. Require will infer the default baseUrl using the path from our data-main attribute in index.html. In other words, our baseUrl is app/ and any scripts we require will be loaded relative to this location. We could use the baseUrl option to override this default if we wanted to use a different location.
The next block is paths, which we can use to specify paths relative to the baseUrl as well as the paths/aliases to dependencies we’re likely to regularly reference.
After this comes shim, an important part of our RequireJS configuration which allows us to load libraries which are not AMD compliant. The basic idea here is that rather than requiring all libraries to implement support for AMD, the shim takes care of the hard work for us.
Going back to deps, the contents of our require.config file can be seen below.
var jam = {
"packages": [
{
"name": "backbone",
"location": "../vendor/jam/backbone",
"main": "backbone.js"
},
{
"name": "backbone.layoutmanager",
"location": "../vendor/jam/backbone.layoutmanager",
"main": "backbone.layoutmanager.js"
},
{
"name": "jquery",
"location": "../vendor/jam/jquery",
"main": "jquery.js"
},
{
"name": "lodash",
"location": "../vendor/jam/lodash",
"main": "./lodash.js"
}
],
"version": "0.2.11",
"shim": {
"backbone": {
"deps": [
"jquery",
"lodash"
],
"exports": "Backbone"
},
"backbone.layoutmanager": {
"deps": [
"jquery",
"backbone",
"lodash"
],
"exports": "Backbone.LayoutManager"
}
}
};The jam object is to support configuration of Jam - a package manager for the front-end which helps instal, upgrade and configurate the dependencies used by your project. It is currently the package manager of choice for Backbone Boilerplate.
Under the packages array, a number of dependencies are specified for inclusion, such as Backbone, the Backbone.LayoutManager plugin, jQuery and Lo-dash.
For those curious about Backbone.LayoutManager, it’s a Backbone plugin that provides a foundation for assembling layouts and views within Backbone.
Additional packages you install using Jam will have a corresponding entry added to packages.
Next, we have main.js, which defines the entry point for our application. We use a global require() method to load an array containing any other scripts needed, such as our application app.js and our main router router.js. Note that most of the time, we will only use require() for bootstrapping an application and a similar method called define() for all other purposes.
The function defined after our array of dependencies is a callback which doesn’t fire until these scripts have loaded. Notice how we’re able to locally alias references to “app” and “router” as app and Router for convenience.
require([
// Application.
"app",
// Main Router.
"router"
],
function(app, Router) {
// Define your master router on the application namespace and trigger all
// navigation from this instance.
app.router = new Router();
// Trigger the initial route and enable HTML5 History API support, set the
// root folder to '/' by default. Change in app.js.
Backbone.history.start({ pushState: true, root: app.root });
// All navigation that is relative should be passed through the navigate
// method, to be processed by the router. If the link has a `data-bypass`
// attribute, bypass the delegation completely.
$(document).on("click", "a[href]:not([data-bypass])", function(evt) {
// Get the absolute anchor href.
var href = { prop: $(this).prop("href"), attr: $(this).attr("href") };
// Get the absolute root.
var root = location.protocol + "//" + location.host + app.root;
// Ensure the root is part of the anchor href, meaning it's relative.
if (href.prop.slice(0, root.length) === root) {
// Stop the default event to ensure the link will not cause a page
// refresh.
evt.preventDefault();
// `Backbone.history.navigate` is sufficient for all Routers and will
// trigger the correct events. The Router's internal `navigate` method
// calls this anyways. The fragment is sliced from the root.
Backbone.history.navigate(href.attr, true);
}
});
});Inline, Backbone Boilerplate includes boilerplate code for initializing our router with HTML5 History API support and handling other navigation scenarios, so we don’t have to.
Let us now look at our app.js module. Typically, in non-Backbone Boilerplate applications, an app.js file may contain the core logic or module references needed to kick start an app.
In this case however, this file is used to define templating and layout configuration options as well as utilities for consuming layouts. To a beginner, this might look like a lot of code to comprehend, but the good news is that for basic apps, you’re unlikely to need to heavily modify this. Instead, you’ll be more concerned with modules for your app, which we’ll look at next.
define([
"backbone.layoutmanager"
], function() {
// Provide a global location to place configuration settings and module
// creation.
var app = {
// The root path to run the application.
root: "/"
};
// Localize or create a new JavaScript Template object.
var JST = window.JST = window.JST || {};
// Configure LayoutManager with Backbone Boilerplate defaults.
Backbone.LayoutManager.configure({
// Allow LayoutManager to augment Backbone.View.prototype.
manage: true,
prefix: "app/templates/",
fetch: function(path) {
// Concatenate the file extension.
path = path + ".html";
// If cached, use the compiled template.
if (JST[path]) {
return JST[path];
}
// Put fetch into `async-mode`.
var done = this.async();
// Seek out the template asynchronously.
$.get(app.root + path, function(contents) {
done(JST[path] = _.template(contents));
});
}
});
// Mix Backbone.Events, modules, and layout management into the app object.
return _.extend(app, {
// Create a custom object with a nested Views object.
module: function(additionalProps) {
return _.extend({ Views: {} }, additionalProps);
},
// Helper for using layouts.
useLayout: function(name, options) {
// Enable variable arity by allowing the first argument to be the options
// object and omitting the name argument.
if (_.isObject(name)) {
options = name;
}
// Ensure options is an object.
options = options || {};
// If a name property was specified use that as the template.
if (_.isString(name)) {
options.template = name;
}
// Create a new Layout with options.
var layout = new Backbone.Layout(_.extend({
el: "#main"
}, options));
// Cache the refererence.
return this.layout = layout;
}
}, Backbone.Events);
});Note: JST stands for JavaScript templates and generally refers to templates which have been (or will be) precompiled as part of a build step. When running bbb release or bbb debug, Underscore/Lo-dash templates will be precompiled to avoid the need to compile them at runtime within the browser.
Not to be confused with simply being just an AMD module, a Backbone Boilerplate module is a script composed of a:
We can easily create a new Boilerplate module using grunt-bbb once again using init:
# Create a new module
$ bbb init:module
# Grunt prompt
Please answer the following:
[?] Module Name foo
[?] Do you need to make any changes to the above before continuing? (y/N)
Writing app/modules/foo.js...OK
Writing app/styles/foo.styl...OK
Writing app/templates/foo.html...OK
Initialized from template "module".
Done, without errors.This will generate a module foo.js as follows:
// Foo module
define([
// Application.
"app"
],
// Map dependencies from above array.
function(app) {
// Create a new module.
var Foo = app.module();
// Default Model.
Foo.Model = Backbone.Model.extend({
});
// Default Collection.
Foo.Collection = Backbone.Collection.extend({
model: Foo.Model
});
// Default View.
Foo.Views.Layout = Backbone.Layout.extend({
template: "foo"
});
// Return the module for AMD compliance.
return Foo;
});Notice how boilerplate code for a model, collection and view have been scaffolded out for us.
Optionally, we may also wish to include references to plugins such as the Backbone LocalStorage or Offline adapters. One clean way of including a plugin in the above boilerplate could be:
// Foo module
define([
// Application.
"app",
// Plugins
'plugins/backbone-localstorage'
],
// Map dependencies from above array.
function(app) {
// Create a new module.
var Foo = app.module();
// Default Model.
Foo.Model = Backbone.Model.extend({
// Save all of the items under the `"foo"` namespace.
localStorage: new Store('foo-backbone'),
});
// Default Collection.
Foo.Collection = Backbone.Collection.extend({
model: Foo.Model
});
// Default View.
Foo.Views.Layout = Backbone.Layout.extend({
template: "foo"
});
// Return the module for AMD compliance.
return Foo;
});Finally, let’s look at our application router which is used for handling navigation. The default router Backbone Boilerplate generates for us includes sane defaults out of the box and can be easily extended.
define([
// Application.
"app"
],
function(app) {
// Defining the application router, you can attach sub routers here.
var Router = Backbone.Router.extend({
routes: {
"": "index"
},
index: function() {
}
});
return Router;
});If however we would like to execute some module-specific logic, when the page loads (i.e when a user hits the default route), we can pull in a module as a dependency and optionally use the Backbone LayoutManager to attach Views to our layout as follows:
define([
// Application.
'app',
// Modules
'modules/foo'
],
function(app, Foo) {
// Defining the application router, you can attach sub routers here.
var Router = Backbone.Router.extend({
routes: {
'': 'index'
},
index: function() {
// Create a new Collection
var collection = new Foo.Collection();
// Use and configure a 'main' layout
app.useLayout('main').setViews({
// Attach the bar View into the content View
'.bar': new Foo.Views.Bar({
collection: collection
})
}).render();
}
});
// Fetch data (e.g., from localStorage)
collection.fetch();
return Router;
});When working with Backbone, you usually need to write a number of different classes and files for your application. Scaffolding tools such as Grunt-BBB can help automate this process by generating basic boilerplates for the files you need for you.
If you appreciated Grunt-BBB but would like to explore a tool for assisting with your broader development workflow, I’m happy to recommend a tool I’ve been helping with called Yeoman.
Yeoman is a workflow comprised of a collection of tools and best practices for helping you develop more efficiently. It’s comprised of yo (a scaffolding tool), Grunt(a build tool) and Bower (a client-side package manager).
Where Grunt-BBB focuses on offering an opionated start for Backbone projects, Yeoman allows you to scaffold apps using Backbone (or other frameworks), get Backbone plugins directly from the command-line and compile your CoffeeScript, Sass or other abstractions without additional effort.
You may also be interested in Brunch, a similar project which uses skeleton boilerplates to generate new applications.
When building an application with Backbone, there’s some additional tooling available for your day-to-day debugging workflow.
Backbone DevTools was created to help with this and is a Chrome DevTools extension allowing you to inspect events, syncs, View-DOM bindings and what objects have been instantiated.
A useful View hierarchy is displayed in the Elements panel. Also, when you inspect a DOM element the closest View will be exposed via $view in the console.
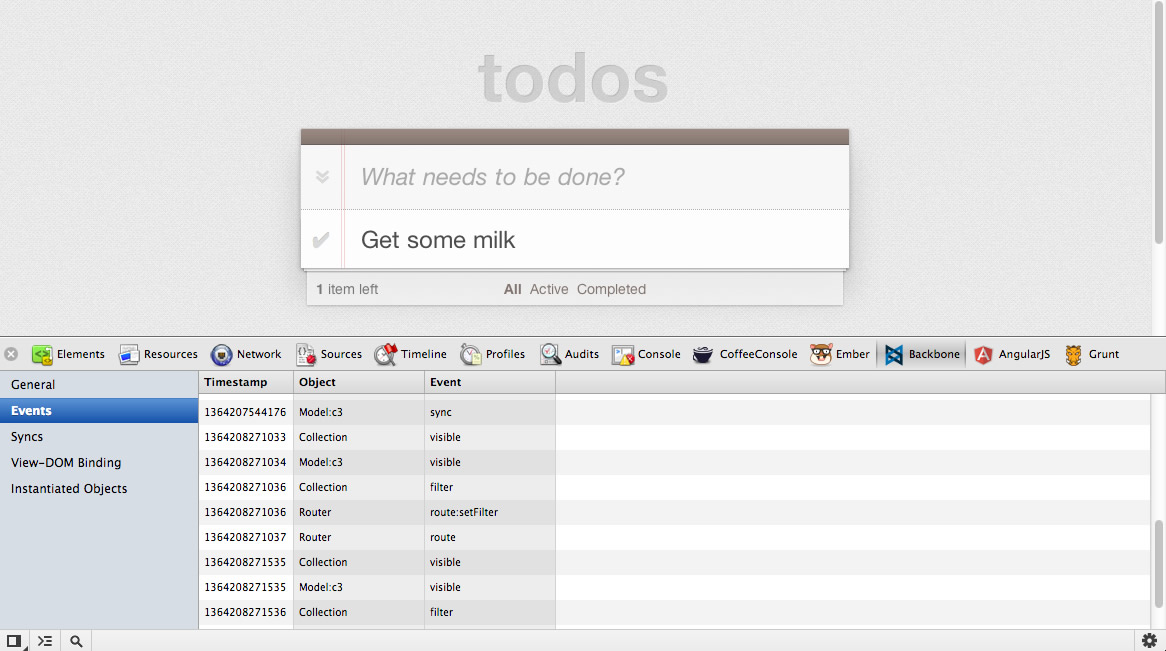
At the time of writing, the project is currently available on GitHub.
In this section we reviewed Backbone Boilerplate and learned how to use the bbb tool to help us scaffold out our application.
If you would like to learn more about how this project helps structure your app, BBB includes some built-in boilerplate sample apps that can be easily generated for review.
These include a boilerplate tutorial project (bbb init:tutorial) and an implementation of my TodoMVC project (bbb init:todomvc). I recommend checking these out as they’ll provide you with a more complete picture of how Backbone Boilerplate, its templates, and so on fit into the overall setup for a web app.
For more about Grunt-BBB, remember to take a look at the official project repository. There is also a related slide-deck available for those interested in reading more.
The mobile web is huge and it is continuing to grow at an impressive rate. Along with the massive growth of the mobile internet comes a striking diversity of devices and browsers. As a result, making your applications cross-platform and mobile-ready is both important and challenging. Creating native apps is expensive. It is very costly in terms of time and it usually requires varied experiences in programming languages like Objective C , C#, Java and JavaScript to support multiple runtime environments.
HTML, CSS, and JavaScript enable you to build a single application targeting a common runtime environment: the browser. This approach supports a broad range of mobile devices such as tablets, smartphones, and notebooks along with traditional PCs.
The challenging task is not only to adapt contents like text and pictures properly to various screen resolutions but also to have same user experience across native apps under different operating systems. Like jQueryUI, jQuery Mobile is a user interface framework based on jQuery that works across all popular phone, tablet, e-Reader, and desktop platforms. It is built with accessibility and universal access in mind.
The main idea of the framework is to enable anyone to create a mobile app using only HTML. Knowledge of a programming language is not required and there is no need to write complex, device specific CSS. For this reason jQMobile follows two main principles we first need to understand in order to integrate the framework to Backbone: progressive enhancement and responsive web design.
JQuery Mobile follows progressive enhancement and responsive web design principles using HTML-5 markup-driven definitions and configurations.
A page in jQuery Mobile consists of an element with a data-role="page" attribute. Within the page container, any valid HTML markup can be used, but for typical pages in jQM, the immediate children are divs with data-role="header", data-role="content", and data-role="footer". The baseline requirement for a page is only a page wrapper to support the navigation system, the rest is optional.
An initial HTML page looks like this:
<!DOCTYPE html>
<html>
<head>
<title>Page Title</title>
<meta name="viewport" content="width=device-width, initial-scale=1">
<link rel="stylesheet" href="http://code.jquery.com/mobile/1.3.0/jquery.mobile-1.3.0.min.css" />
<script src="http://code.jquery.com/jquery-1.9.1.min.js"></script>
<script src="http://code.jquery.com/mobile/1.3.0/jquery.mobile-1.3.0.min.js"></script>
</head>
<body>
<div data-role="page">
<div data-role="header">
<h1>Page Title</h1>
</div>
<div data-role="content">
<p>Page content goes here.</p>
<form>
<label for="slider-1">Slider with tooltip:</label>
<input type="range" name="slider-1" id="slider-1" min="0" max="100" value="50"
data-popup-enabled="true">
</form>
</div>
<div data-role="footer">
<h4>Page Footer</h4>
</div>
</div>
</body>
</html>Example HTML setup of a basic jQuery Mobile page
JQuery Mobile will transform the written HTML definition to the rendered HTML and CSS using its Progressive Widget Enhancement API. It also executes JavaScript which is conditioned by configurations, attribute properties, and runtime specific settings.
This implies: Whenever HTML content is added or changed, it needs to be handled by the progressive widget enhancement of jQuery Mobile.
Comparison of the user interface of the default HTML to the jQuery Mobile enhanced version
The jQuery Mobile navigation system controls its application’s lifecycle by automatically “hijacking” standard links and form submissions and turning them into AJAX requests. Whenever a link is clicked or a form is submitted, that event is automatically intercepted and used to issue an AJAX request based on the href or form action instead of reloading the page.
When the page document is requested, jQuery Mobile searches the document for all elements with the data-role="page" attribute, parses its contents, and inserts that code into the DOM of the original page. Once the new page is prepared, jQuery Mobile’s JavaScript triggers a transition that shows the new page and hides the HTML of the previous page in the DOM.
Next, any widgets in the incoming page are enhanced to apply all the styles and behavior. The rest of the incoming page is discarded so any scripts, stylesheets, or other information will not be included.
Via the multi-page templating feature, you can add as many pages as you want to the same HTML file within the body tag by defining divs with data-role="page" or data-role="dialog" attributes along with an id which can be used in links (preceded by a hashbang):
<html>
<head>...</head>
<body>
...
<div data-role="page" id="firstpage">
...
<div data-role="content">
<a href="#secondpage">go to secondpage</a>
</div>
</div>
<div data-role="page" id="secondpage">
...
<div data-role="content" >
<a href="#firstdialog" data-rel="dialog" >open a page as a dialog</a>
</div>
</div>
<div data-role="dialog" id="firstdialog">
...
<div data-role="content">
<a href="#firstpage">leave dialog and go to first page</a>
</div>
</div>
</body>
</html>jQuery Mobile multi-page templating example
To, for example, navigate to secondpage and have it appear in a modal dialog using a fade-transition, you would just add the data-rel="dialog", data-transition="fade", and href="index.html#secondpage" attributes to an anchor tag.
Roughly speaking, having its own event cycle, jQuery Mobile is a tiny MVC framework which includes features like progressive widget enhancement, pre-fetching, caching, and multi-page templating by HTML configurations innately. In general, a Backbone.js developer does not need to know about its internal event workflow, but will need to know how to apply HTML-based configurations which will take action within the event phase. The Intercepting jQuery Mobile Events section goes into detail regarding how to handle special scenarios when fine-grained JavaScript adaptions need to be applied.
For further introduction and explanations about jQuery Mobile visit:
The first major hurdle developers typically run into when building applications with jQuery Mobile and an MV* framework is that both frameworks want to handle application navigation.
To combine Backbone and jQuery Mobile, we first need to disable jQuery Mobile’s navigation system and progressive enhancement. The second step will then be to make use of jQM’s custom API to apply configurations and enhance components during Backbone’s application lifecycle instead.
The mobile app example presented here is based on the existing codebase of the TodoMVC Backbone-Require.js example, which was discussed in an earlier chapter, and is enhanced to support jQuery Mobile.
Screenshot of the TodoMVC app with jQuery Mobile
This implementation makes use of Grunt-BBB as well as Handlebars.js. Additional utilities useful for mobile applications will be provided, which can be easily combined and extended. (see the Backbone Boilerplate & Grunt-BBB and Backbone Extensions chapters)
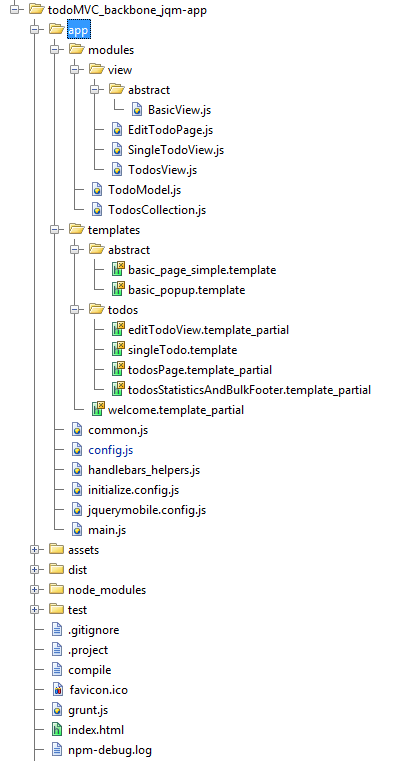
Workspace of the TodoMVC app with jQueryMobile and Backbone
The order of the files loaded by Require.js is as follows:
By opening the console in the project directory and then running the Grunt-Backbone command grunt handlebars or grunt watch in the console, it will combine and compile all template files to dist/debug/handlebars_packaged. To start the application, run grunt server.
Files instantiated, when redirected from the Backbone-Router are:
The BasicView is responsible for the Handlebars multipage-template processing. Its implementation of render calls the jQuery Mobile API $.mobile.changePage to handle page navigation and progressive widget enhancement.
E.g., EditTodoPage.js and editTodoView.template_partial
The head section of index.html needs to load the jquerymobile.css as well as the base.css, which is used by all Todo-MVC apps, and the index.css for some project-specific custom CSS.
<html>
<head>
<meta charset="utf-8">
<meta http-equiv="X-UA-Compatible" content="IE=edge,chrome=1">
<meta name="viewport" content="width=device-width,initial-scale=1">
<title>TodoMVC Jquery Mobile</title>
<!-- widget and responsive design styles -->
<link rel="stylesheet" href="/assets/css/jquerymobile.css">
<!-- used by all TodoMVC apps -->
<link rel="stylesheet" href="/assets/css/base.css">
<!-- custom css -->
<link rel="stylesheet" href="/assets/css/index.css">
</head>
<body>
<script data-main="/app/config" src="/assets/js/libs/require.js"></script>
</body>
</html>index.html
By delegating the routing and navigation functions of the jQuery Mobile Framework to Backbone, we can profit from its clear separation of application structure to later on easily share application logic between a desktop webpage, tablets, and mobile apps.
We now need to contend with the different ways in which Backbone and jQuery Mobile handle requests. Backbone.Router offers an explicit way to define custom navigation routes, while jQuery Mobile uses URL hash fragments to reference separate pages or views in the same document.
Some of the ideas that have been previously proposed to work-around this problem included manually patching Backbone and jQuery Mobile. The solution demonstrated below will not only simplify the handling of the jQuery Mobile component initialization event-cycle, but also enables use of existing Backbone Router handlers.
To adapt the navigation control from jQuery Mobile to Backbone, we first need to apply some specific settings to the mobileinit event which occurs after the framework has loaded in order to let the Backbone Router decide which page to load.
A configuration which will get jQM to delegate navigation to Backbone and which will also enable manual widget creation triggering is given below:
$(document).bind("mobileinit", function(){
// Disable jQM routing and component creation events
// disable hash-routing
$.mobile.hashListeningEnabled = false;
// disable anchor-control
$.mobile.linkBindingEnabled = false;
// can cause calling object creation twice and back button issues are solved
$.mobile.ajaxEnabled = false;
// Otherwise after mobileinit, it tries to load a landing page
$.mobile.autoInitializePage = false;
// we want to handle caching and cleaning the DOM ourselves
$.mobile.page.prototype.options.domCache = false;
// consider due to compatibility issues
// not supported by all browsers
$.mobile.pushStateEnabled = false;
// Solves phonegap issues with the back-button
$.mobile.phonegapNavigationEnabled = true;
//no native datepicker will conflict with the jQM component
$.mobile.page.prototype.options.degradeInputs.date = true;
});jquerymobile.config.js
The behaviour and usage of the new workflow will be explained below, grouped by its functionalities:
Routing to a concrete View-page
Management of mobile page templates
DOM management
$.mobile.changePage
In the following discussion, the steps 1-11 in the text refer to the new workflow diagram of the mobile application below.
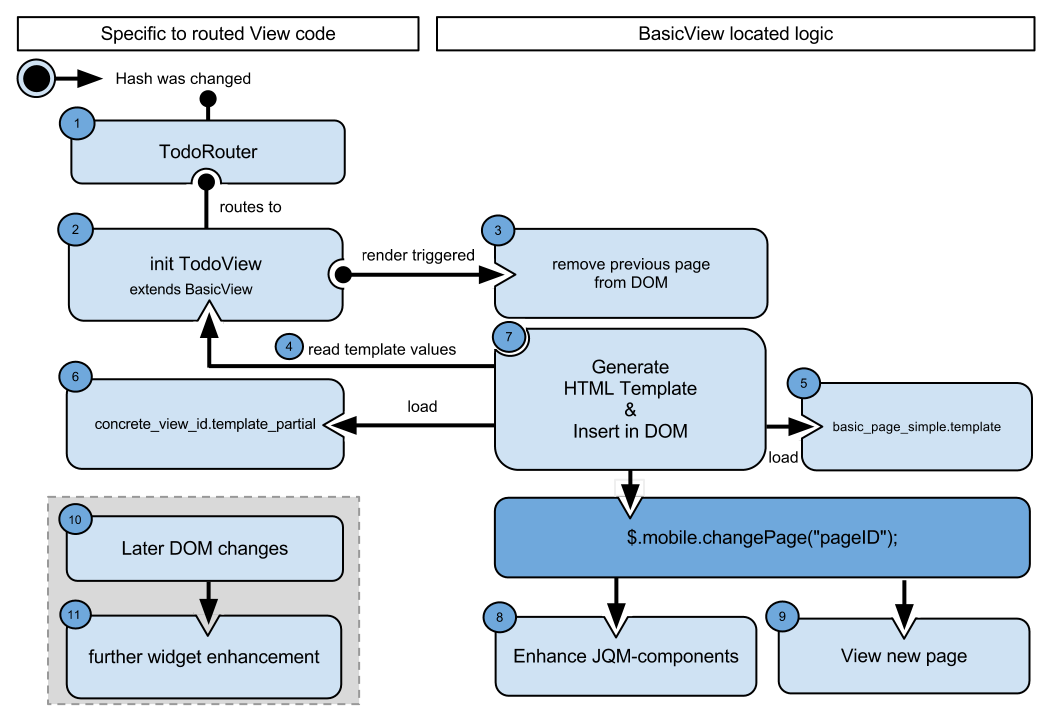
Workflow of TodoMVC, with Backbone and jQueryMobile
When the hash URL changes, e.g., a link is clicked, the configuration above prevents jQM from triggering its events. Instead, the Backbone Router listens to the hash changes and decides which view to request.
Experience has shown that, for mobile pages, it is a good practice to create basic prototypes for jQM components such as basic pages, popups, and dialogs, as well as for using the jQuery Validation Plugin. This makes it much easier to exchange device-specific view logic at runtime and adopt general strategies. This will also help to add syntax and to support multi-chaining of prototype inheritance with JavaScript and Backbone.
By creating a BasicView superclass, we enable all inheriting view-pages to share a common way of handling jQM along with common usage of a template engine and specific view handling.
When building with Grunt/Yeoman, the semantic templates are compiled by Handlebar.js and the AMDs template files are combined into a single file. By merging all page definitions into a single-file-app, it becomes offline capable, which is important for mobile app.
Within a concrete View page, you can override properties for static values and functions to return dynamic values of the super class BasicView. These values will be processed later by the BasicView to construct the HTML of a jQuery Mobile page with the help of Handlebars.
Additional dynamic template parameters, e.g., Backbone model information, will be taken from the specific View and merged with the ones from the BasicView.
A concrete View might look like:
define([
"backbone", "modules/view/abstract/BasicView"],
function (Backbone, BasicView) {
return BasicView.extend({
id : "editTodoView",
getHeaderTitle : function () {
return "Edit Todo";
},
getSpecificTemplateValues : function () {
return this.model.toJSON();
},
events : function () {
// merged events of BasicView, to add an older fix for back button functionality
return _.extend({
'click #saveDescription' : 'saveDescription'
}, this.constructor.__super__.events);
},
saveDescription : function (clickEvent) {
this.model.save({
title : $("#todoDescription", this.el).val()
});
return true;
}
});
});A concrete View (EditTodoPage.js)
By default, the BasicView uses basic_page_simple.template as the Handlebars template. If you need to use a custom template or want to introduce a new Super abstract View with an alternate template, override the getTemplateID function:
getTemplateID : function(){
return "custom_page_template";
}By convention, the id attribute will be taken as the id of the jQM page as well as the filename of the corresponding template file to be inserted as a partial in the basic_page_simple template. In the case of the EditTodoPage view, the name of the file will be editTodoPage.template_partial.
Every concrete page is meant to be a partial, which will be inserted in the data-role="content" element, where the parameter templatePartialPageID is located.
Later on, the result of the getHeaderTitle function from EditTodoPage will replace the headerTitle in the abstract template.
<div data-role="header">
{{whatis "Specific loaded Handlebars parameters:"}}
{{whatis this}}
<h2>{{headerTitle}}</h2>
<a id="backButton" href="href="javascript:history.go(-1);" data-icon="star" data-rel="back" >back</a>
</div>
<div data-role="content">
{{whatis "Template page trying to load:"}}
{{whatis templatePartialPageID}}
{{> templatePartialPageID}}
</div>
<div data-role="footer">
{{footerContent}}
</div>basic_page_simple.template
Note: The whatis Handlebars View helper does simple logging of parameters.
All the additional parameters being returned by getSpecificTemplateValues will be inserted into the concrete template editTodoPage.template_partial.
Because footerContent is expected to be used rarely, its content is returned by getSpecificTemplateValues.
In the case of the EditTodoPage view, all the model information is being returned and title is used in the concrete partial page:
<div data-role="fieldcontain">
<label for="todoDescription">Todo Description</label>
<input type="text" name="todoDescription" id="todoDescription" value="{{title}}" />
</div>
<a id="saveDescription" href="#" data-role="button" data-mini="true">Save</a>editTodoView.template_partial
When render is triggered, the basic_page_simple.template and editTodoView.template_partial templates will be loaded and the parameters from EditTodoPage and BasicView will be combined and generated by Handlebars to generate:
<div data-role="header">
<h2>Edit Todo</h2>
<a id="backButton" href="href="javascript:history.go(-1);" data-icon="star" data-rel="back" >back</a>
</div>
<div data-role="content">
<div data-role="fieldcontain">
<label for="todoDescription">Todo Description</label>
<input type="text" name="todoDescription" id="todoDescription" value="Cooking" />
</div>
<a id="saveDescription" href="#" data-role="button" data-mini="true">Save</a>
</div>
<div data-role="footer">
Footer
</div>Final HTML definition resulting from basic_page_simple_template and editTodoView.template_partial
The next section explains how the template parameters are collected by the BasicView and the HTML definition is loaded.
When render is executed (line 29 is the source code listing below), BasicView first cleans up the DOM by removing the previous page (line 70). To delete the elements from the DOM, $.remove cannot be used, but $previousEl.detach() can be since detach does not remove the element’s attached events and data.
This is important, because jQuery Mobile still needs information (e.g., to trigger transition effects when switching to another page). Keep in mind that the DOM data and events should be cleared later on as well to avoid possible performance issues.
Other strategies than the one used in the function cleanupPossiblePageDuplicationInDOM to cleanup the DOM are viable. To only remove the old page having the same id as the current from the DOM, when it was already requested before, would also be a working strategy of preventing DOM duplication. Depending on what fits best to your application needs, it is also possibly a one-banana problem to exchange it using a caching mechanism.
Next, BasicView collects all template parameters from the concrete View implementation and inserts the HTML of the requested page into the body. This is done in steps 4, 5, 6, and 7 in the diagram above (between lines 23 and 51 in the source listing).
Additionally, the data-role will be set on the jQuery Mobile page. Commonly used attribute values are page, dialog, or popup.
As you can see, (starting at line 74), the goBackInHistory function contains a manual implementation to handle the back button’s action. In certain scenarios, the back button navigation functionality of jQuery Mobile was not working with older versions and disabled jQMobile’s navigation sytem.
1 define([
2 "lodash",
3 "backbone",
4 "handlebars",
5 "handlebars_helpers"
6 ],
7
8 function (_, Backbone, Handlebars) {
9 var BasicView = Backbone.View.extend({
10 initialize: function () {
11 _.bindAll();
12 this.render();
13 },
14 events: {
15 "click #backButton": "goBackInHistory"
16 },
17 role: "page",
18 attributes: function () {
19 return {
20 "data-role": this.role
21 };
22 },
23 getHeaderTitle: function () {
24 return this.getSpecificTemplateValues().headerTitle;
25 },
26 getTemplateID: function () {
27 return "basic_page_simple";
28 },
29 render: function () {
30 this.cleanupPossiblePageDuplicationInDOM();
31 $(this.el).html(this.getBasicPageTemplateResult());
32 this.addPageToDOMAndRenderJQM();
33 this.enhanceJQMComponentsAPI();
34 },
35 // Generate HTML using the Handlebars templates
36 getTemplateResult: function (templateDefinitionID, templateValues) {
37 return window.JST[templateDefinitionID](templateValues);
38 },
39 // Collect all template paramters and merge them
40 getBasicPageTemplateResult: function () {
41 var templateValues = {
42 templatePartialPageID: this.id,
43 headerTitle: this.getHeaderTitle()
44 };
45 var specific = this.getSpecificTemplateValues();
46 $.extend(templateValues, this.getSpecificTemplateValues());
47 return this.getTemplateResult(this.getTemplateID(), templateValues);
48 },
49 getRequestedPageTemplateResult: function () {
50 this.getBasicPageTemplateResult();
51 },
52 enhanceJQMComponentsAPI: function () {
53 // changePage
54 $.mobile.changePage("#" + this.id, {
55 changeHash: false,
56 role: this.role
57 });
58 },
59 // Add page to DOM
60 addPageToDOMAndRenderJQM: function () {
61 $("body").append($(this.el));
62 $("#" + this.id).page();
63 },
64 // Cleanup DOM strategy
65 cleanupPossiblePageDuplicationInDOM: function () {
66 // Can also be moved to the event "pagehide": or "onPageHide"
67 var $previousEl = $("#" + this.id);
68 var alreadyInDom = $previousEl.length >= 0;
69 if (alreadyInDom) {
70 $previousEl.detach();
71 }
72 },
73 // Strategy to always support back button with disabled navigation
74 goBackInHistory: function (clickEvent) {
75 history.go(-1);
76 return false;
77 }
78 });
79
80 return BasicView;
81 });BasicView.js
After the dynamic HTML is added to the DOM, $.mobile.changePage has to be applied at step 8 (code line 54).
This is the most important API call, because it triggers the jQuery Mobile component creation for the current page.
Next, the page will be displayed to the user at step 9.
<a data-mini="true" data-role="button" href="#" id="saveDescription" data-corners="true"
data-shadow="true" data-iconshadow="true" data-wrapperels="span" data-theme="c"
class="ui-btn ui-shadow ui-btn-corner-all ui-mini ui-btn-up-c">
<span class="ui-btn-inner">
<span class="ui-btn-text">Save</span>
</span>
</a>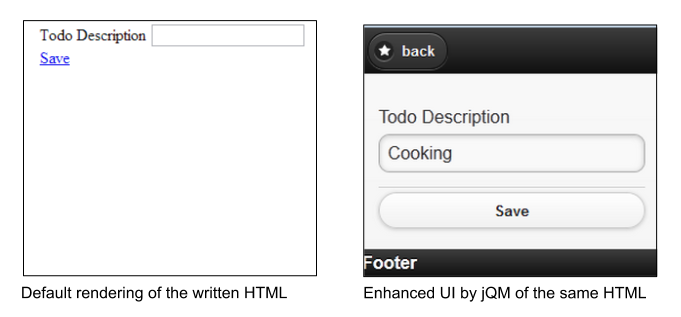
Look and feel of the written HTML code and the jQuery Mobile enhanced Todo description page
UI enhancement is done in the enhanceJQMComponentsAPI function in line 52:
$.mobile.changePage("#" + this.id, {
changeHash: false,
role: this.role
});To retain control of hash routing, changeHash has to be set to false and the proper role parameter provided to guarantee proper page appearance. Finally, changePage will show the new page with its defined transition to the user.
For the basic use cases, it is advised to have one View per page, and always render the complete page again by calling $.mobile.changePage when widget enhancement needs to be done.
To progress component enrichment of a newly added HTML-fragment into the DOM, advanced techniques need to be applied to guarantee correct appearance of the mobile components. You need to be very careful when creating partial HTML code and updating values on UI elements. The next section will explain how to handle these situations.
The solution described above solves the issues of handling routing with Backbone by calling $.mobile.changePage('pageID'). Additionally, it guarantees that the HTML page will be completely enhanced by the markup for jQuery Mobile.
The second tricky part with jQuery Mobile is to dynamically manipulate specific DOM contents (e.g. after loading in content with Ajax). We suggest you use this technique only if there is evidence for an appreciable performance gain.
With the current version (1.3), jQM provides three ways, documented and explained below in the official API, on forums, and blogs.
$(“pageId”).trigger(“pagecreate”)
Creates markup of header, content as well as footer
$(“anyElement”).trigger(“create”)
Creates markup of the element as well as all children
$(‘select’).selectmenu()
Every component of jQM offers plugins methods they can invoke to update the state of specific UI elements.
Sometimes, when creating a component from scratch, the following error can occur: ‘cannot call methods on listview prior to initialization’. This can be avoided, with component initialization prior to markup enhancement, by calling it in the following way:
$('#mylist').listview().listview('refresh')To see more details and enhancements for further scripting pages of JQM read their API and follow the release notes frequently.
If you consider using a Model-Binding Plugin, you will need to come up with an automated mechanism to enrich single components.
After having a look at the previous section about Dynamic DOM Scripting, it might not be acceptable to completely re-create a component (e.g a Listview) which takes a longer time to load and to reduce the complexity of event-delegation. Instead, the component-specific plugins, which will only update the needed parts of the HTML and CSS, should be used.
In the case of a Listview, you would need to call the following function to update the list of added, edited, or removed entries:
$('#mylist').listview()You need to come up with a means of detecting the component type to in order to decide which plugin method needs to be called. The jQuery Mobile Angular.js Adapter provides such a strategy and solution as well.
Example of Model Binding with jQuery Mobile
In special situations you will need to take action on a triggered jQuery Mobile event, which can be done as follows:
$('#myPage').live('pagebeforecreate', function(event){
console.log(page was inserted into the DOM');
//run your own enhancement scripting here...
// prevent the page plugin from making its manipulations
return false;
});
$('#myPage').live('pagecreate', function(event){
console.log(‘page was enhanced by jQM');
});In such scenarios, it is important to know when the jQuery Mobile events occur. The following diagram depicts the event cycle (page A is the outgoing page and page B is the incoming page).
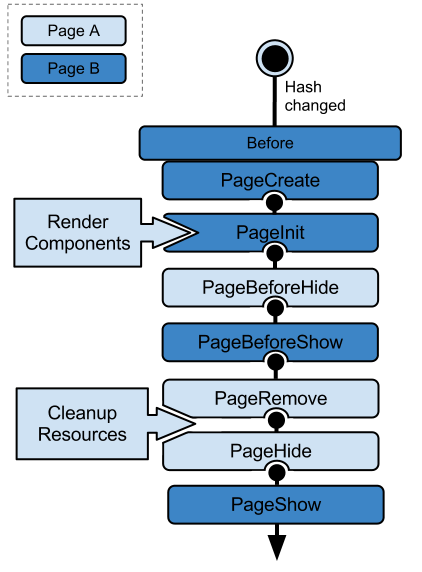
jQuery Mobile Event Cycle
An alternative is the jQuery Mobile Router project, which you might use to replace the Backbone Router. With the help of the jQM Router project, you could achieve a powerful way to intercept and route one of the various jQM events. It is an extension to jQuery Mobile, which can be used independently.
Be aware that jQM-Router misses some features of Backbone.Router and is tightly coupled with the jQuery Mobile framework. For these reasons, we did not use it for the TodoMVC app. If you intend to use it, consider using a Backbone.js custom build to exclude the router code. This might save around 25% relative to the max compressed size of 17,1 KB.
Performance is an important topic on mobile devices. jQuery Mobile provides various tools that create performance logs which can give you a good overview of the actual time spent in routing logic, component enhancement, and visual effects.
Depending on the device, the time spent on transitions can take up to 90% of the load time. To disable all transitions, you can either pass the transition none to $.mobile.changePage(), in the configuration code block:
$(document).bind("mobileinit", function(){
…
// Otherwise, depending on takes up to 90% of loadtime
$.mobile.defaultPageTransition = "none";
$.mobile.defaultDialogTransition = "none";
});
})or consider adding device-specific settings, for example:
$(document).bind("mobileinit", function(){
var iosDevice =((navigator.userAgent.match(/iPhone/i))
|| (navigator.userAgent.match(/iPod/i))) ? true : false;
$.extend( $.mobile , {
slideText : (iosDevice) ? "slide" : "none",
slideUpText : (iosDevice) ? "slideup" : "none",
defaultPageTransition:(iosDevice) ? "slide" : "none",
defaultDialogTransition:(iosDevice) ? "slide" : "none"
});Also, consider doing your own pre-caching of enhanced jQuery Mobile pages.
The jQuery Mobile API is frequently enhanced with regards to this topic in each new release. We suggest you take a look at the latest updated API to determine an optimal caching strategy with dynamic scripting that best fits your needs.
For further information on performance, see the following:
Nowadays, a company typically has an existing webpage and management decides to provide an additional mobile app to customers. The code of the web page and the mobile app become independent of each other and the time required for content or feature changes becomes much higher than for the webpage alone.
As the trend is towards an increasing number of mobile platforms and dimensions, the effort required to support them is only increasing as well. Ultimately, creating per-device experiences is not always viable. However, it is essential that content is available to all users, regardless of their browser and platform. This principle must be kept in mind during the design phase.
Responsive Design and Mobile First approaches address these challenges.
The mobile app architecture presented in this chapter takes care of a lot of the actual heavy lifting required, as it supports responsive layouts out of the box and even supports browsers which cannot handle media queries. It might not be obvious that jQM is a UI framework not dissimilar to jQuery UI. jQuery Mobile is using the widget factory and is capable of being used for more than just mobile environments.
To support multi-platform browsers using jQuery Mobile and Backbone, you can, in order of increasing time and effort:
The ideal solution, to build a nice-looking desktop application with only one mobile framework, sounds crazy, but is feasible.
If you have a look at the jQuery Mobile API page in a desktop browser, it does not look anything like a mobile application.
Desktop view of the jQuery Mobile API and Docs application (http://view.jquerymobile.com/1.3.0/)
The same goes for the jQuery Mobile design examples, where jQuery Mobile intends to add further user interface experiences.
Design examples of jQuery Mobile for desktop environments, http://jquerymobile.com/designs/#desktop
The accordions, date-pickers, sliders - everything in the desktop UI is re-using what jQM would be providing users on mobile devices. By way of example, adding the attribute data-mini="true" on components will lose the clumsiness of the mobile widgets on a desktop browser.
See http://jquerymobile.com/demos/1.2.0/docs/forms/forms-all-mini.html, Mini-widgets for desktop applications by jQuery Mobile.
Thanks to some media queries, the desktop UI can make optimal use of whitespace, expanding component blocks out and providing alternative layouts while still making use of jQM as the component framework.
The benefit of this is that you don’t need to pull in another widget framework (e.g., jQuery UI) separately to be able to take advantage of these features. Thanks to the ThemeRoller, the components can look pretty much exactly how you would like them to and users of the app can get a jQM UI for lower-resolutions and a jQM-ish UI for everything else.
The take away here is just to remember that if you are not already going through the hassle of conditional script/style loading based on screen-resolution (using matchMedia.js, etc.), there are simpler approaches that can be taken to cross-device component theming. At least the Responsive Design API of jQuery Mobile, which was added since version 1.3.0, is always reasonable because it will work for mobile as well as for desktop. In summary, you can manage jQuery Mobile components to give users a typical desktop appearance and they will not realize a difference.
Responsive Design with jQuery Mobile
Also, if you hit your limits of CSS-styling and configurations of your jQuery Mobile application for desktop browsers, the additional effort to use jQuery Mobile and Twitter Bootstrap together can be quite simple. In the case that a desktop browser requests the page and Twitter Bootstrap has been loaded, the mobile TodoMVC app would need conditional code to not trigger the jQM Widget processive enhancement plugins API (demonstrated in the Dynamic DOM Scripting section) in the Backbone.View implementation. Therefore, as explained in the previous sections, we recommend triggering widget enhancements by $.mobile.changePage only once to load the complete page.
An example of such a widget hybrid usage can be seen here:
Appengine boilerplate, desktop and mobile appearance
Although it is using server-side technologies for templating using the programming language Python, the principle of triggering progressive enhancement at page load is the same as $mobile.changePage.
As you can see, the JavaScript and even the CSS stays the same. The only device-specific conditions and differences in implementations are for selecting the appropriate framework imports, which are located in the HTML template:
...
{% if is_mobile %}
<link rel="stylesheet" href="/mobile/jquery.mobile-1.1.0.min.css" />
{% else %}
<link rel="apple-touch-icon" href="/apple-touch-icon.png" />
<link rel="stylesheet" href="/css/style.css" />
<link rel="stylesheet" href="/css/bootstrap.min.css">
<link rel="stylesheet" href="/css/bootstrap-responsive.min.css">
{% endif %}
<link rel="stylesheet" href="/css/main.css" />
{% block mediaCSS %}{% endblock %}
...
{% if is_mobile %}
<script src="/mobile/jquery.mobile-1.1.0.min.js"></script>
{% else %}
<script src="/js/libs/bootstrap.min.js"></script>
{% endif %}
...单元测试的定义就是把整个应用中小片可测试的代码从代码库中隔离,然后检验它的行为是否跟期望的一致。
一个被称为’好’测试的应用,很明显功能上应该有分开的单元测试,以验证不同情况下它的正确性。所有测试应该在功能完成之前介入。这可以让开发者修改一块代码的时候通过单元测试确认他的修改是否会引发问题,建立代码质量的信心。
一个最基本的单元测试例子,开发者想要断言传入指定的value給一个sum函数其返回结果是否正确。与我们这本书有关的例子就是,我们想要断言一个用户添加一个新的Todo项到列表中,是否添加了一个指定类型的Model到Todos Collection。
构建现代的web应用时,通常认为最好的实践方式是在开发过程中引入自动的单元测试。这里我们关注下使用Jasmine的方案,当然也有很多其它选择值得考虑,包括QUnit。
这一节,我们会讲述如何使用一个流行的测试框架Jasmine来测试Backbone应用,这个框架来自Pivotal Labs。
Jasmine自称是一个用于测试JavaScript代码的行为-驱动开发(Behavior-Driven Development,BDD)的框架。在开始使用这个框架之前,我们先来弄清楚下什么是BDD。
BDD是一种第二代测试方法,由Dan North (BDD方面的权威)首次定义,它是试图测试软件的行为。称之为第二代是因为其想法来自于领域驱动设计(Domain driven design,DDD)和精益软件开发,通过在敏捷过程中回答许多令人困惑的问题来帮助团队产出高质量软件。这类问题通常包含相关文档和测试。
如果阅读过一本关于BDD的书籍,有可能它会被描述成’由外及内的、基于拉(pull)的(outside-in and pull-based)’。原因就是它从精益生产借鉴了pull特性, 通过a) 注重系统的预期输出(outputs),b) 确保这些输出被达到,这2两点有效的确保开发出正确的软件方案。
BDD提出在一个项目中通常有多元利益体并且系统不是只有一个单一的无形用户。这些不同的群体,将会以不同的形式影响所编写的软件,而且软件系统的质量对于他们的意义他们有不同的理解。所以,要明白对于这个软件谁会给你带来价值以及软件会给他们带来什么价值,这点非常重要。
最后,BDD依赖于自动化。一旦定义好你期望的质量,你的团队可能就会定期的检查正在做的功能是否与他们期望的一致。为了促进效率,这个过程需要自动完成。BDDIn order to facilitate this efficiently, the process has to be automated. BDD严重依赖于自动规格测试,而Jasmine正好是一个做这件事的工具。
BDD可以帮助开发者和非技术的利益相关者做到:
这就意味着开发者要把Jasmine单元测试给项目的利益相关者做展示,然后他们在观念上要理解代码的用途。
开发者经常跟另外一种测试方法TDD (test-driven development)一样来实施BDD。TDD背后的主要观点:
这一章我们将会用这两种方式(BDD和TDD)来为Backbone应用编写单元测试。
提示 我看到很多开发者仍然是在完成编码之后才编写测试来做验证。虽然这也还不错,不过容易调入陷入,它只能测试到你现在代码所支持的行为,而不一定完整包含我们原本设计需要支持的功能。
使用Jasmine时,要编写suites(套件)和specs(specifications,规格说明)。Suites主要描述场景,specs描述在这些场景l里要做些什么。
每个spec就是一个一个JavaScript函数,调用it()来描述,传入一个描述字符串和一个function。描述语要描述出指定单元代码的展现结果,牢记BDD的观念,表述应该有意义。下面是一个简单的例子:
it('should be incrementing in value', function(){
var counter = 0;
counter++;
});就其本身而言,一个spec如果没有设置行为代码的期望结果就没有什么用处了。使用expect()函数和expectation matcher (比如toEqual(), toBeTruthy(), toContain())来定义期望结果。示例:
it('should be incrementing in value', function(){
var counter = 0;
counter++;
expect(counter).toEqual(1);
});上面代码中对counter的期望值要等于1。这种代码读起来非常简单(凭直觉就可以理解了,无需任何解释)。
一组Specs就构成了suites,通过Jasmine的describe()函数定义,传入一个描述字符串和一个函数。suite的名称或者描述通常是需要测试的组件或者模块。
Jasmine会把它作为给出报告时运行specs的分组名称。下面是一个简单的示例:
describe('Stats', function(){
it('can increment a number', function(){
...
});
it('can subtract a number', function(){
...
});
});Suites共享一个函数域,所以可以在describe函数内声明变量, specs里的函数也可以访问到:
describe('Stats', function(){
var counter = 1;
it('can increment a number', function(){
// the counter was = 1
counter = counter + 1;
expect(counter).toEqual(2);
});
it('can subtract a number', function(){
// the counter was = 2
counter = counter - 1;
expect(counter).toEqual(1);
});
});提示: Suites是按其定义的顺序执行,如果你要看整个应用测试报告的某个特定部分的测试结果,这可能非常有用。
Jasmine同样支持spies(监视) ——在单元测试中一种模仿,监视,和伪造行为的方法。Spies会替换它们监视的函数,可以模仿我们想要伪造的行为。
在下面这个例子中,我们用一个虚拟的Todo function监视setComplete方法,测试传入的参数是否符合期望。
var Todo = function(){
};
Todo.prototype.setComplete = function (arg){
return arg;
}
describe('a simple spy', function(){
it('should spy on an instance method of a Todo', function(){
var myTodo = new Todo();
spyOn(myTodo, 'setComplete');
myTodo.setComplete('foo bar');
expect(myTodo.setComplete).toHaveBeenCalledWith('foo bar');
var myTodo2 = new Todo();
spyOn(myTodo2, 'setComplete');
expect(myTodo2.setComplete).not.toHaveBeenCalled();
});
});更有可能会用到spies的地方是测试asynchronous(异步)行为,比如AJAX请求。Jasmine支持:
第一种测试,可以伪造AJAX请求,验证请求的URL是否正确以及执行回调,如果有的话。
it("the callback should be executed on success", function () {
spyOn($, "ajax").andCallFake(function(options) {
options.success();
});
var callback = jasmine.createSpy();
getTodo(15, callback);
expect($.ajax.mostRecentCall.args[0]["url"]).toEqual("/todos/15");
expect(callback).toHaveBeenCalled();
});
function getTodo(id, callback) {
$.ajax({
type: "GET",
url: "/todos/" + id,
dataType: "json",
success: callback
});
}andCallFake(),toHaveBeenCalled()是匹配方法,所有Spy可用的匹配方法可以看Jasmine wiki。
第二种测试(异步测试),我们可以用Jasmine支持的下面这三个方法对前面的例子做些改进:
it("should make an actual AJAX request to a server", function () {
var callback = jasmine.createSpy();
getTodo(16, callback);
waitsFor(function() {
return callback.callCount > 0;
});
runs(function() {
expect(callback).toHaveBeenCalled();
});
});
function getTodo(id, callback) {
$.ajax({
type: "GET",
url: "todos.json",
dataType: "json",
success: callback
});
}提示: 当在单元测试中创建真实的服务器端请求时,会极大的拖慢测试运行的速度(有很多因素,包括服务器延迟)。同时也引入了外部依赖,原本可以(也应该要)最小化你的单元测试,所以强烈推荐你选择spies,避免使用真实的服务器端调用。
Jasmine同样支持在每个测试之前(beforeEach())或者之后(afterEach)执行特定的代码。这对强制为一致的条件非常有用(比如重置specs引入的变量)。下面这个例子中,beforeEach()中创建一个specs用于测试属性的Todo model。
beforeEach(function(){
this.todo = new Backbone.Model({
text: 'Buy some more groceries',
done: false
});
});
it('should contain a text value if not the default value', function(){
expect(this.todo.get('text')).toEqual('Buy some more groceries');
});每个describe()中都可嵌套自己的beforeEach()和afterEach()方法,支持对应suite相关的setup和teardown方法。
beforeEach() and afterEach() can be used together to write tests verifying that our Backbone routes are being correctly triggered when we navigate to the URL. We can start with the index action:
describe('Todo routes', function(){
beforeEach(function(){
// Create a new router
this.router = new App.TodoRouter();
// Create a new spy
this.routerSpy = jasmine.spy();
// Begin monitoring hashchange events
try{
Backbone.history.start({
silent:true,
pushState: true
});
}catch(e){
// ...
}
// Navigate to a URL
this.router.navigate('/js/spec/SpecRunner.html');
});
afterEach(function(){
// Navigate back to the URL
this.router.navigate('/js/spec/SpecRunner.html');
// Disable Backbone.history temporarily.
// Note that this is not really useful in real apps but is
// good for testing routers
Backbone.history.stop();
});
it('should call the index route correctly', function(){
this.router.bind('route:index', this.routerSpy, this);
this.router.navigate('', {trigger: true});
// If everything in our beforeEach() and afterEach()
// calls have been correctly executed, the following
// should now pass.
expect(this.routerSpy).toHaveBeenCalledOnce();
expect(this.routerSpy).toHaveBeenCalledWith();
});
});The actual TodoRouter for that would make the above test pass looks like:
var App = App || {};
App.TodoRouter = Backbone.Router.extend({
routes:{
'': 'index'
},
index: function(){
//...
}
});Let’s imagine we have a Suite where we wish to check for the existence of a new Todo item instance. This could be done by duplicating the spec as follows:
describe("Todo tests", function(){
// Spec
it("Should be defined when we create it", function(){
// A Todo item we are testing
var todo = new Todo("Get the milk", "Tuesday");
expect(todo).toBeDefined();
});
it("Should have the correct title", function(){
// Where we introduce code duplication
var todo = new Todo("Get the milk", "Tuesday");
expect(todo.title).toBe("Get the milk");
});
});As you can see, we’ve introduced duplication that should ideally be refactored into something cleaner. We can do this using Jasmine’s Suite (Shared) Functional Scope.
All of the specs within the same Suite share the same functional scope, meaning that variables declared within the Suite itself are available to all of the Specs in that suite. This gives us a way to work around our duplication problem by moving the creation of our Todo objects into the common functional scope:
describe("Todo tests", function(){
// The instance of Todo, the object we wish to test
// is now in the shared functional scope
var todo = new Todo("Get the milk", "Tuesday");
// Spec
it("should be correctly defined", function(){
expect(todo).toBeDefined();
});
it("should have the correct title", function(){
expect(todo.title).toBe("Get the milk");
});
});前面你可能注意到beforeEach()调用中我们定义了一个变量this.todo,然后在afterEach()也可以继续使用它。这要归功于Jasmine的共享函数域。共享域可以让所有块(包括runs())访问的this的属性都是相同的,除了声明的变量之外(var声明的变量)。
现在我们来分析下基本原理,先下载Jasmine并且做好编写测试前的准备。
官方独立版本可以从这里下载。
下载到的包中还有一个SpecRunner.html文件。 Jasmine代码仓库可以从用git从这里获取https://github.com/pivotal/jasmine.git。
我们来看下SpecRunner.html文件(下面示例代码可能相对于新版本的Jasmine较老了):
首先引入Jasmine和必要用于report的css:
<link rel="stylesheet" type="text/css" href="lib/jasmine-1.1.0.rc1/jasmine.css"/>
<script type="text/javascript" src="lib/jasmine-1.1.0.rc1/jasmine.js"></script>
<script type="text/javascript" src="lib/jasmine-1.1.0.rc1/jasmine-html.js"></script>然后,引入一些测试:
<script type="text/javascript" src="spec/SpecHelper.js"></script>
<script type="text/javascript" src="spec/PlayerSpec.js"></script>最后是需要被测试的代码:
<script type="text/javascript" src="src/Player.js"></script>
<script type="text/javascript" src="src/Song.js"></script>提示: SpecRunner后面的代码是负责运行测试。 这里不做分析,鼓励你看看PlayerSpec.js和SpecHelper.js的代码。这是个如何做一组测试的很好的例子。
当使用Backbone开发应用时,需要测试个别的模块代码同时也要测试models, views, collections和routers。采用TDD测试方法,我们来看下测试Backbone Todo这个示例项目中Backbone组件的一些specs。这一节我们将使用一个由Larry Myers修改版本的Backbone Koans项目, 在practicals\jasmine-koans目录下。
Backbone models的复杂程度完全依赖于应用要实现的功能。下面例子中,我们将测试默认值,属性,状态改变,和验证规则。
首先,使用describe()创建suite:
describe('Tests for Todo', function() {Model的属性理想上应该有默认值。可以确保创建实例时未指定值的话可以使用默认值替代。这里的意思主要是与models交互是可以避免一些意外的行为。
下面这个spec,创建一个Todo没有传入任何属性,然后检查下text属性的值是什么。因为没有设置任何值,所以我们期望的值是返回""。
it('Can be created with default values for its attributes.', function() {
var todo = new Todo();
expect(todo.get('text')).toBe("");
});如果你在编写model前测试这个spec的话,会引发失败。这个spec需要传入一个text属性的默认值。示例:
window.Todo = Backbone.Model.extend({
defaults: {
text: "",
done: false,
order: 0
}接下来,我们测试下model在初始化之后会把属性值设为传入的值。另外也测试下其它几个属性的默认值是否是我们期望的。
it('Will set passed attributes on the model instance when created.', function() {
var todo = new Todo({ text: 'Get oil change for car.' });
// what are the values expected here for each of the
// attributes in our Todo?
expect(todo.get('text')).toBe("Get oil change for car.");
expect(todo.get('done')).toBe(false);
expect(todo.get('order')).toBe(0);
});Backbone models支持model.change()事件,当model的状态改变时触发。下面这个例子中,通过设置Todo model属性值来改变它的’state(状态)’,状态改变的原因非常值得测试,因为应用中可能有状态依赖的事件,比如当model被修改时想要显示一个确认视图。
it('Fires a custom event when the state changes.', function() {
var spy = jasmine.createSpy('-change event callback-');
var todo = new Todo();
// how do we monitor changes of state?
todo.on('change', spy);
// what would you need to do to force a change of state?
todo.set({ text: 'Get oil change for car.' });
expect(spy).toHaveBeenCalled();
});通常在model中引入验证逻辑来确保来自用户的输入(或者其它模块)是有效的’(valid)’。Todo app可能会验证text输入框输入进来的内容没有粗鲁的单词。 同样的, 当保存Todo项done状态时,需要验证传入的值是true/false, 而不是字符串。
在下面的spec中,我们用了一些是验证失败的值,让model.validate()触发“error”事件。检验一下传入无效值是是否会真的触发失败。
使用Jasmine内置createSpy()方法创建一个errorCallback spy,就可以检测error事件了:
it('Can contain custom validation rules, and will trigger an error event on failed validation.', function() {
var errorCallback = jasmine.createSpy('-error event callback-');
var todo = new Todo();
todo.on('error', errorCallback);
// What would you need to set on the todo properties to
// cause validation to fail?
todo.set({done:'a non-integer value'});
var errorArgs = errorCallback.mostRecentCall.args;
expect(errorArgs).toBeDefined();
expect(errorArgs[0]).toBe(todo);
expect(errorArgs[1]).toBe('Todo.done must be a boolean value.');
});要让上面这段失败测试代码支持验证非常简单。这个model中,我们重写validate()方法(像Backbone文档推荐的那样),检查model有’done’属性并且给它传入值时是一个合法的布尔值。
validate: function(attrs) {
if (attrs.hasOwnProperty('done') && !_.isBoolean(attrs.done)) {
return 'Todo.done must be a boolean value.';
}
}这个完整的Todo model代码如下:
var NAUGHTY_WORDS = /crap|poop|hell|frogs/gi;
function sanitize(str) {
return str.replace(NAUGHTY_WORDS, 'rainbows');
}
window.Todo = Backbone.Model.extend({
defaults: {
text: '',
done: false,
order: 0
},
initialize: function() {
this.set({text: sanitize(this.get('text'))}, {silent: true});
},
validate: function(attrs) {
if (attrs.hasOwnProperty('done') && !_.isBoolean(attrs.done)) {
return 'Todo.done must be a boolean value.';
}
},
toggle: function() {
this.save({done: !this.get("done")});
}
});现在我们需要定义specs来测试Backbone Todo model的collection(一个TodoList)。Collections处理列表的排序,过滤等。
测试collections时可能会有下面这些明确的specs:
done:true的todo项, 然后检查collection认为已完成项的数量和未完成项的数量。这一节我们只会讲到前2个问题,第三个问题作为读者的扩着练习。
测试Todo models可通过一个对象或者数组来添加相对简单。首先,初始化一个TodoList collection,确保其长度为0。然后,添加新的Todos,对象和数组两种情况都添加一次,然后检查collection的length属性是否符合期望值:
describe('Tests for TodoList', function() {
it('Can add Model instances as objects and arrays.', function() {
var todos = new TodoList();
expect(todos.length).toBe(0);
todos.add({ text: 'Clean the kitchen' });
// how many todos have been added so far?
expect(todos.length).toBe(1);
todos.add([
{ text: 'Do the laundry', done: true },
{ text: 'Go to the gym'}
]);
// how many are there in total now?
expect(todos.length).toBe(3);
});
...跟model的属性一样,测试collections的属性也非常简单。下面是一个简单的测试collection.url的spec例子:
it('Can have a url property to define the basic url structure for all contained models.', function() {
var todos = new TodoList();
// what has been specified as the url base in our model?
expect(todos.url).toBe('/todos/');
});对于第三个spec,collection会实现``done()和remaining()方法,分别过滤已完成Todo项和未完成项。编写一个spec,创建一个collection,添加一个done状态为为true的model,2个done状态为false的model。然后测试调用done()和remaining()```方法返回的结果的length,看是否正常。
TodoList collection实现代码可以像下面这样:
window.TodoList = Backbone.Collection.extend({
model: Todo,
url: '/todos/',
done: function() {
return this.filter(function(todo) { return todo.get('done'); });
},
remaining: function() {
return this.without.apply(this, this.done());
},
nextOrder: function() {
if (!this.length) {
return 1;
}
return this.last().get('order') + 1;
},
comparator: function(todo) {
return todo.get('order');
}
});在开始测试Backbone views前,先简短的来看一个编写Jasmine specs的jQuery plugin。
The Jasmine jQuery Plugin
Todo application使用jQuery来做DOM操作,有一个jasmine-jquery 插件可以帮助简化BDD测试view创建的元素。
这个插件提供了很多额外的Jasmine matchers 以帮助测试jQuery包装的sets:
toBe(jQuerySelector)示例 : expect($('<div id="some-id"></div>')).toBe('div#some-id')toBeChecked() 示例:expect($('<input type="checkbox" checked="checked"/>')).toBeChecked()toBeSelected() 示例 expect($('<option selected="selected"></option>')).toBeSelected()更多可以参看 这里。它支持的完整matchers可以在项目主页上找到。它跟标准的Jasmine matchers类似,上面的matchers可以加.not前缀反过来使用(比如expect(x).not.toBe(y)):
expect($('<div>I am an example</div>')).not.toHaveText(/other/)jasmine-jquery同时包含一个固定装置模型(fixtures model),可以加载任意HTML内容到时候。可以像下面这样使用:
在一个外部文件中包含一段HTML:
some.fixture.html: <div id="sample-fixture">some HTML content</div>
然后,实际测试时想下面这样载入:
loadFixtures('some.fixture.html')
$('some-fixture').myTestedPlugin();
expect($('#some-fixture')).to<the rest of your matcher would go here>jasmine-jquery插件默认会从一个特定目录加载fixtures:spec/javascripts/fixtures。如果想配置这个路径的话在初始化设置中jasmine.getFixtures().fixturesPath = 'your custom path'。
最后,jasmine-jquery包含对jQuery事件spying的支持,而且不需要什么额外的工作。可使用spyOnEvent()和assert(eventName).toHaveBeenTriggered(selector)方法来完成。下面是一个示例:
spyOnEvent($('#el'), 'click');
$('#el').click();
expect('click').toHaveBeenTriggeredOn($('#el'));这一小节我们从三个维度来看下编写Backbone Views的specs:初始化,view渲染和模板生成。后两个跟通常的测试差不多,不过我会简短的说下为什么对views的初始化编写specs也是有好处的。
最基本的,为Backbone views写的specs需要验证view被正确的绑定到指定的DOM元素,被有效的数据model支持。考虑这样做的原因是,如果这些specs失败的话会导致后面一些更复杂的测试也失败,而且这些specs写起来比较简单,可以提供一个整体的价值。
为确保一致的测试配置条件,使用beforeEach()追加一个空的UL (#todoList)到DOM并且用一个空的Todo model初始化一个TodoView实例。在afterEach()中移除前面的#todoList UL和view实例。
describe('Tests for TodoView', function() {
beforeEach(function() {
$('body').append('<ul id="todoList"></ul>');
this.todoView = new TodoView({ model: new Todo() });
});
afterEach(function() {
this.todoView.remove();
$('#todoList').remove();
});
...第一个spec就是检查我们创建的TodoView使用了正确的tagName(元素或者className)。目的就是确保创建时正确的绑定到DOM元素。
Backbone views通常一旦初始化会创建一些空的DOM元素,不过这些元素不会附加到可见的DOM中, 目的是在不影响性能和渲染的情况下让他们构建出来。
it('Should be tied to a DOM element when created, based off the property provided.', function() {
//what html element tag name represents this view?
expect(todoView.el.tagName.toLowerCase()).toBe('li');
});如果TodoView还没编写好的话,specs就会失败。通过指定tagName创建一个Backbone.View。
var todoView = Backbone.View.extend({
tagName: "li"
});也可以通过测试className来替代tagName,可以使用更高级的jasmine-jquery matcher toHaveClass()来完成。
it('Should have a class of "todos"'), function(){
expect(this.view.$el).toHaveClass('todos');
});toHaveClass() matcher对jQuery操作,而且如果没有使用这个插件的话就会引发异常(如果没有使用jasmine-jquery插件也可通过获取el.className来判断)。
你可能注意到beforeEach()中我们传入里一个新创建的Todo给view。Views应该基于一个有数据的model实例。因为它对view的功能非常重要,我们可以写一个spec来确保model是一定义(使用toBeDefined() matcher) 并且测试model有默认属性,而且是我们期望的值。
it('Is backed by a model instance, which provides the data.', function() {
expect(todoView.model).toBeDefined();
// what's the value for Todo.get('done') here?
expect(todoView.model.get('done')).toBe(false); //or toBeFalsy()
});接下来看下给view渲染编写specs。特别是,我们想测试下TodoView实际被渲染出来的元素是否符合期望。
对于小的额applications,有些BDD新手认为视觉上确认view的渲染可以替代view的单元测试。实际上,开发的应用可能变成多视个view时,通常从开端就劲量让这个过程自动化。同样也有aspects来验证屏幕上所看到的渲染效果。
我们编写两个spec来测试view。第一个测试检车view的render()方法正确的返回view实例,可以用于链式调用。第二个测试检查生成的HTML是基于TodoView相关联的mode实例的属性所期望的结果。
不同于前面我们写的specs,这一节我们会大量使用beforeEach()彰显如何使用嵌套的suites,以及确保specs的条件一致。第一个TodoView的spec,将创建一个简单的model (基于Todo),然后用这个model初始化一个TodoView。
describe("TodoView", function() {
beforeEach(function() {
this.model = new Backbone.Model({
text: "My Todo",
order: 1,
done: false
});
this.view = new TodoView({model:this.model});
});
describe("Rendering", function() {
it("returns the view object", function() {
expect(this.view.render()).toEqual(this.view);
});
it("produces the correct HTML", function() {
this.view.render();
//let's use jasmine-jquery's toContain() to avoid
//testing for the complete content of a todo's markup
expect(this.view.el.innerHTML)
.toContain('<label class="todo-content">My Todo</label>');
});
});
});这些specs一旦运行,只有第二个(‘produces the correct HTML’)失败。第一个spec (‘returns the view object’),测试render()返回的TodoView实例, 可以通过因为这是Backbone的默认行为。我们并没有重写render()方法。
提示: 为了维护可读性,这一节中所有的模板例子都将使用下面这个最小化版本的Todo view模板。需要使用时可以返回来查看:
<div class="todo <%= done ? 'done' : '' %>">
<div class="display">
<input class="check" type="checkbox" <%= done ? 'checked="checked"' : '' %> />
<label class="todo-content"><%= text %></label>
<span class="todo-destroy"></span>
</div>
<div class="edit">
<input class="todo-input" type="text" value="<%= content %>" />
</div>
</div>第二个spec失败会有下面这段提示:
Expected '' to contain '<label class="todo-content">My Todo</label>'.
原因是render()的默认行为不创建任何标签。我们来编写一个替代的render()来解决它:
render: function() {
var template = '<label class="todo-content"><%= text %></label>';
var output = template
.replace("<%= text %>", this.model.get('text'));
this.$el.html(output);
return this;
}上面指定了一行模板字符串,然后用model对应的属性值替换“<% %>”区域内的内容。同时也返回TodoView实例,所以第一个spec也可以通过。像这样在spec中使用HTML字符串来进行测试有非常大的缺点。即便是模板微小的变化(一个tab或者空格符)就会导致spec失败,即便渲染结果是一样的。实际应用中模板也会更复杂,将耗费更多的时间去维护。更好的测试渲染输出结果的方法是使用jQuery来选择和检查。
基于这个思想,我们来重写这个spec,使用jasmine-jquery提供的自定义matchers:
describe("Template", function() {
beforeEach(function() {
this.view.render();
});
it("has the correct text content", function() {
expect(this.view.$('.todo-content'))
.toHaveText('My Todo');
});
});讨论单元测试不提到fixtures是不可能的。Fixtures通常包含单元测试当需要时(可以是本地或者从外部文件)载入的测试数据(比如HTML)。 一直以来我们都是把jQuery的期望建立在view的el属性上。大部分情况这是有效的,不过,有时我们需要把标签渲染到document。再specs中处理这个问题的最理想方式就是使用fixtures (jasmine-jquery插件带给我们的另外一个特性)。
使用fixtures重写上面这个spec:
describe("TodoView", function() {
beforeEach(function() {
...
setFixtures('<ul class="todos"></ul>');
});
...
describe("Template", function() {
beforeEach(function() {
$('.todos').append(this.view.render().el);
});
it("has the correct text content", function() {
expect($('.todos').find('.todo-content'))
.toHaveText('My Todo');
});
});
});在上面这个spec中,把渲染的todo元素append到fixture。然后对这个fixture设置期望,当view对应到一个已经存在的DOM元素之后的一些desirable。有必要提供fixture和测试当view初始化的时候el属性是否指向正确的元素。
当一个用户设置一个Tood项为完成(done)是,我们期望给他一点视觉上的反馈(比如文本上加一条横线)以区分其余的的项。可以通过给这个项附加一个class来实现。下面开始编写测试:
describe('When a todo is done', function() {
beforeEach(function() {
this.model.set({done: true}, {silent: true});
$('.todos').append(this.view.render().el);
});
it('has a done class', function() {
expect($('.todos .todo-content:first-child'))
.toHaveClass('done');
});
});这样会失败,并引发下面消息:
Expected '<label class="todo-content">My Todo</label>' to have class 'done'.
可以在render()方法中解决:
render: function() {
var template = '<label class="todo-content">' +
'<%= text %></label>';
var output = template
.replace('<%= text %>', this.model.get('text'));
this.$el.html(output);
if (this.model.get('done')) {
this.$('.todo-content').addClass('done');
}
return this;
}不过,很快它就会变得不那么方便了。随着模板中逻辑的增加,它就会变得越复杂。我们可以通过使用模板库轻易的解决这个问题。有许多模板库也能很好的与测试方案一起配合的很好,比如Jasmine。
JavaScript模板系统(比如Handlebars, Mustache 以及Underscore的Micro-templating)在模板字符串中支持条件逻辑。这就意味着我们可以一行字符串内使用if/else/三元表单时,可以构建更强大的模板。
在我们的案例中,这里我们选择Underscore内置的Microtemplating,不需要添加额外额文件,而且对现有specs也不需要做太多的修改。
假设模板定义在ID myTemplate的script标签中:
<script type="text/template" id="myTemplate">
<div class="todo <%= done ? 'done' : '' %>">
<div class="display">
<input class="check" type="checkbox" <%= done ? 'checked="checked"' : '' %> />
<label class="todo-content"><%= text %></label>
<span class="todo-destroy"></span>
</div>
<div class="edit">
<input class="todo-input" type="text" value="<%= content %>" />
</div>
</div>
</script>TodoView可以使用Underscore模板修改成下面这样:
var TodoView = Backbone.View.extend({
tagName: 'li',
template: _.template($('#myTemplate').html()),
initialize: function(options) {
// ...
},
render: function() {
this.$el.html(this.template(this.model.toJSON()));
return this;
},
...
});So, what’s going on here? We’re first defining our template in a script tag with a custom script type (e.g., type=“text/template”). As this isn’t a script type any browser understands, it’s simply ignored, however referencing the script by an id attribute allows the template to be kept separate to other parts of the page.
In our view, we’re the using the Underscore _.template() method to compile our template into a function that we can easily pass model data to later on. In the line this.model.toJSON() we are simply returning a copy of the model’s attributes for JSON stringification to the template method, creating a block of HTML that can now be appended to the DOM.
Note: Ideally all of your template logic should exist outside of your specs, either in individual template files or embedded using script tags within your SpecRunner. This is generally more maintainable.
If you are working with much smaller templates and are not doing this, there is however a useful trick that can be applied to automatically create or extend templates in the Jasmine shared functional scope for each test.
By creating a new directory (say, ‘templates’) in the ‘spec’ folder and including a new script file with the following contents into SpecRunner.html, we can manually add custom attributes representing smaller templates we wish to use:
beforeEach(function() {
this.templates = _.extend(this.templates || {}, {
todo: '<label class="todo-content">' +
'<%= text %>' +
'</label>'
});
});To finish this off, we simply update our existing spec to reference the template when instantiating the TodoView:
describe('TodoView', function() {
beforeEach(function() {
...
this.view = new TodoView({
model: this.model,
template: this.templates.todo
});
});
...
});The existing specs we’ve looked at would continue to pass using this approach, leaving us free to adjust the template with some additional conditional logic for Todos with a status of ‘done’:
beforeEach(function() {
this.templates = _.extend(this.templates || {}, {
todo: '<label class="todo-content <%= done ? 'done' : '' %>"' +
'<%= text %>' +
'</label>'
});
});This will now also pass without any issues, however as mentioned, this last approach probably only makes sense if you’re working with smaller, highly dynamic templates.
现在我们已经讨论如何为Backbone.js应用中的models, views和collections编写Jasmine测试。虽然测试路由(routing)有时是可取的,有些开发者认为它可以由第三方工具更好的完成比如Selenium,所以请记住这点。
A作为练习,推荐大家尝试下Jasmine Koans,在practicals\jasmine-joans目录下,然后尝试fix一些里面有意提供的失败的测试。这是一种很好的了解Jasmine specs 和 suites工作原理和学习Backbone技巧的方式。
QUnit is a powerful JavaScript test suite written by jQuery team member Jörn Zaefferer and used by many large open-source projects (such as jQuery and Backbone.js) to test their code. It’s both capable of testing standard JavaScript code in the browser as well as code on the server-side (where environments supported include Rhino, V8 and SpiderMonkey). This makes it a robust solution for a large number of use-cases.
Quite a few Backbone.js contributors feel that QUnit is a better introductory framework for testing if you don’t wish to start off with Jasmine and BDD right away. As we’ll see later on in this chapter, QUnit can also be combined with third-party solutions such as SinonJS to produce an even more powerful testing solution supporting spies and mocks, which some say is preferable over Jasmine.
My personal recommendation is that it’s worth comparing both frameworks and opting for the solution that you feel the most comfortable with.
Luckily, getting QUnit setup is a fairly straight-forward process that will take less than 5 minutes.
We first setup a testing environment composed of three files:
The latter two of these can be downloaded from the QUnit website.
If you would prefer, you can use a hosted version of the QUnit source files for testing purposes. The hosted URLs can be found at http://github.com/jquery/qunit/raw/master/qunit/.
<!DOCTYPE html>
<html>
<head>
<title>QUnit Test Suite</title>
<link rel="stylesheet" href="qunit.css">
<script src="qunit.js"></script>
<!-- Your application -->
<script src="app.js"></script>
<!-- Your tests -->
<script src="tests.js"></script>
</head>
<body>
<h1 id="qunit-header">QUnit Test Suite</h1>
<h2 id="qunit-banner"></h2>
<div id="qunit-testrunner-toolbar"></div>
<h2 id="qunit-userAgent"></h2>
<ol id="qunit-tests">test markup, hidden.</ol>
</body>
</html>Let’s go through the elements above with qunit mentioned in their ID. When QUnit is running:
When running correctly, the above test runner looks as follows:
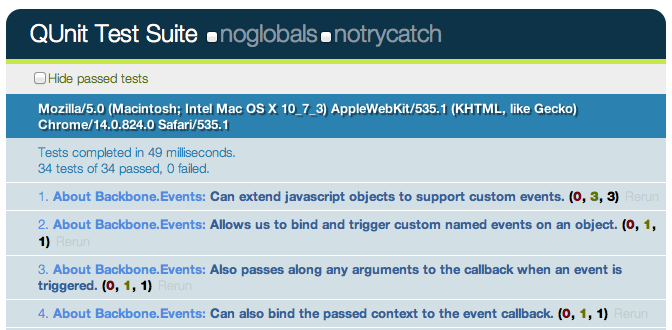
The numbers of the form (a, b, c) after each test name correspond to a) failed asserts, b) passed asserts and c) total asserts. Clicking on a test name expands it to display all of the assertions for that test case. Assertions in green have successfully passed.
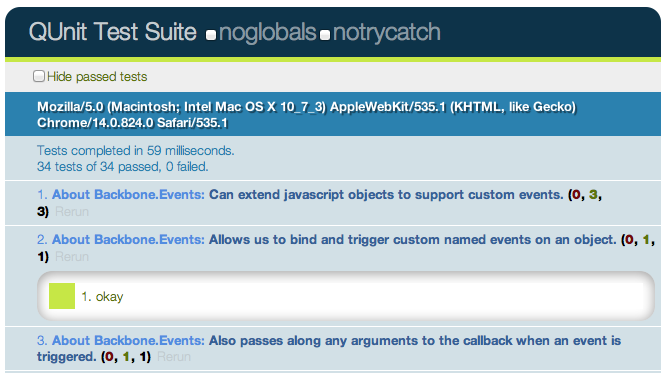
If however any tests fail, the test gets highlighted (and the qunit-banner at the top switches to red):
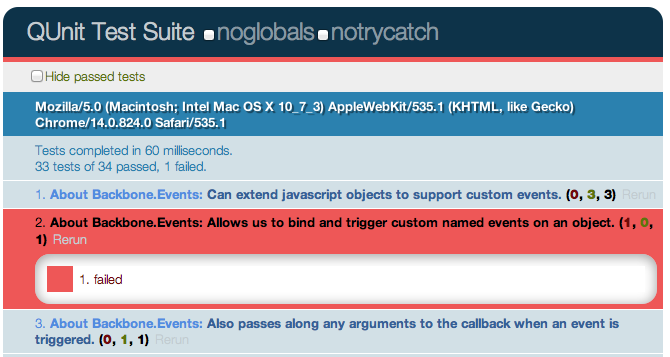
QUnit supports a number of basic assertions, which are used in tests to verify that the result being returned by our code is what we expect. If an assertion fails, we know that a bug exists. Similar to Jasmine, QUnit can be used to easily test for regressions. Specifically, when a bug is found one can write an assertion to test the existence of the bug, write a patch, and then commit both. If subsequent changes to the code break the test you’ll know what was responsible and be able to address it more easily.
Some of the supported QUnit assertions we’re going to look at first are:
ok ( state, message ) - passes if the first argument is truthyequal ( actual, expected, message ) - a simple comparison assertion with type coercionnotEqual ( actual, expected, message ) - the opposite of the aboveexpect( amount ) - the number of assertions expected to run within each teststrictEqual( actual, expected, message) - offers a much stricter comparison than equal() and is considered the preferred method of checking equality as it avoids stumbling on subtle coercion bugsdeepEqual( actual, expected, message ) - similar to strictEqual, comparing the contents (with ===) of the given objects, arrays and primitives.Creating new test cases with QUnit is relatively straight-forward and can be done using test(), which constructs a test where the first argument is the name of the test to be displayed in our results and the second is a callback function containing all of our assertions. This is called as soon as QUnit is running.
var myString = 'Hello Backbone.js';
test( 'Our first QUnit test - asserting results', function(){
// ok( boolean, message )
ok( true, 'the test succeeds');
ok( false, 'the test fails');
// equal( actualValue, expectedValue, message )
equal( myString, 'Hello Backbone.js', 'The value expected is Hello Backbone.js!');
});What we’re doing in the above is defining a variable with a specific value and then testing to ensure the value was what we expected it to be. This was done using the comparison assertion, equal(), which expects its first argument to be a value being tested and the second argument to be the expected value. We also used ok(), which allows us to easily test against functions or variables that evaluate to booleans.
Note: Optionally in our test case, we could have passed an ‘expected’ value to test() defining the number of assertions we expect to run. This takes the form: test( name, [expected], test ); or by manually settings the expectation at the top of the test function, like so: expect( 1 ). I recommend you make a habit of always defining how many assertions you expect. More on this later.
As testing a simple static variable is fairly trivial, we can take this further to test actual functions. In the following example we test the output of a function that reverses a string to ensure that the output is correct using equal() and notEqual():
function reverseString( str ){
return str.split('').reverse().join('');
}
test( 'reverseString()', function() {
expect( 5 );
equal( reverseString('hello'), 'olleh', 'The value expected was olleh' );
equal( reverseString('foobar'), 'raboof', 'The value expected was raboof' );
equal( reverseString('world'), 'dlrow', 'The value expected was dlrow' );
notEqual( reverseString('world'), 'dlroo', 'The value was expected to not be dlroo' );
equal( reverseString('bubble'), 'double', 'The value expected was elbbub' );
})Running these tests in the QUnit test runner (which you would see when your HTML test page was loaded) we would find that four of the assertions pass while the last one does not. The reason the test against 'double' fails is because it was purposefully written incorrectly. In your own projects if a test fails to pass and your assertions are correct, you’ve probably just found a bug!
Housing all of our assertions in one test case can quickly become difficult to maintain, but luckily QUnit supports structuring blocks of assertions more cleanly. This can be done using module() - a method that allows us to easily group tests together. A typical approach to grouping might be keeping multiple tests for a specific method as part of the same group (module).
module( 'Module One' );
test( 'first test', function() {} );
test( 'another test', function() {} );
module( 'Module Two' );
test( 'second test', function() {} );
test( 'another test', function() {} );
module( 'Module Three' );
test( 'third test', function() {} );
test( 'another test', function() {} );We can take this further by introducing setup() and teardown() callbacks to our modules, where setup() is run before each test and teardown() is run after each test.
module( 'Module One', {
setup: function() {
// run before
},
teardown: function() {
// run after
}
});
test('first test', function() {
// run the first test
});These callbacks can be used to define (or clear) any components we wish to instantiate for use in one or more of our tests. As we’ll see shortly, this is ideal for defining new instances of views, collections, models, or routers from a project that we can then reference across multiple tests.
// Define a simple model and collection modeling a store and
// list of stores
var Store = Backbone.Model.extend({});
var StoreList = Backbone.Collection.extend({
model: store,
comparator: function( store ) { return store.get('name') }
});
// Define a group for our tests
module( 'StoreList sanity check', {
setup: function() {
this.list = new StoreList;
this.list.add(new Store({ name: 'Costcutter' }));
this.list.add(new Store({ name: 'Target' }));
this.list.add(new Store({ name: 'Walmart' }));
this.list.add(new Store({ name: 'Barnes & Noble' });
},
teardown: function() {
window.errors = null;
}
});
// Test the order of items added
test( 'test ordering', function() {
expect( 1 );
var expected = ['Barnes & Noble', 'Costcutter', 'Target', 'Walmart'];
var actual = this.list.pluck('name');
deepEqual( actual, expected, 'is maintained by comparator' );
});Here, a list of stores is created and stored on setup(). A teardown() callback is used to simply clear a list of errors we might be storing within the window scope, but is otherwise not needed.
Before we continue any further, let’s review some more examples of how QUnit’s various assertions can be correctly used when writing tests:
test( 'equal', 2, function() {
var actual = 6 - 5;
equal( actual, true, 'passes as 1 == true' );
equal( actual, 1, 'passes as 1 == 1' );
});test( 'notEqual', 2, function() {
var actual = 6 - 5;
notEqual( actual, false, 'passes as 1 != false' );
notEqual( actual, 0, 'passes as 1 != 0' );
});test( 'strictEqual', 2, function() {
var actual = 6 - 5;
strictEqual( actual, true, 'fails as 1 !== true' );
strictEqual( actual, 1, 'passes as 1 === 1' );
});test('notStrictEqual', 2, function() {
var actual = 6 - 5;
notStrictEqual( actual, true, 'passes as 1 !== true' );
notStrictEqual( actual, 1, 'fails as 1 === 1' );
});test('deepEqual', 4, function() {
var actual = {q: 'foo', t: 'bar'};
var el = $('div');
var children = $('div').children();
equal( actual, {q: 'foo', t: 'bar'}, 'fails - objects are not equal using equal()' );
deepEqual( actual, {q: 'foo', t: 'bar'}, 'passes - objects are equal' );
equal( el, children, 'fails - jQuery objects are not the same' );
deepEqual(el, children, 'fails - objects not equivalent' );
});test('notDeepEqual', 2, function() {
var actual = {q: 'foo', t: 'bar'};
notEqual( actual, {q: 'foo', t: 'bar'}, 'passes - objects are not equal' );
notDeepEqual( actual, {q: 'foo', t: 'bar'}, 'fails - objects are equivalent' );
});test('raises', 1, function() {
raises(function() {
throw new Error( 'Oh no! It`s an error!' );
}, 'passes - an error was thrown inside our callback');
});From time to time we may need to write tests that modify the DOM. Managing the clean-up of such operations between tests can be a genuine pain, but thankfully QUnit has a solution to this problem in the form of the #qunit-fixture element, seen below.
<!DOCTYPE html>
<html>
<head>
<title>QUnit Test</title>
<link rel="stylesheet" href="qunit.css">
<script src="qunit.js"></script>
<script src="app.js"></script>
<script src="tests.js"></script>
</head>
<body>
<h1 id="qunit-header">QUnit Test</h1>
<h2 id="qunit-banner"></h2>
<div id="qunit-testrunner-toolbar"></div>
<h2 id="qunit-userAgent"></h2>
<ol id="qunit-tests"></ol>
<div id="qunit-fixture"></div>
</body>
</html>We can either opt to place static markup in the fixture or just insert/append any DOM elements we may need to it. QUnit will automatically reset the innerHTML of the fixture after each test to its original value. In case you’re using jQuery, it’s useful to know that QUnit checks for its availability and will opt to use $(el).html() instead, which will cleanup any jQuery event handlers too.
Let us now go through a more complete example of using fixtures. One thing that most of us are used to doing in jQuery is working with lists - they’re often used to define the markup for menus, grids, and a number of other components. You may have used jQuery plugins before that manipulated a given list in a particular way and it can be useful to test that the final (manipulated) output of the plugin is what was expected.
For the purposes of our next example, we’re going to use Ben Alman’s $.enumerate() plugin, which can prepend each item in a list by its index, optionally allowing us to set what the first number in the list is. The code snippet for the plugin can be found below, followed by an example of the output it generates:
$.fn.enumerate = function( start ) {
if ( typeof start !== 'undefined' ) {
// Since `start` value was provided, enumerate and return
// the initial jQuery object to allow chaining.
return this.each(function(i){
$(this).prepend( '<b>' + ( i + start ) + '</b> ' );
});
} else {
// Since no `start` value was provided, function as a
// getter, returning the appropriate value from the first
// selected element.
var val = this.eq( 0 ).children( 'b' ).eq( 0 ).text();
return Number( val );
}
};
/*
<ul>
<li>1. hello</li>
<li>2. world</li>
<li>3. i</li>
<li>4. am</li>
<li>5. foo</li>
</ul>
*/Let’s now write some tests for the plugin. First, we define the markup for a list containing some sample items inside our qunit-fixture element:
<div id="qunit-fixture">
<ul>
<li>hello</li>
<li>world</li>
<li>i</li>
<li>am</li>
<li>foo</li>
</ul>
</div>Next, we need to think about what should be tested. $.enumerate() supports a few different use cases, including:
$(el).enumerate()$(el).enumerate(0)$(el).enumerate(1)As the text value for each list item is of the form “n. item-text” and we only require this to test against the expected output, we can simply access the content using $(el).eq(index).text() (for more information on .eq() see here).
and finally, here are our test cases:
module('jQuery#enumerate');
test( 'No arguments passed', 5, function() {
var items = $('#qunit-fixture li').enumerate(); // 0
equal( items.eq(0).text(), '0. hello', 'first item should have index 0' );
equal( items.eq(1).text(), '1. world', 'second item should have index 1' );
equal( items.eq(2).text(), '2. i', 'third item should have index 2' );
equal( items.eq(3).text(), '3. am', 'fourth item should have index 3' );
equal( items.eq(4).text(), '4. foo', 'fifth item should have index 4' );
});
test( '0 passed as an argument', 5, function() {
var items = $('#qunit-fixture li').enumerate( 0 );
equal( items.eq(0).text(), '0. hello', 'first item should have index 0' );
equal( items.eq(1).text(), '1. world', 'second item should have index 1' );
equal( items.eq(2).text(), '2. i', 'third item should have index 2' );
equal( items.eq(3).text(), '3. am', 'fourth item should have index 3' );
equal( items.eq(4).text(), '4. foo', 'fifth item should have index 4' );
});
test( '1 passed as an argument', 3, function() {
var items = $('#qunit-fixture li').enumerate( 1 );
equal( items.eq(0).text(), '1. hello', 'first item should have index 1' );
equal( items.eq(1).text(), '2. world', 'second item should have index 2' );
equal( items.eq(2).text(), '3. i', 'third item should have index 3' );
equal( items.eq(3).text(), '4. am', 'fourth item should have index 4' );
equal( items.eq(4).text(), '5. foo', 'fifth item should have index 5' );
});As with Jasmine, the effort required to run synchronous tests with QUnit is fairly minimal. That said, what about tests that require asynchronous callbacks (such as expensive processes, Ajax requests, and so on)? When we’re dealing with asynchronous code, rather than letting QUnit control when the next test runs, we can tell it that we need it to stop running and wait until it’s okay to continue once again.
Remember: running asynchronous code without any special considerations can cause incorrect assertions to appear in other tests, so we want to make sure we get it right.
Writing QUnit tests for asynchronous code is made possible using the start() and stop() methods, which programmatically set the start and stop points during such tests. Here’s a simple example:
test('An async test', function(){
stop();
expect( 1 );
$.ajax({
url: '/test',
dataType: 'json',
success: function( data ){
deepEqual(data, {
topic: 'hello',
message: 'hi there!''
});
ok(true, 'Asynchronous test passed!');
start();
}
});
});A jQuery $.ajax() request is used to connect to a test resource and assert that the data returned is correct. deepEqual() is used here as it allows us to compare different data types (e.g., objects, arrays) and ensures that what is returned is exactly what we’re expecting. We know that our Ajax request is asynchronous and so we first call stop(), then run the code making the request, and finally, at the very end of our callback, inform QUnit that it is okay to continue running other tests.
Note: rather than including stop(), we can simply exclude it and substitute test() with asyncTest() if we prefer. This improves readability when dealing with a mixture of asynchronous and synchronous tests in your suite. While this setup should work fine for many use-cases, there is no guarantee that the callback in our $.ajax() request will actually get called. To factor this into our tests, we can use expect() once again to define how many assertions we expect to see within our test. This is a healthy safety blanket as it ensures that if a test completes with an insufficient number of assertions, we know something went wrong and can fix it.
跟前面使用Jasmine BDD框架测试Backbone.js app类似,我们通过给Todo应用写一些QUnit测试来学习。
你可能注意到QUnit不支持spies。Test spies记录参数,异常并且返回值给其它的调用。通常用于测试回调,以及函数如何被使用。在测试框架中,spies可以是匿名也可以是包裹已有的函数。
在QUnit中我们可以用Christian Johansen编写的模拟框架SinonJS来支持spies。同时还要使用SinonJS-QUnit adapter来与QUnit进行无缝集成。Sinon.JS 是完全与测试框架无关的,而且可以容易的与任何测试框架一同使用,所以对于我们的需求它是非常理想的选择。
这个框架支持三项特性我们会在单元测试中用上:
使用this.spy()不传入任何参数则创建一个匿名的spy。可以与jasmine.createSpy()做比较, 下面是基本的使用SinonJS spy的例子:
test("should call all subscribers for a message exactly once", function () {
var message = getUniqueString();
var spy = this.spy();
PubSub.subscribe( message, spy );
PubSub.publishSync( message, "Hello World" );
ok( spy1.calledOnce, "the subscriber was called once" );
});同样可以使用this.spy()来监视下面例子中已有的函数(比如jQuery的$.ajax)。当监视了一个已有函数时,它的函数行为跟正常情况一样,但是我们可以访问到调用的相关数据用于测试。
test( "should inspect jQuery.getJSON's usage of jQuery.ajax", function () {
this.spy( jQuery, "ajax" );
jQuery.getJSON( "/todos/completed" );
ok( jQuery.ajax.calledOnce );
equals( jQuery.ajax.getCall(0).args[0].url, "/todos/completed" );
equals( jQuery.ajax.getCall(0).args[0].dataType, "json" );
});SinonJS提供了一套丰富的监视接口,可以测试一个spy是否使用指定的参数调用,是否被调用了指定的次数,以及测试调用时参数的值。接口支持的完整特性可以看这里(http://sinonjs.org/docs/),我们通过一些例子来看下常用的特性:
test( "Should call a subscriber with standard matching": function () {
var spy = sinon.spy();
PubSub.subscribe( "message", spy );
PubSub.publishSync( "message", { id: 45 } );
assertTrue( spy.calledWith( { id: 45 } ) );
});test( "Should call a subscriber with strict matching": function () {
var spy = sinon.spy();
PubSub.subscribe( "message", spy );
PubSub.publishSync( "message", "many", "arguments" );
PubSub.publishSync( "message", 12, 34 );
// This passes
assertTrue( spy.calledWith("many") );
// This however, fails
assertTrue( spy.calledWithExactly( "many" ) );
});test( "Should call a subscriber and maintain call order": function () {
var a = sinon.spy();
var b = sinon.spy();
PubSub.subscribe( "message", a );
PubSub.subscribe( "event", b );
PubSub.publishSync( "message", { id: 45 } );
PubSub.publishSync( "event", [1, 2, 3] );
assertTrue( a.calledBefore(b) );
assertTrue( b.calledAfter(a) );
});test( "Should call a subscriber and check call counts", function () {
var message = getUniqueString();
var spy = this.spy();
PubSub.subscribe( message, spy );
PubSub.publishSync( message, "some payload" );
// Passes if spy was called once and only once.
ok( spy.calledOnce ); // calledTwice and calledThrice are also supported
// The number of recorded calls.
equal( spy.callCount, 1 );
// Directly checking the arguments of the call
equals( spy.getCall(0).args[0], message );
});SinonJS还支持另外2个强大的特性:stubs和mocks。stubs和mocks都实现了spy API的所有特性,但是添加写其它功能。
一个stub可以允许我们把指定的方法的行为替换成其它的东西。它可以用于模拟异常,常用于编写当必要依赖项代码还没编写时的测试。
我们重新回到Backbone Todo application,包含一个Todo model和一个TodoList collection。作为演示,我们把TodoList collection单独隔离,仿造Todo model来测试添加新的models会发生什么。
假设models并没有编写好,仅示范stubbing如何进行。一个包含model引用的collection外壳:
var TodoList = Backbone.Collection.extend({
model: Todo
});
// Let's assume our instance of this collection is
this.todoList;假设collection自身可以实例化models,我们需要为这个测试stub models的构造函数。可以像下面这样:
this.todoStub = sinon.stub( window, "Todo" );上面在window上创建了一个Todo方法的stub。当stubbing一个持久对象时,可能还需要恢复其原始状态。可以使用teardown() :
this.todoStub.restore();然后,我们需要改变这个构造函数的返回,使用真实的Backbone.Model构造器。虽然它不是一个Todo model,但它给我们提供了一个实际的Backbone model。
teardown: function() {
this.model = new Backbone.Model({
id: 2,
title: "Hello world"
});
this.todoStub.returns( this.model );
});这里的期望可能是这段代码可以确保TodoList collection总是实例化stubbed Todo model,不过collection已经存在一个model的引用,我们需要重新设置下collection的model属性:
this.todoList.model = Todo;这样做的结果就是,当TodoList collection实例化新的Todo models时,它会返回给我们一个纯净的Backbone model。下面编写一个spec测试下添加字面的model:
module( "Should function when instantiated with model literals", {
setup:function() {
this.todoStub = sinon.stub(window, "Todo");
this.model = new Backbone.Model({
id: 2,
title: "Hello world"
});
this.todoStub.returns(this.model);
this.todos = new TodoList();
// Let's reset the relationship to use a stub
this.todos.model = Todo;
this.todos.add({
id: 2,
title: "Hello world"
});
},
teardown: function() {
this.todoStub.restore();
}
});
test("should add a model", function() {
equal( this.todos.length, 1 );
});
test("should find a model by id", function() {
equal( this.todos.get(5).get("id"), 5 );
});
});Mocks实际上跟stubs一样,不过它们会模仿出完整的API并且如何使用它们有一些内置的期望。 mock也spy的区别就是因为它们使用的expectations是预定义的,如果有任何不符就会失败。
这有个基于PubSubJS使用mock的例子。有一个clearTodo() 方法做为回调,使用mocks来校验它的行为。 ```javascript test(“should call all subscribers when exceptions”, function () { var myAPI = { clearTodo: function () {} };
var spy = this.spy();
var mock = this.mock( myAPI );
mock.expects( "clearTodo" ).once().throws();
PubSub.subscribe( "message", myAPI.clearTodo );
PubSub.subscribe( "message", spy );
PubSub.publishSync( "message", undefined );
mock.verify();
ok( spy.calledOnce );}); ```
现在我们可以开始给Todo application写测试specs了,根据组件(比如Models, Collections等)来列举和分隔。需要注意测试的名称,被测试的逻辑,以及最重要的断言,这些都可以让你体会到如何将所学到的应用到一个完整的项目中。
另外,建议你看下practicals\qunit-koans目录下的QUnit Koans - 这是我为这篇文章将Jasmine Koans转换成了QUnit。
如果你还没有尝试过Koans kits,它是一组使用特定测试框架的单元测试,展示了如何为一个application编写一组specs,同时也留了一些没有填充的测试作为练习。
对于model我们需要测试下面几点:
module( 'About Backbone.Model');
test('Can be created with default values for its attributes.', function() {
expect( 1 );
var todo = new Todo();
equal( todo.get('text'), "" );
});
test('Will set attributes on the model instance when created.', function() {
expect( 3 );
var todo = new Todo( { text: 'Get oil change for car.' } );
equal( todo.get('text'), "Get oil change for car." );
equal( todo.get('done'), false );
equal( todo.get('order'), 0 );
});
test('Will call a custom initialize function on the model instance when created.', function() {
expect( 1 );
var toot = new Todo({ text: 'Stop monkeys from throwing their own crap!' });
equal( toot.get('text'), 'Stop monkeys from throwing their own rainbows!' );
});
test('Fires a custom event when the state changes.', function() {
expect( 1 );
var spy = this.spy();
var todo = new Todo();
todo.on( 'change', spy );
// How would you update a property on the todo here?
// Hint: http://documentcloud.github.com/backbone/#Model-set
todo.set( { text: "new text" } );
ok( spy.calledOnce, "A change event callback was correctly triggered" );
});
test('Can contain custom validation rules, and will trigger an error event on failed validation.', function() {
expect( 3 );
var errorCallback = this.spy();
var todo = new Todo();
todo.on('error', errorCallback);
// What would you need to set on the todo properties to cause validation to fail?
todo.set( { done: "not a boolean" } );
ok( errorCallback.called, 'A failed validation correctly triggered an error' );
notEqual( errorCallback.getCall(0), undefined );
equal( errorCallback.getCall(0).args[1], 'Todo.done must be a boolean value.' );
});对于collection我们要测试到下面几点:
url属性是正确的。module( 'About Backbone.Collection');
test( 'Can add Model instances as objects and arrays.', function() {
expect( 3 );
var todos = new TodoList();
equal( todos.length, 0 );
todos.add( { text: 'Clean the kitchen' } );
equal( todos.length, 1 );
todos.add([
{ text: 'Do the laundry', done: true },
{ text: 'Go to the gym' }
]);
equal( todos.length, 3 );
});
test( 'Can have a url property to define the basic url structure for all contained models.', function() {
expect( 1 );
var todos = new TodoList();
equal( todos.url, '/todos/' );
});
test('Fires custom named events when the models change.', function() {
expect(2);
var todos = new TodoList();
var addModelCallback = this.spy();
var removeModelCallback = this.spy();
todos.on( 'add', addModelCallback );
todos.on( 'remove', removeModelCallback );
// How would you get the 'add' event to trigger?
todos.add( {text:"New todo"} );
ok( addModelCallback.called );
// How would you get the 'remove' callback to trigger?
todos.remove( todos.last() );
ok( removeModelCallback.called );
});对于views我们要确保下面几点:
也可以进一步测试用于与view的交互行为会正确触发models必要的更新。
module( 'About Backbone.View', {
setup: function() {
$('body').append('<ul id="todoList"></ul>');
this.todoView = new TodoView({ model: new Todo() });
},
teardown: function() {
this.todoView.remove();
$('#todoList').remove();
}
});
test('Should be tied to a DOM element when created, based off the property provided.', function() {
expect( 1 );
equal( this.todoView.el.tagName.toLowerCase(), 'li' );
});
test('Is backed by a model instance, which provides the data.', function() {
expect( 2 );
notEqual( this.todoView.model, undefined );
equal( this.todoView.model.get('done'), false );
});
test('Can render, after which the DOM representation of the view will be visible.', function() {
this.todoView.render();
// Hint: render() just builds the DOM representation of the view, but doesn't insert it into the DOM.
// How would you append it to the ul#todoList?
// How do you access the view's DOM representation?
//
// Hint: http://documentcloud.github.com/backbone/#View-el
$('ul#todoList').append(this.todoView.el);
equal($('#todoList').find('li').length, 1);
});
asyncTest('Can wire up view methods to DOM elements.', function() {
expect( 2 );
var viewElt;
$('#todoList').append( this.todoView.render().el );
setTimeout(function() {
viewElt = $('#todoList li input.check').filter(':first');
equal(viewElt.length > 0, true);
// Make sure that QUnit knows we can continue
start();
}, 1000, 'Expected DOM Elt to exist');
// Hint: How would you trigger the view, via a DOM Event, to toggle the 'done' status.
// (See todos.js line 70, where the events hash is defined.)
//
// Hint: http://api.jquery.com/click
$('#todoList li input.check').click();
expect( this.todoView.model.get('done'), true );
});对于事件,我们需要做一些不一样的测试用例:
还有一些其它细节将会在面的模块中:
module( 'About Backbone.Events', {
setup: function() {
this.obj = {};
_.extend( this.obj, Backbone.Events );
this.obj.off(); // remove all custom events before each spec is run.
}
});
test('Can extend JavaScript objects to support custom events.', function() {
expect(3);
var basicObject = {};
// How would you give basicObject these functions?
// Hint: http://documentcloud.github.com/backbone/#Events
_.extend( basicObject, Backbone.Events );
equal( typeof basicObject.on, 'function' );
equal( typeof basicObject.off, 'function' );
equal( typeof basicObject.trigger, 'function' );
});
test('Allows us to bind and trigger custom named events on an object.', function() {
expect( 1 );
var callback = this.spy();
this.obj.on( 'basic event', callback );
this.obj.trigger( 'basic event' );
// How would you cause the callback for this custom event to be called?
ok( callback.called );
});
test('Also passes along any arguments to the callback when an event is triggered.', function() {
expect( 1 );
var passedArgs = [];
this.obj.on('some event', function() {
for (var i = 0; i < arguments.length; i++) {
passedArgs.push( arguments[i] );
}
});
this.obj.trigger( 'some event', 'arg1', 'arg2' );
deepEqual( passedArgs, ['arg1', 'arg2'] );
});
test('Can also bind the passed context to the event callback.', function() {
expect( 1 );
var foo = { color: 'blue' };
var changeColor = function() {
this.color = 'red';
};
// How would you get 'this.color' to refer to 'foo' in the changeColor function?
this.obj.on( 'an event', changeColor, foo );
this.obj.trigger( 'an event' );
equal( foo.color, 'red' );
});
test( "Uses 'all' as a special event name to capture all events bound to the object." , function() {
expect( 2 );
var callback = this.spy();
this.obj.on( 'all', callback );
this.obj.trigger( "custom event 1" );
this.obj.trigger( "custom event 2" );
equal( callback.callCount, 2 );
equal( callback.getCall(0).args[0], 'custom event 1' );
});
test('Also can remove custom events from objects.', function() {
expect( 5 );
var spy1 = this.spy();
var spy2 = this.spy();
var spy3 = this.spy();
this.obj.on( 'foo', spy1 );
this.obj.on( 'bar', spy1 );
this.obj.on( 'foo', spy2 );
this.obj.on( 'foo', spy3 );
// How do you unbind just a single callback for the event?
this.obj.off( 'foo', spy1 );
this.obj.trigger( 'foo' );
ok( spy2.called );
// How do you unbind all callbacks tied to the event with a single method
this.obj.off( 'foo' );
this.obj.trigger( 'foo' );
ok( spy2.callCount, 1 );
ok( spy2.calledOnce, "Spy 2 called once" );
ok( spy3.calledOnce, "Spy 3 called once" );
// How do you unbind all callbacks and events tied to the object with a single method?
this.obj.off( 'bar' );
this.obj.trigger( 'bar' );
equal( spy1.callCount, 0 );
});编写应用启动程序的测试specs也非常有必要。下面的模块,setup中启动和添加了一个TodoApp view,然后测试application内的view是否被正确的定义,view的交互是否触发collections的正确变化。
module( 'About Backbone Applications' , {
setup: function() {
Backbone.localStorageDB = new Store('testTodos');
$('#qunit-fixture').append('<div id="app"></div>');
this.App = new TodoApp({ appendTo: $('#app') });
},
teardown: function() {
this.App.todos.reset();
$('#app').remove();
}
});
test('Should bootstrap the application by initializing the Collection.', function() {
expect( 2 );
notEqual( this.App.todos, undefined );
equal( this.App.todos.length, 0 );
});
test( 'Should bind Collection events to View creation.' , function() {
$('#new-todo').val( 'Foo' );
$('#new-todo').trigger(new $.Event( 'keypress', { keyCode: 13 } ));
equal( this.App.todos.length, 1 );
});使用QUnit和SinonJS来测试应用这一节就这么多了。鼓励你尝试下QUnit Backbone.js Koans 看是否能扩展里面的一些例子。 可参看下面更多相关阅读资料:
I hope that you’ve found this introduction to Backbone.js of value. What you’ve hopefully learned is that while building a JavaScript-heavy application using nothing more than a DOM manipulation library (such as jQuery) is certainly a possible feat, it is difficult to build anything non-trivial without any formal structure in place. Your nested pile of jQuery callbacks and DOM elements are unlikely to scale and they can be very difficult to maintain as your application grows.
The beauty of Backbone.js is it’s simplicity. It’s very small given the functionality and flexibility it provides, which is evident if you begin to study the Backbone.js source. In the words of Jeremy Ashkenas, “The essential premise at the heart of Backbone has always been to try and discover the minimal set of data-structuring (Models and Collections) and user interface (Views and URLs) primitives that are useful when building web applications with JavaScript.” It just helps you improve the structure of your applications, helping you better separate concerns. There isn’t anything more to it than that.
Backbone offers Models with key-value bindings and events, Collections with an API of rich enumerable methods, declarative Views with event handling and a simple way to connect an existing API to your client-side application over a RESTful JSON interface. Use it and you can abstract away data into sane models and your DOM manipulation into views, binding them together using nothing more than events.
Almost any developer working on JavaScript applications for a while will ultimately create a similar solution on their own if they value architecture and maintainability. The alternative to using it or something similar is rolling your own - often a process that involves glueing together a diverse set of libraries that weren’t built to work together. You might use jQuery BBQ for history management and Handlebars for templating, while writing abstracts for organizing and testing code by yourself.
Contrast this with Backbone, which has literate documentation of the source code, a thriving community of both users and hackers, and a large number of questions about it asked and answered daily on sites like Stack Overflow. Rather than re-inventing the wheel there are many advantages to structuring your application using a solution based on the collective knowledge and experience of an entire community.
In addition to helping provide sane structure to your applications, Backbone is highly extensible supporting more custom architecture should you require more than what is prescribed out of the box. This is evident by the number of extensions and plugins which have been released for it over the past year, including those which we have touched upon such as MarionetteJS and Thorax.
These days Backbone.js powers many complex web applications, ranging from the LinkedIn mobile app to popular RSS readers such as NewsBlur through to social commentary widgets such as Disqus. This small library of simple, but sane abstractions has helped to create a new generation of rich web applications, and I and my collaborators hope that in time it can help you too.
If you’re wondering whether it is worth using Backbone on a project, ask yourself whether what you are building is complex enough to merit using it. Are you hitting the limits of your ability to organize your code? Will your application have regular changes to what is displayed in the UI without a trip back to the server for new pages? Would you benefit from a separation of concerns? If so, a solution like Backbone may be able to help.
Google’s GMail is often cited as an example of a well built single-page app. If you’ve used it, you might have noticed that it requests a large initial chunk, representing most of the JavaScript, CSS and HTML most users will need and everything extra needed after that occurs in the background. GMail can easily switch between your inbox to your spam folder without needing the whole page to be re-rendered. Libraries like Backbone make it easier for web developers to create experiences like this.
That said, Backbone won’t be able to help if you’re planning on building something which isn’t worth the learning curve associated with a library. If your application or site will still be using the server to do the heavy lifting of constructing and serving complete pages to the browser, you may find just using plain JavaScript or jQuery for simple effects or interactions to be more appropriate. Spend time assessing how suitable Backbone might be for you and make the right choice on a per-project basis.
Backbone is neither difficult to learn nor use, however the time and effort you spend learning how to structure applications using it will be well worth it. While reading this book will equip you with the fundamentals needed to understand the library, the best way to learn is to try building your own real-world applications. You will hopefully find that the end product is cleaner, better organized and more maintainable code.
With that, I wish you the very best with your onward journey into the world of Backbone and will leave you with a quote from American writer Henry Miller - “One’s destination is never a place, but a new way of seeing things.”
A comprehensive discussion of Backbone’s implementation is beyond the scope of this book. We can, however, present a simple MVC library - which we will call Cranium.js - that illustrates how frameworks such as Backbone implement the MVC pattern.
Like Backbone, we will rely on Underscore for inheritance and templating.
At the heart of our JavaScript MVC implementation is an Event system (object) based on the Publisher-Subscriber Pattern which makes it possible for MVC components to communicate in an elegant, decoupled manner. Subscribers ‘listen’ for specific events of interest and react when Publishers broadcast these events.
Event is mixed into both the View and Model components so that instances of either of these components can publish events of interest.
// cranium.js - Cranium.Events
var Cranium = Cranium || {};
// Set DOM selection utility
var $ = document.querySelector.bind(document) || this.jQuery || this.Zepto;
// Mix in to any object in order to provide it with custom events.
var Events = Cranium.Events = {
// Keeps list of events and associated listeners
channels: {},
// Counter
eventNumber: 0,
// Announce events and passes data to the listeners;
trigger: function (events, data) {
for (var topic in Cranium.Events.channels){
if (Cranium.Events.channels.hasOwnProperty(topic)) {
if (topic.split("-")[0] == events){
Cranium.Events.channels[topic](data) !== false || delete Cranium.Events.channels[topic];
}
}
}
},
// Registers an event type and its listener
on: function (events, callback) {
Cranium.Events.channels[events + --Cranium.Events.eventNumber] = callback;
},
// Unregisters an event type and its listener
off: function(topic) {
delete Cranium.Events.channels[topic];
}
};The Event system makes it possible for:
Models manage the (domain-specific) data for an application. They are concerned with neither the user-interface nor presentation layers, but instead represent structured data that an application may require. When a model changes (e.g when it is updated), it will typically notify its observers (Subscribers) that a change has occurred so that they may react accordingly.
Let’s see a simple implementation of the Model:
// cranium.js - Cranium.Model
// Attributes represents data, model's properties.
// These are to be passed at Model instantiation.
// Also we are creating id for each Model instance
// so that it can identify itself (e.g. on chage
// announcements)
var Model = Cranium.Model = function (attributes) {
this.id = _.uniqueId('model');
this.attributes = attributes || {};
};
// Getter (accessor) method;
// returns named data item
Cranium.Model.prototype.get = function(attrName) {
return this.attributes[attrName];
};
// Setter (mutator) method;
// Set/mix in into model mapped data (e.g.{name: "John"})
// and publishes the change event
Cranium.Model.prototype.set = function(attrs){
if (_.isObject(attrs)) {
_.extend(this.attributes, attrs);
this.change(this.attributes);
}
return this;
};
// Returns clone of the Models data object
// (used for view template rendering)
Cranium.Model.prototype.toJSON = function(options) {
return _.clone(this.attributes);
};
// Helper function that announces changes to the Model
// and passes the new data
Cranium.Model.prototype.change = function(attrs){
this.trigger(this.id + 'update', attrs);
};
// Mix in Event system
_.extend(Cranium.Model.prototype, Cranium.Events);Views are a visual representation of models that present a filtered view of their current state. A view typically observes a model and is notified when the model changes, allowing the view to update itself accordingly. Design pattern literature commonly refers to views as ‘dumb’, given that their knowledge of models and controllers in an application is limited.
Let’s explore Views a little further using a simple JavaScript example:
// DOM View
var View = Cranium.View = function (options) {
// Mix in options object (e.g extending functionallity)
_.extend(this, options);
this.id = _.uniqueId('view');
};
// Mix in Event system
_.extend(Cranium.View.prototype, Cranium.Events);Controllers are an intermediary between models and views which are classically responsible for two tasks:
// cranium.js - Cranium.Controller
// Controller tying together a model and view
var Controller = Cranium.Controller = function(options){
// Mix in options object (e.g extending functionallity)
_.extend(this, options);
this.id = _.uniqueId('controller');
var parts, selector, eventType;
// Parses Events object passed during the definition of the
// controller and maps it to the defined method to handle it;
if(this.events){
_.each(this.events, function(method, eventName){
parts = eventName.split('.');
selector = parts[0];
eventType = parts[1];
$(selector)['on' + eventType] = this[method];
}.bind(this));
}
};HTML template for the primer that follows:
<!doctype html>
<html lang="en">
<head>
<meta charset="utf-8">
<title></title>
<meta name="description" content="">
</head>
<body>
<div id="todo">
</div>
<script type="text/template" class="todo-template">
<div>
<input id="todo_complete" type="checkbox" <%= completed %>>
<%= title %>
</div>
</script>
<script src="underscore-min.js"></script>
<script src="cranium.js"></script>
<script src="example.js"></script>
</body>
</html>Cranium.js usage:
// example.js - usage of Cranium MVC
// And todo instance
var todo1 = new Cranium.Model({
title: "",
completed: ""
});
console.log("First todo title - nothing set: " + todo1.get('title'));
todo1.set({title: "Do something"});
console.log("Its changed now: " + todo1.get('title'));
''
// View instance
var todoView = new Cranium.View({
// DOM element selector
el: '#todo',
// Todo template; Underscore temlating used
template: _.template($('.todo-template').innerHTML),
init: function (model) {
this.render( model.toJSON() );
this.on(model.id + 'update', this.render.bind(this));
},
render: function (data) {
console.log("View about to render.");
$(this.el).innerHTML = this.template( data );
}
});
var todoController = new Cranium.Controller({
// Specify the model to update
model: todo1,
// and the view to observe this model
view: todoView,
events: {
"#todo.click" : "toggleComplete"
},
// Initialize everything
initialize: function () {
this.view.init(this.model);
return this;
},
// Toggles the value of the todo in the Model
toggleComplete: function () {
var completed = todoController.model.get('completed');
console.log("Todo old 'completed' value?", completed);
todoController.model.set({ completed: (!completed) ? 'checked': '' });
console.log("Todo new 'completed' value?", todoController.model.get('completed'));
return this;
}
});
// Let's kick start things off
todoController.initialize();
todo1.set({ title: "Due to this change Model will notify View and it will re-render"});Samuel Clay, one of the authors of the first version of Backbone.js says of cranium.js: “Unsurprisingly, it looks a whole lot like the beginnings of Backbone. Views are dumb, so they get very little boilerplate and setup. Models are responsible for their attributes and announcing changes to those models.”
I hope you’ve found this implementation helpful in understanding how one would go about writing their own library like Backbone from scratch, but moreso that it encourages you to take advantage of mature existing solutions where possible but never be afraid to explore deeper down into what makes them tick.
Model-View-Presenter (MVP) is a derivative of the MVC design pattern which focuses on improving presentation logic. It originated at a company named Taligent in the early 1990s while they were working on a model for a C++ CommonPoint environment. Whilst both MVC and MVP target the separation of concerns across multiple components, there are some fundamental differences between them.
For the purposes of this summary we will focus on the version of MVP most suitable for web-based architectures.
The P in MVP stands for presenter. It’s a component which contains the user-interface business logic for the view. Unlike MVC, invocations from the view are delegated to the presenter, which are decoupled from the view and instead talk to it through an interface. This allows for all kinds of useful things such as being able to mock views in unit tests.
The most common implementation of MVP is one which uses a Passive View (a view which is for all intents and purposes “dumb”), containing little to no logic. MVP models are almost identical to MVC models and handle application data. The presenter acts as a mediator which talks to both the view and model, however both of these are isolated from each other. They effectively bind models to views, a responsibility held by Controllers in MVC. Presenters are at the heart of the MVP pattern and as you can guess, incorporate the presentation logic behind views.
Solicited by a view, presenters perform any work to do with user requests and pass data back to them. In this respect, they retrieve data, manipulate it and determine how the data should be displayed in the view. In some implementations, the presenter also interacts with a service layer to persist data (models). Models may trigger events but it’s the presenter’s role to subscribe to them so that it can update the view. In this passive architecture, we have no concept of direct data binding. Views expose setters which presenters can use to set data.
The benefit of this change from MVC is that it increases the testability of your application and provides a more clean separation between the view and the model. This isn’t however without its costs as the lack of data binding support in the pattern can often mean having to take care of this task separately.
Although a common implementation of a Passive View is for the view to implement an interface, there are variations on it, including the use of events which can decouple the View from the Presenter a little more. As we don’t have the interface construct in JavaScript, we’re using it more and more as a protocol than an explicit interface here. It’s technically still an API and it’s probably fair for us to refer to it as an interface from that perspective.
There is also a Supervising Controller variation of MVP, which is closer to the MVC and MVVM - Model-View-ViewModel patterns as it provides data-binding from the Model directly from the View. Key-value observing (KVO) plugins (such as Derick Bailey’s Backbone.ModelBinding plugin) introduce this idea of a Supervising Controller to Backbone.
MVP is generally used most often in enterprise-level applications where it’s necessary to reuse as much presentation logic as possible. Applications with very complex views and a great deal of user interaction may find that MVC doesn’t quite fit the bill here as solving this problem may mean heavily relying on multiple controllers. In MVP, all of this complex logic can be encapsulated in a presenter, which can simplify maintenance greatly.
As MVP views are defined through an interface and the interface is technically the only point of contact between the system and the view (other than a presenter), this pattern also allows developers to write presentation logic without needing to wait for designers to produce layouts and graphics for the application.
Depending on the implementation, MVP may be more easy to automatically unit test than MVC. The reason often cited for this is that the presenter can be used as a complete mock of the user-interface and so it can be unit tested independent of other components. In my experience this really depends on the languages you are implementing MVP in (there’s quite a difference between opting for MVP for a JavaScript project over one for say, ASP.NET).
At the end of the day, the underlying concerns you may have with MVC will likely hold true for MVP given that the differences between them are mainly semantic. As long as you are cleanly separating concerns into models, views and controllers (or presenters) you should be achieving most of the same benefits regardless of the pattern you opt for.
There are very few, if any architectural JavaScript frameworks that claim to implement the MVC or MVP patterns in their classical form as many JavaScript developers don’t view MVC and MVP as being mutually exclusive (we are actually more likely to see MVP strictly implemented when looking at web frameworks such as ASP.NET or GWT). This is because it’s possible to have additional presenter/view logic in your application and yet still consider it a flavor of MVC.
Backbone contributor Irene Ros subscribes to this way of thinking as when she separates Backbone views out into their own distinct components, she needs something to actually assemble them for her. This could either be a controller route (such as a Backbone.Router) or a callback in response to data being fetched.
That said, some developers do however feel that Backbone.js better fits the description of MVP than it does MVC . Their view is that:
Backbone.View (the layer between View templates and the data bound to it) than a controller doesBackbone.Model (it isn’t that different from the classical MVC “Model”)A response to this could be that the view can also just be a View (as per MVC) because Backbone is flexible enough to let it be used for multiple purposes. The V in MVC and the P in MVP can both be accomplished by Backbone.View because they’re able to achieve two purposes: both rendering atomic components and assembling those components rendered by other views.
We’ve also seen that in Backbone the responsibility of a controller is shared with both the Backbone.View and Backbone.Router and in the following example we can actually see that aspects of that are certainly true.
Here, our Backbone TodoView uses the Observer pattern to ‘subscribe’ to changes to a View’s model in the line this.model.on('change',...). It also handles templating in the render() method, but unlike some other implementations, user interaction is also handled in the View (see events).
// The DOM element for a todo item...
app.TodoView = Backbone.View.extend({
//... is a list tag.
tagName: 'li',
// Pass the contents of the todo template through a templating
// function, cache it for a single todo
template: _.template( $('#item-template').html() ),
// The DOM events specific to an item.
events: {
'click .toggle': 'togglecompleted'
},
// The TodoView listens for changes to its model, re-rendering. Since there's
// a one-to-one correspondence between a **Todo** and a **TodoView** in this
// app, we set a direct reference on the model for convenience.
initialize: function() {
this.model.on( 'change', this.render, this );
this.model.on( 'destroy', this.remove, this );
},
// Re-render the titles of the todo item.
render: function() {
this.$el.html( this.template( this.model.toJSON() ) );
return this;
},
// Toggle the `"completed"` state of the model.
togglecompleted: function() {
this.model.toggle();
},
});Another (quite different) opinion is that Backbone more closely resembles Smalltalk-80 MVC, which we went through earlier.
As MarionetteJS author Derick Bailey has written, it’s ultimately best not to force Backbone to fit any specific design patterns. Design patterns should be considered flexible guides to how applications may be structured and in this respect, Backbone doesn’t fit either MVC nor MVP perfectly. Instead, it borrows some of the best concepts from multiple architectural patterns and creates a flexible framework that just works well. Call it the Backbone way, MV* or whatever helps reference its flavor of application architecture.
It is however worth understanding where and why these concepts originated, so I hope that my explanations of MVC and MVP have been of help. Most structural JavaScript frameworks will adopt their own take on classical patterns, either intentionally or by accident, but the important thing is that they help us develop applications which are organized, clean and can be easily maintained.
When learning how to use Backbone, an important and commonly overlooked area by tutorials is namespacing. If you already have experience with namespacing in JavaScript, the following section will provide some advice on how to specifically apply concepts you know to Backbone, however I will also be covering explanations for beginners to ensure everyone is on the same page.
Namespacing is a way to avoid collisions with other objects or variables in the global namespace. Using namespacing reduces the potential of your code breaking because another script on the page is using the same variable names that you are. As a good ‘citizen’ of the global namespace, it’s also imperative that you do your best to minimize the possibility of your code breaking other developer’s scripts.
JavaScript doesn’t really have built-in support for namespaces like other languages, however it does have closures which can be used to achieve a similar effect.
In this section we’ll be taking a look shortly at some examples of how you can namespace your models, views, routers and other components. The patterns we’ll be examining are:
Single global variables
One popular pattern for namespacing in JavaScript is opting for a single global variable as your primary object of reference. A skeleton implementation of this where we return an object with functions and properties can be found below:
var myApplication = (function(){
function(){
// ...
},
return {
// ...
}
})();You’ve probably seen this technique before. A Backbone-specific example might look like this:
var myViews = (function(){
return {
TodoView: Backbone.View.extend({ .. }),
TodosView: Backbone.View.extend({ .. }),
AboutView: Backbone.View.extend({ .. });
//etc.
};
})();Here we can return a set of views, but the same technique could return an entire collection of models, views and routers depending on how you decide to structure your application. Although this works for certain situations, the biggest challenge with the single global variable pattern is ensuring that no one else has used the same global variable name as you have in the page.
One solution to this problem, as mentioned by Peter Michaux, is to use prefix namespacing. It’s a simple concept at heart, but the idea is you select a common prefix name (in this example, myApplication_) and then define any methods, variables or other objects after the prefix.
var myApplication_todoView = Backbone.View.extend({}),
myApplication_todosView = Backbone.View.extend({});This is effective from the perspective of trying to lower the chances of a particular variable existing in the global scope, but remember that a uniquely named object can have the same effect. This aside, the biggest issue with the pattern is that it can result in a large number of global objects once your application starts to grow.
For more on Peter’s views about the single global variable pattern, read his excellent post on them.
Note: There are several other variations on the single global variable pattern out in the wild, however having reviewed quite a few, I felt the prefixing approach applied best to Backbone.
Object Literals
Object Literals have the advantage of not polluting the global namespace but assist in organizing code and parameters logically. They’re beneficial if you wish to create easily readable structures that can be expanded to support deep nesting. Unlike simple global variables, Object Literals often also take into account tests for the existence of a variable by the same name, which helps reduce the chances of collision.
This example demonstrates two ways you can check to see if a namespace already exists before defining it. I commonly use Option 2.
/* Doesn't check for existence of myApplication */
var myApplication = {};
/*
Does check for existence. If already defined, we use that instance.
Option 1: if(!myApplication) myApplication = {};
Option 2: var myApplication = myApplication || {};
We can then populate our object literal to support models, views and collections (or any data, really):
*/
var myApplication = {
models : {},
views : {
pages : {}
},
collections : {}
};One can also opt for adding properties directly to the namespace (such as your views, in the following example):
var myTodosViews = myTodosViews || {};
myTodosViews.todoView = Backbone.View.extend({});
myTodosViews.todosView = Backbone.View.extend({});The benefit of this pattern is that you’re able to easily encapsulate all of your models, views, routers etc. in a way that clearly separates them and provides a solid foundation for extending your code.
This pattern has a number of benefits. It’s often a good idea to decouple the default configuration for your application into a single area that can be easily modified without the need to search through your entire codebase just to alter it. Here’s an example of a hypothetical object literal that stores application configuration settings:
var myConfig = {
language: 'english',
defaults: {
enableDelegation: true,
maxTodos: 40
},
theme: {
skin: 'a',
toolbars: {
index: 'ui-navigation-toolbar',
pages: 'ui-custom-toolbar'
}
}
}Note that there are really only minor syntactical differences between the Object Literal pattern and a standard JSON data set. If for any reason you wish to use JSON for storing your configurations instead (e.g. for simpler storage when sending to the back-end), feel free to.
For more on the Object Literal pattern, I recommend reading Rebecca Murphey’s excellent article on the topic.
Nested namespacing
An extension of the Object Literal pattern is nested namespacing. It’s another common pattern used that offers a lower risk of collision due to the fact that even if a top-level namespace already exists, it’s unlikely the same nested children do. For example, Yahoo’s YUI uses the nested object namespacing pattern extensively:
YAHOO.util.Dom.getElementsByClassName('test');Yahoo’s YUI uses the nested object namespacing pattern regularly and even DocumentCloud (the creators of Backbone) use the nested namespacing pattern in their main applications. A sample implementation of nested namespacing with Backbone may look like this:
var todoApp = todoApp || {};
// perform similar check for nested children
todoApp.routers = todoApp.routers || {};
todoApp.model = todoApp.model || {};
todoApp.model.special = todoApp.model.special || {};
// routers
todoApp.routers.Workspace = Backbone.Router.extend({});
todoApp.routers.TodoSearch = Backbone.Router.extend({});
// models
todoApp.model.Todo = Backbone.Model.extend({});
todoApp.model.Notes = Backbone.Model.extend({});
// special models
todoApp.model.special.Admin = Backbone.Model.extend({});This is readable, clearly organized, and is a relatively safe way of namespacing your Backbone application. The only real caveat however is that it requires your browser’s JavaScript engine to first locate the todoApp object, then dig down until it gets to the function you’re calling. However, developers such as Juriy Zaytsev (kangax) have tested and found the performance differences between single object namespacing vs the ‘nested’ approach to be quite negligible.
What does DocumentCloud use?
In case you were wondering, here is the original DocumentCloud (remember those guys that created Backbone?) workspace that uses namespacing in a necessary way. This approach makes sense as their documents (and annotations and document lists) are embedded on third-party news sites.
// Provide top-level namespaces for our javascript.
(function() {
window.dc = {};
dc.controllers = {};
dc.model = {};
dc.app = {};
dc.ui = {};
})();As you can see, they opt for declaring a top-level namespace on the window called dc, a short-form name of their app, followed by nested namesapces for the controllers, models, UI and other pieces of their application.
Recommendation
Reviewing the namespace patterns above, the option that I prefer when writing Backbone applications is nested object namespacing with the object literal pattern.
Single global variables may work fine for applications that are relatively trivial. However, larger codebases requiring both namespaces and deep sub-namespaces require a succinct solution that’s both readable and scalable. I feel this pattern achieves both of these objectives and is a good choice for most Backbone development.
The following sections provide insight into how Backbone uses jQuery/Zepto and Underscore.js.
Although most developers won’t need it, Backbone does support setting a custom DOM library to be used instead of these options. From the source:
// For Backbone's purposes, jQuery, Zepto, Ender, or My Library (kidding) owns
// the `$` variable.
Backbone.$ = root.jQuery || root.Zepto || root.ender || root.$;So, setting Backbone.$ = myLibrary; will allow you to use any custom DOM-manipulation library in place of the jQuery default.
Underscore.js is heavily used in Backbone behind the scenes for everything from object extension to event binding. As the entire library is generally included, we get free access to a number of useful utilities we can use on Collections such as filtering _.filter(), sorting _.sortBy(), mapping _.map() and so on.
From the source:
// Underscore methods that we want to implement on the Collection.
// 90% of the core usefulness of Backbone Collections is actually implemented
// right here:
var methods = ['forEach', 'each', 'map', 'collect', 'reduce', 'foldl', 'inject', 'reduceRight', 'foldr', 'find', 'detect', 'filter', 'select', 'reject', 'every', 'all', 'some', 'any', 'include', 'contains', 'invoke', 'max', 'min', 'toArray', 'size', 'first', 'head', 'take', 'initial', 'rest', 'tail', 'drop', 'last', 'without', 'indexOf', 'shuffle', 'lastIndexOf', 'isEmpty', 'chain'];
// Mix in each Underscore method as a proxy to `Collection#models`.
_.each(methods, function(method) {
Collection.prototype[method] = function() {
var args = slice.call(arguments);
args.unshift(this.models);
return _[method].apply(_, args);
};
});However, for a complete linked list of methods supported, see the official documentation.
Models and collections in Backbone can be “sync”ed with the server using the fetch, save and destroy methods. All of these methods delegate back to the Backbone.sync function, which actually wraps jQuery/Zepto’s $.ajax function, calling GET, POST and DELETE for the respective persistence methods on Backbone models.
From the the source for Backbone.sync:
var methodMap = {
'create': 'POST',
'update': 'PUT',
'patch': 'PATCH',
'delete': 'DELETE',
'read': 'GET'
};
Backbone.sync = function(method, model, options) {
var type = methodMap[method];
// ... Followed by lots of Backbone.js configuration, then..
// Make the request, allowing the user to override any Ajax options.
var xhr = options.xhr = Backbone.ajax(_.extend(params, options));
model.trigger('request', model, xhr, options);
return xhr;Calls to Backbone.History.start rely on jQuery/Zepto binding popState or hashchange event listeners back to the window object.
From the source for Backbone.history.start:
// Depending on whether we're using pushState or hashes, and whether
// 'onhashchange' is supported, determine how we check the URL state.
if (this._hasPushState) {
Backbone.$(window)
.on('popstate', this.checkUrl);
} else if (this._wantsHashChange && ('onhashchange' in window) && !oldIE) {
Backbone.$(window)
.on('hashchange', this.checkUrl);
} else if (this._wantsHashChange) {
this._checkUrlInterval = setInterval(this.checkUrl, this.interval);
}
...Backbone.History.stop similarly uses your DOM manipulation library to unbind these event listeners.
Backbone is just one of many different solutions available for structuring your application and we’re by no means advocating it as the be all and end all. It’s served the authors of this book well in building many simple and complex web applications and we hope that it can serve you equally as well. The answer to the question ‘Is Backbone better than X?’ generally has a lot more to do with what kind of application you’re building.
AngularJS and Ember.js are examples of powerful alternatives but differ from Backbone in that there are more opinionated. For some projects this can be useful and for others, perhaps not. The important thing to remember is that there is no library or framework that’s going to be the best solution for every use-case and so it’s important to learn about the tools at your disposal and decide which one is best on a project-by-project basis.
Choose the right tool for the right job. This is why we recommend spending some time doing a little due diligence. Consider productivity, ease of use, testability, community and documentation. If you’re looking for more concrete comparisons between frameworks, read:
The authors behind Backbone.js, AngularJS and Ember have also discussed some of the strengths and weaknesses of their solutions on Quora, StackOverflow and so on:
The solution you opt for may need to support building non-trivial features and could end up being used to maintain the app for years to come so think about things like:
What is the library/framework really capable of?
Spend time reviewing both the source code of the framework and official list of features to see how well they fit with your requirements. There will be projects that may require modifying or extending the underlying source and thus make sure that if this might be the case, you’ve performed due diligence on the code. Has the framework been proven in production?
i.e Have developers actually built and deployed large applications with it that are publicly accessible? Backbone has a strong portfolio of these (SoundCloud, LinkedIn, Walmart) but not all frameworks do. Ember is used in number of large apps, including the new version of ZenDesk. AngularJS has been used to build the YouTube app for PS3 amongst other places. It’s not only important to know that a framework works in production, but also being able to look at real world code and be inspired by what can be built with it.
Is the framework mature?
I generally recommend developers don’t simply “pick one and go with it”. New projects often come with a lot of buzz surrounding their releases but remember to take care when selecting them for use on a production-level app. You don’t want to risk the project being canned, going through major periods of refactoring or other breaking changes that tend to be more carefully planned out when a framework is mature. Mature projects also tend to have more detailed documentation available, either as a part of their official or community-driven docs.
Is the framework flexible or opinionated?
Know what flavor you’re after as there are plenty of frameworks available which provide one or the other. Opinionated frameworks lock (or suggest) you to do things in a specific way (theirs). By design they are limiting, but place less emphasis on the developer having to figure out how things should work on their own. Have you really played with the framework?
Write a small application without using frameworks and then attempt to refactor your code with a framework to confirm whether it’s easy to work with or not. As much as researching and reading up on code will influence your decision, it’s equally as important to write actual code using the framework to make sure you’re comfortable with the concepts it enforces.
Does the framework have a comprehensive set of documentation?
Although demo applications can be useful for reference, you’ll almost always find yourself consulting the official framework docs to find out what its API supports, how common tasks or components can be created with it and what the gotchas worth noting are. Any framework worth it’s salt should have a detailed set of documentation which will help guide developers using it. Without this, you can find yourself heavily relying on IRC channels, groups and self-discovery, which can be fine, but are often overly time-consuming when compared to a great set of docs provided upfront.
What is the total size of the framework, factoring in minification, gzipping and any modular building that it supports?
What dependencies does the framework have? Frameworks tend to only list the total filesize of the base library itself, but don’t list the sizes of the library’s dependencies. This can mean the difference between opting for a library that initially looks quite small, but could be relatively large if it say, depends on jQuery and other libraries.
Have you reviewed the community around the framework?
Is there an active community of project contributors and users who would be able to assist if you run into issues? Have enough developers been using the framework that there are existing reference applications, tutorials and maybe even screencasts that you can use to learn more about it?
Where relevant, copyright Addy Osmani, 2012-2013.